Thanks for signing up!
Check your email for further instructions to verify your account.


For the first-time user
Before you take the test, make sure you have...
Before starting your test, remember to
You may click on the video guide to assist you in taking the app test.
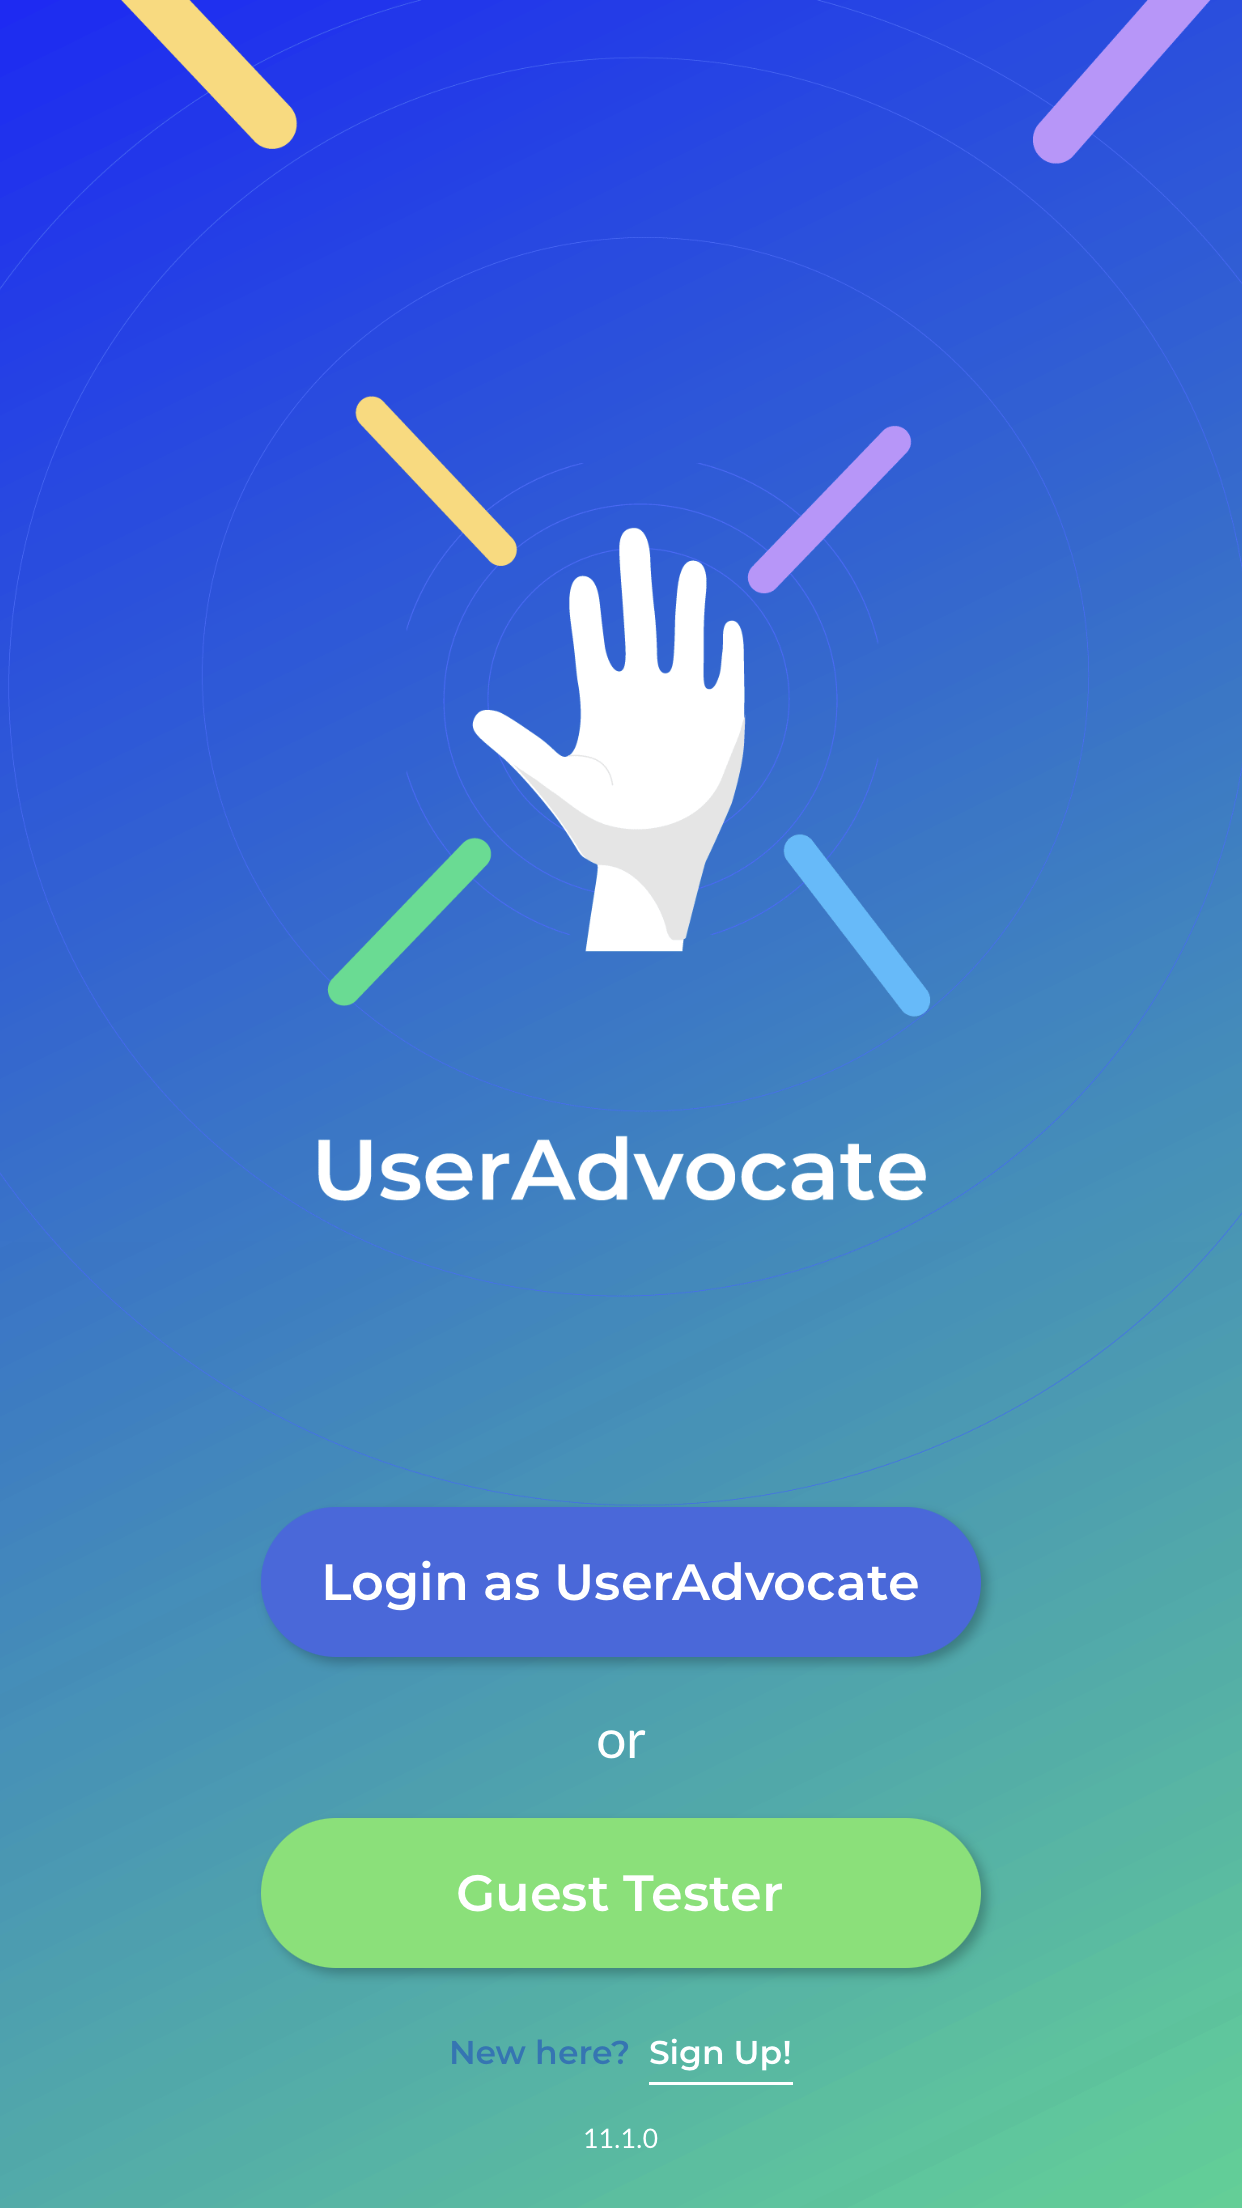
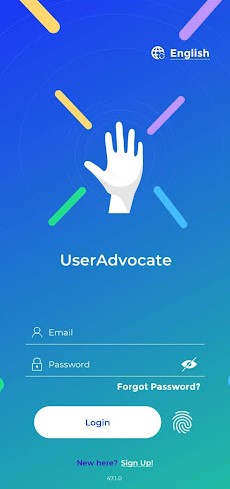
Login As UserAdvocate
Check Available Tests in Your Account

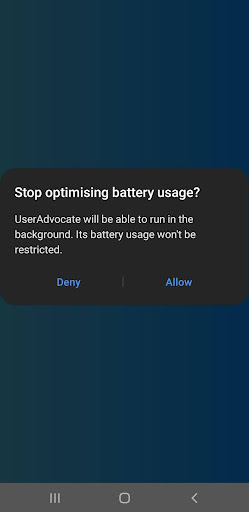
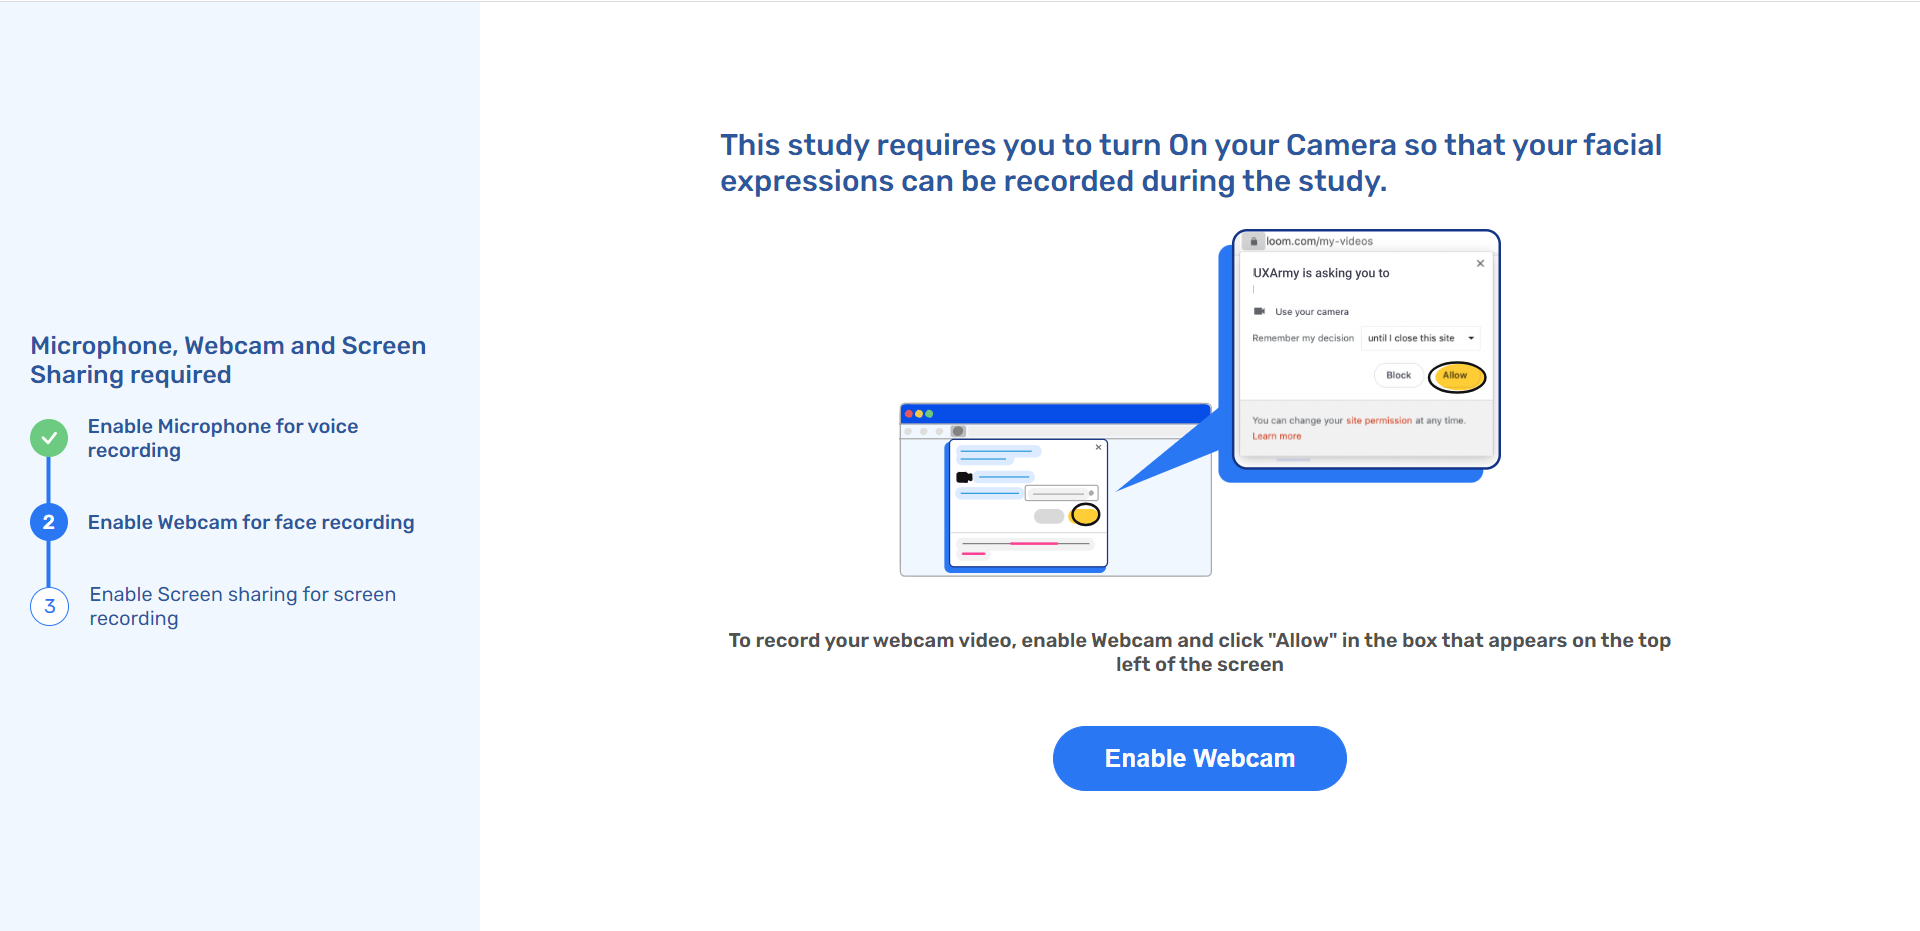
Allow Permission Requests
❗️ It is highly important to allow these permissions to have your submission uploaded successfully. Please DO NOT skip or deny any requests. You can change these permissions after the test.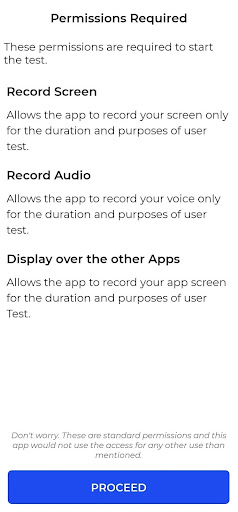
Starting The Task

Types of Tasks
When starting the tasks, you might be shown one of these different tasks.
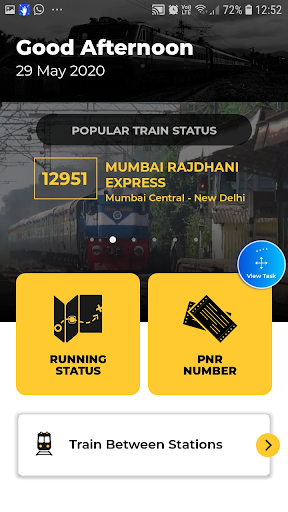
a. App navigation task: You might be asked to download and open an app or the TestFlight app (i.e., the app used for testing the iOS applications that are still in development) on your phone. Follow the task instruction given, and complete the task.
Please remember to return to the UserAdvocate App to continue your test journey. You can do this by reopening the app from where you left off or using the home button to switch back to the tested app.
❗Ensure all other tabs on your mobile device are closed to avoid confusion while toggling between the tested app and UserAdvocate App.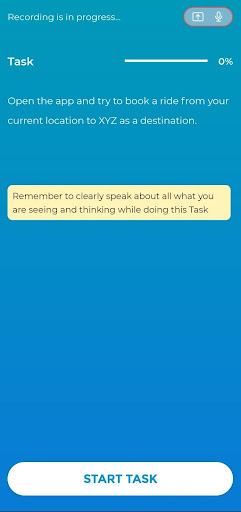
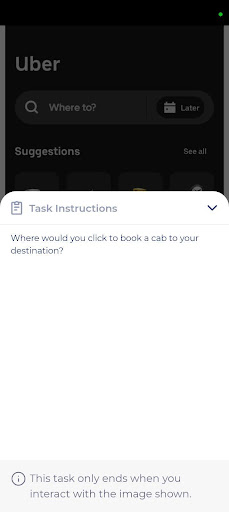
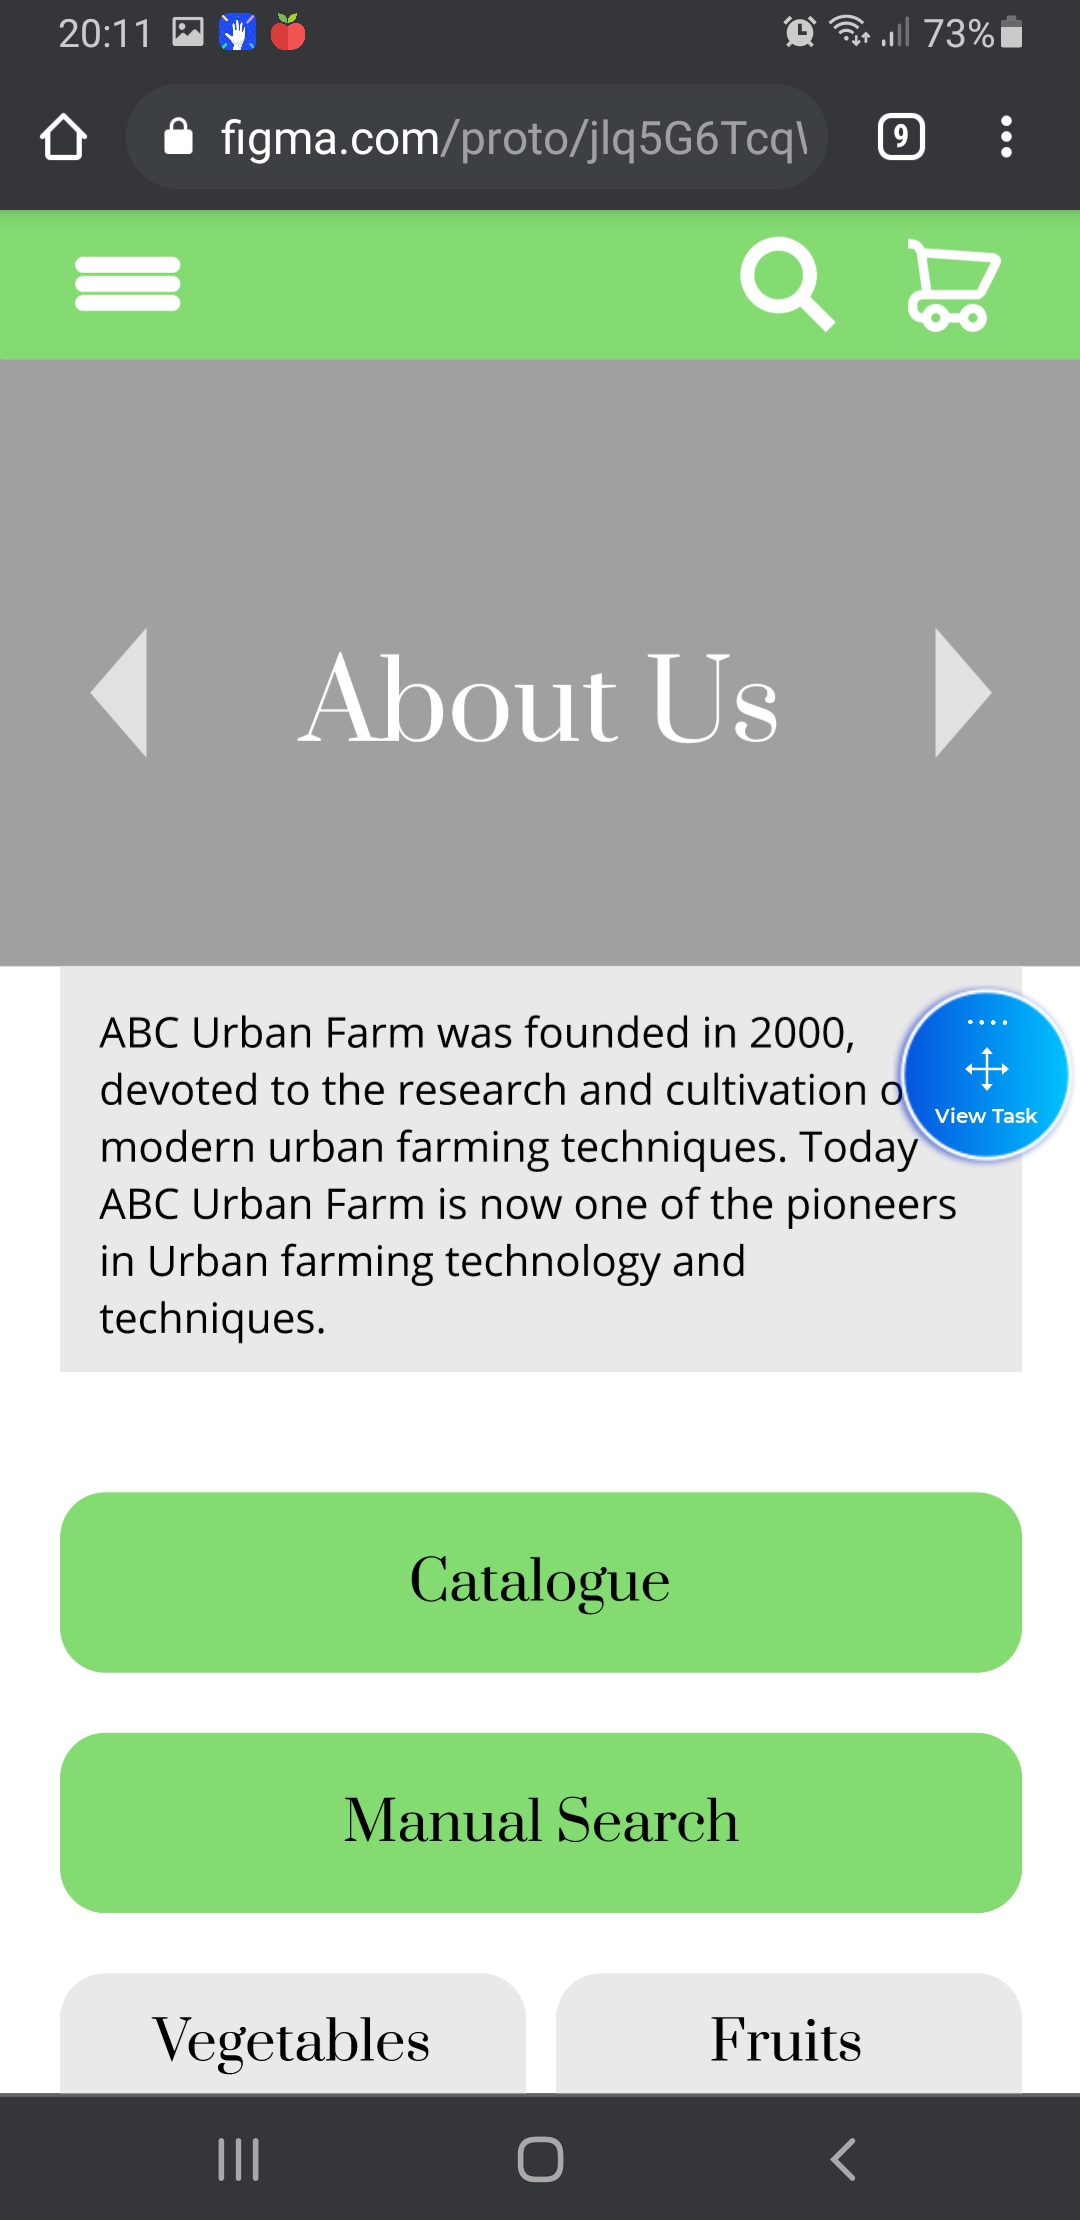
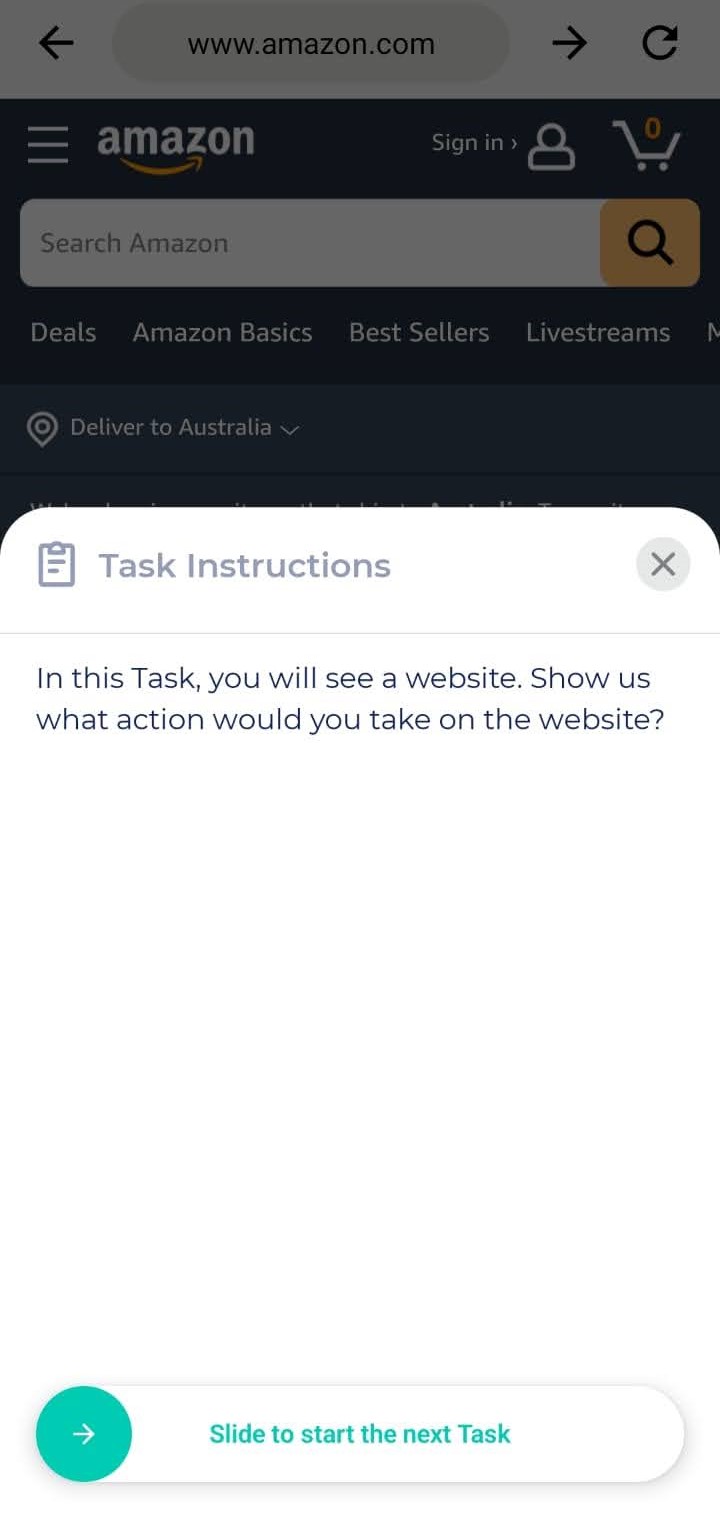
b. Prototype task: You’ll see a prototype, and follow the task instructions given to you to complete the task. If you see a screen similar to the left screen below, the prototype is loading, please wait for it.
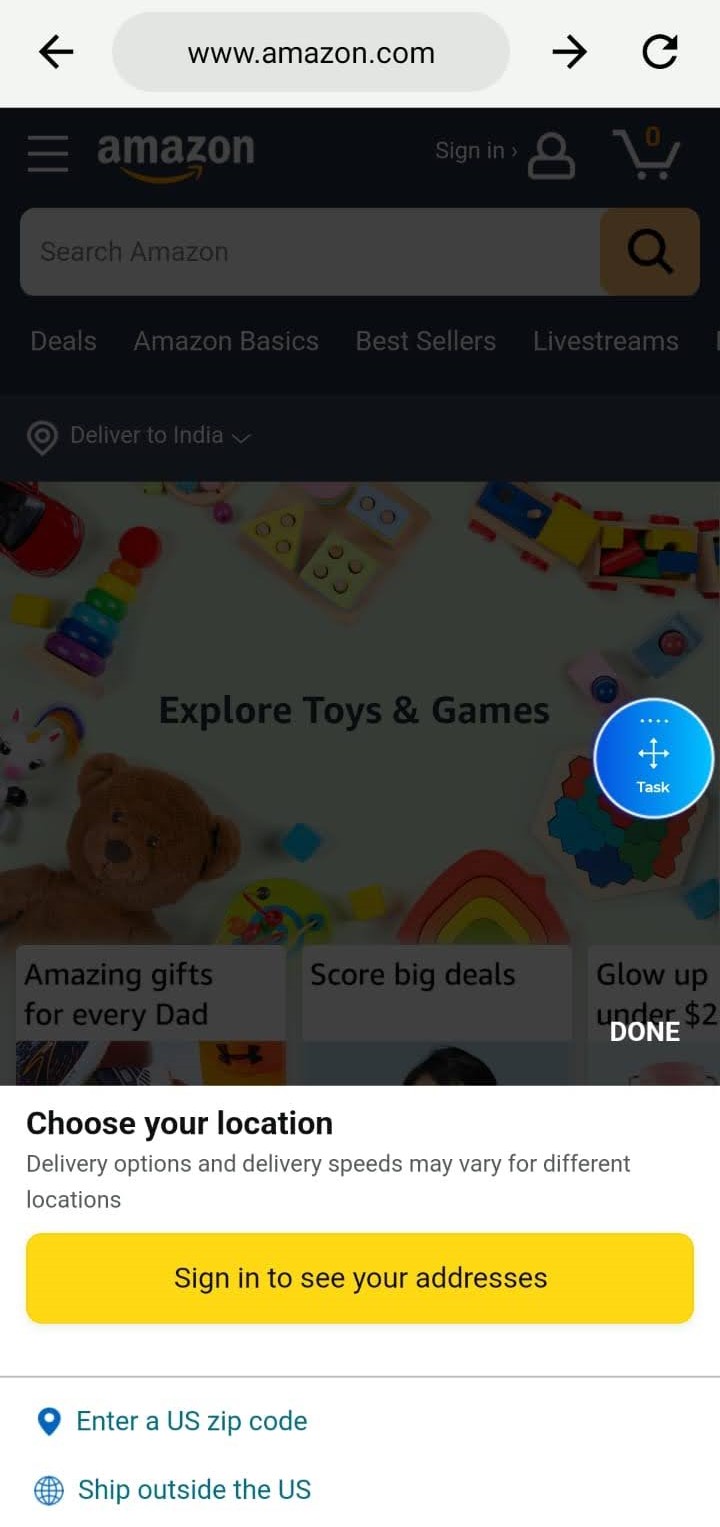
If you are stuck at the prototype loading screen, please stop the test, and take a screenshot. Kindly email hi@uxarmy.com, we will contact you shortly. ❗️You will notice a task circle during certain tasks, this will contain task instructions and guide you to go to your next task.
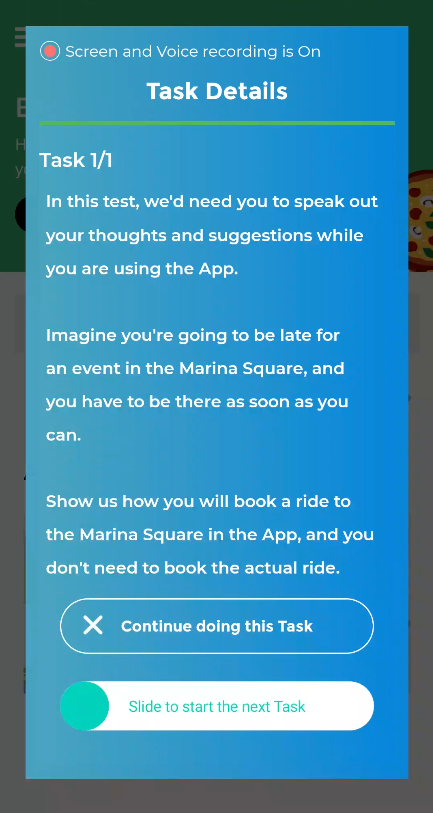
c. Speaking task: You’ll only need to speak out, talk about your thoughts, and give your verbal feedback, based on the task description given.

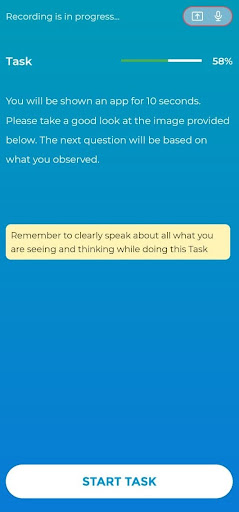
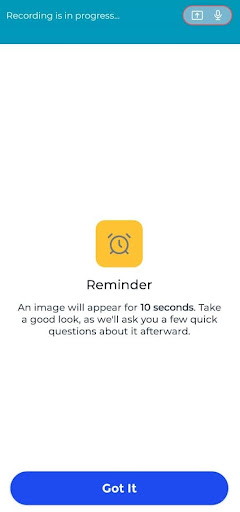
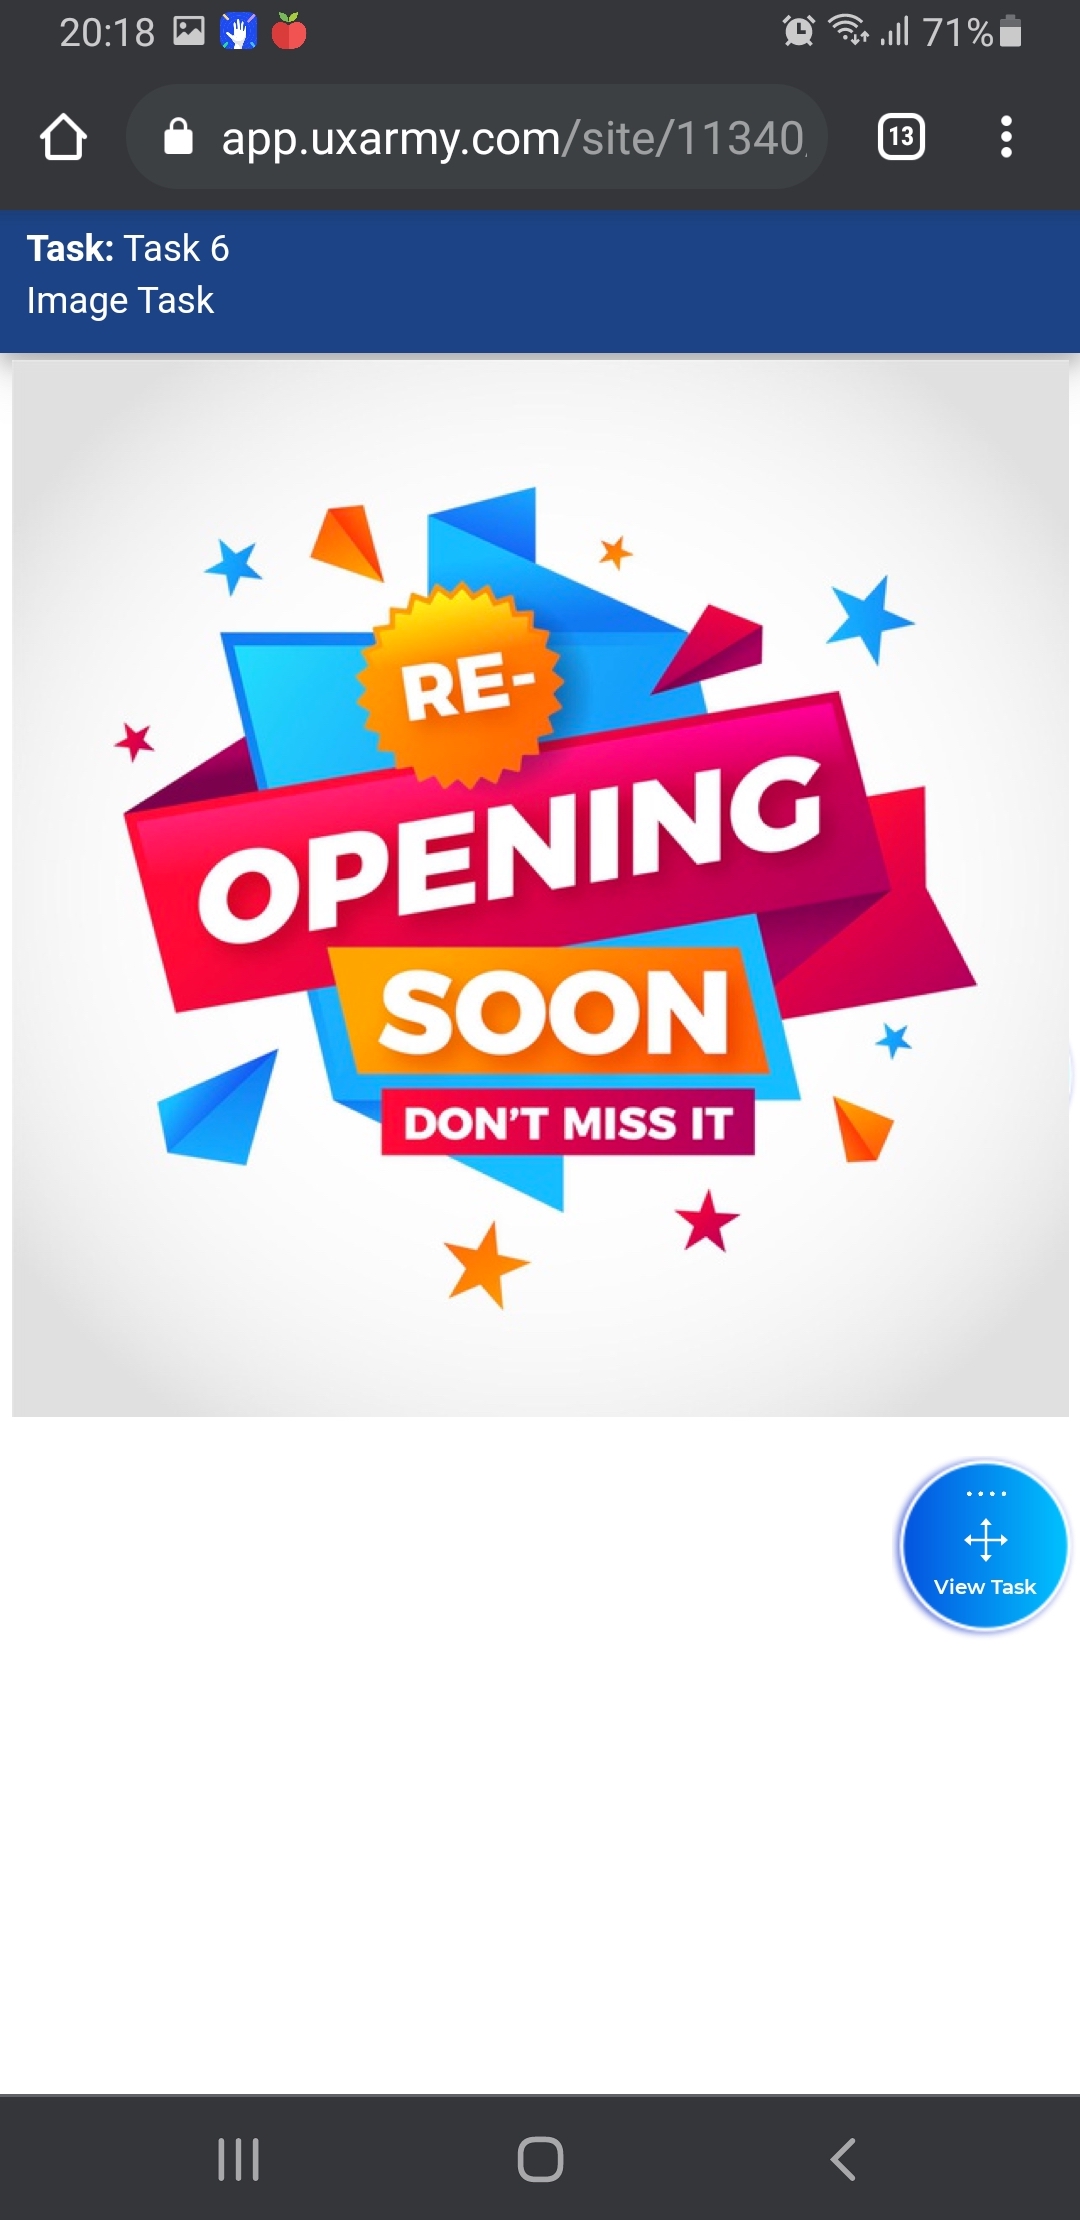
d. 5 Second tasks: You’ll be shown an image and asked to give some feedback, based on the image presented in the task.
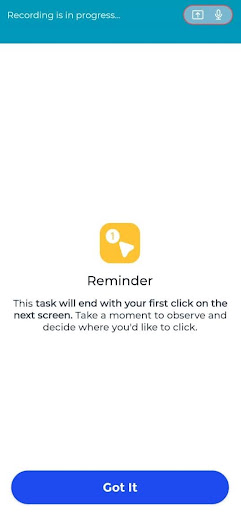
e. First-click tasks: You will be shown an image and will be asked to click on a part of the image based on your first impression.
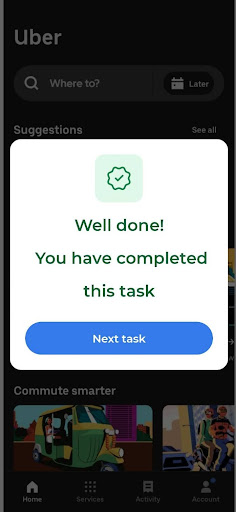
After Completing The Task
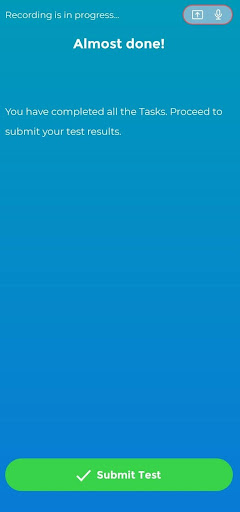
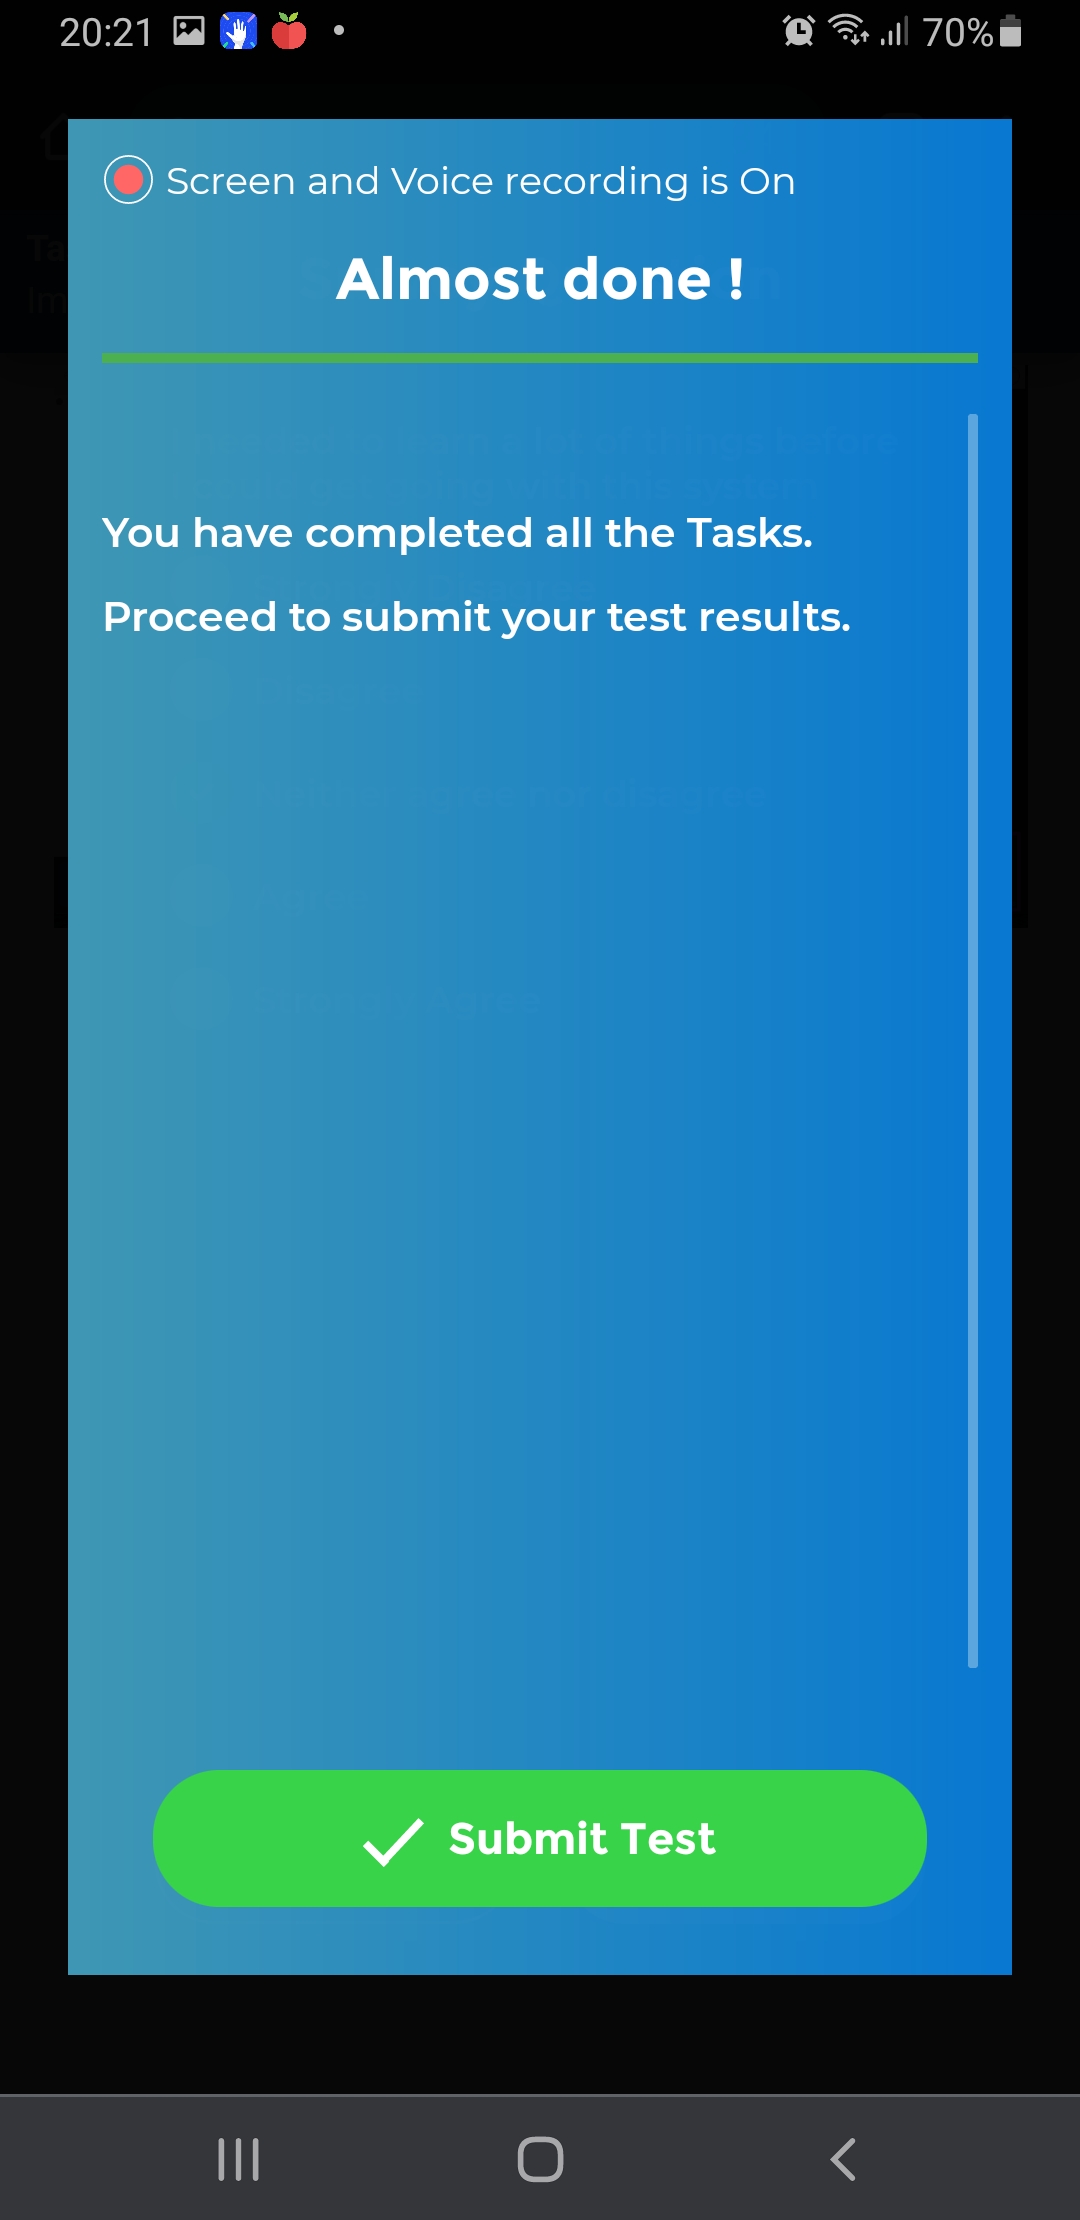
Submit Test
For First-timer User
Before taking the test, make sure you have...
Before starting your test, remember to
Login As UserAdvocate
Check Available Tests in Your Account
Allow Permission Requests
❗️ It is highly important to allow these permissions to have your submission is successful. Please DO NOT skip or deny any requests. You can change these permissions after the test.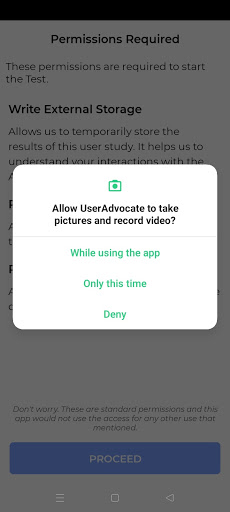
Starting The Task
Types of Tasks
When starting the tasks, you might be shown one of these different tasks.
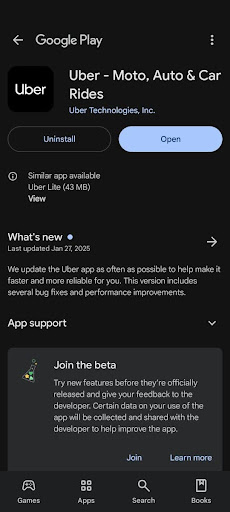
a. App navigation task: You might be asked to download and open an app or a Beta version app that is still in development on your phone. Follow the task instruction given, and complete the task.
❗ Please note that the Alibaba App shown in the below screenshot is for example purposes only. You would be asked to download a different App according to the study you are taking.
b. Prototype task: You’ll see a prototype, and follow the task instructions given to you to complete the task. If you see a screen similar to the left screen below, the prototype is loading, please wait for it.
❗️ If you are stuck at the prototype loading screen, please stop the test, and take a screenshot. Kindly email hi@uxarmy.com, we will contact you shortly.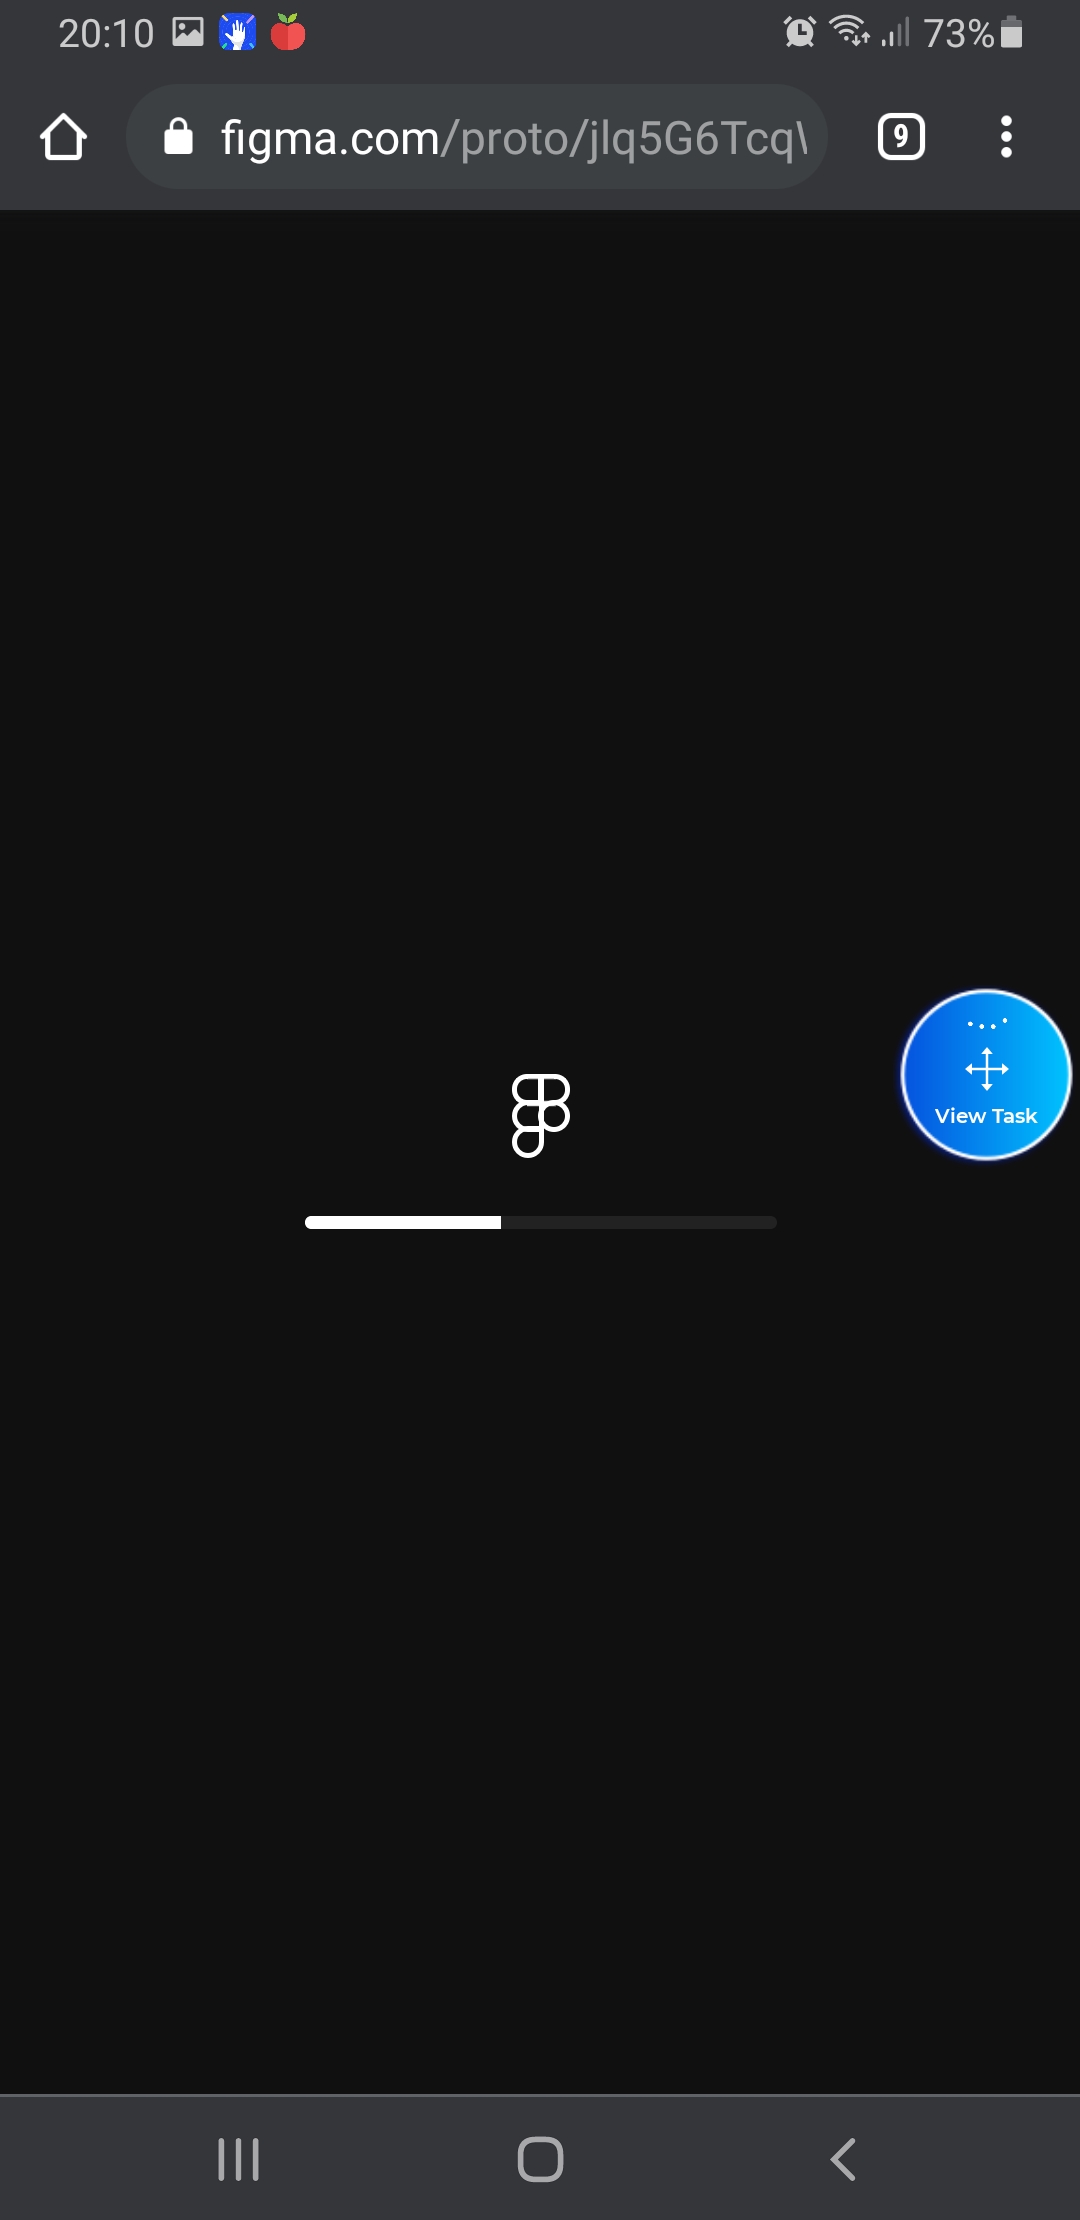
c. Speaking task: You’ll only need to speak out, talk about your thoughts, and give your verbal feedback, based on the task description given.

d. Image task: You’ll be shown an image, and you’ll need to speak out your thoughts and give some feedback, based on the image presented in the task.
During The Task
After Completing The Task
Submit Test

 ⭐️ Not all tests will require face recording
❗️ Do NOT close your browser until see the screen as shown below.
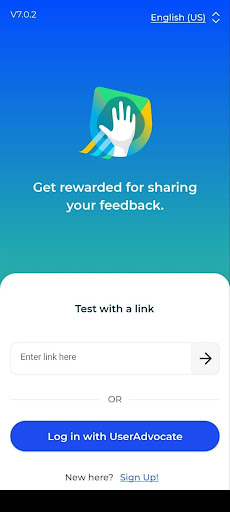
1. Install the UserAdvocate App on your mobile device using the given link of the email.
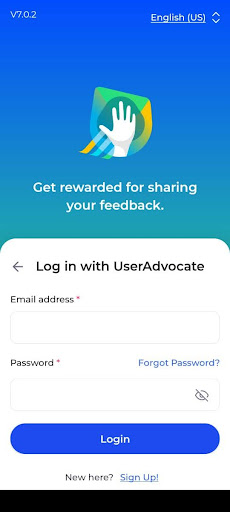
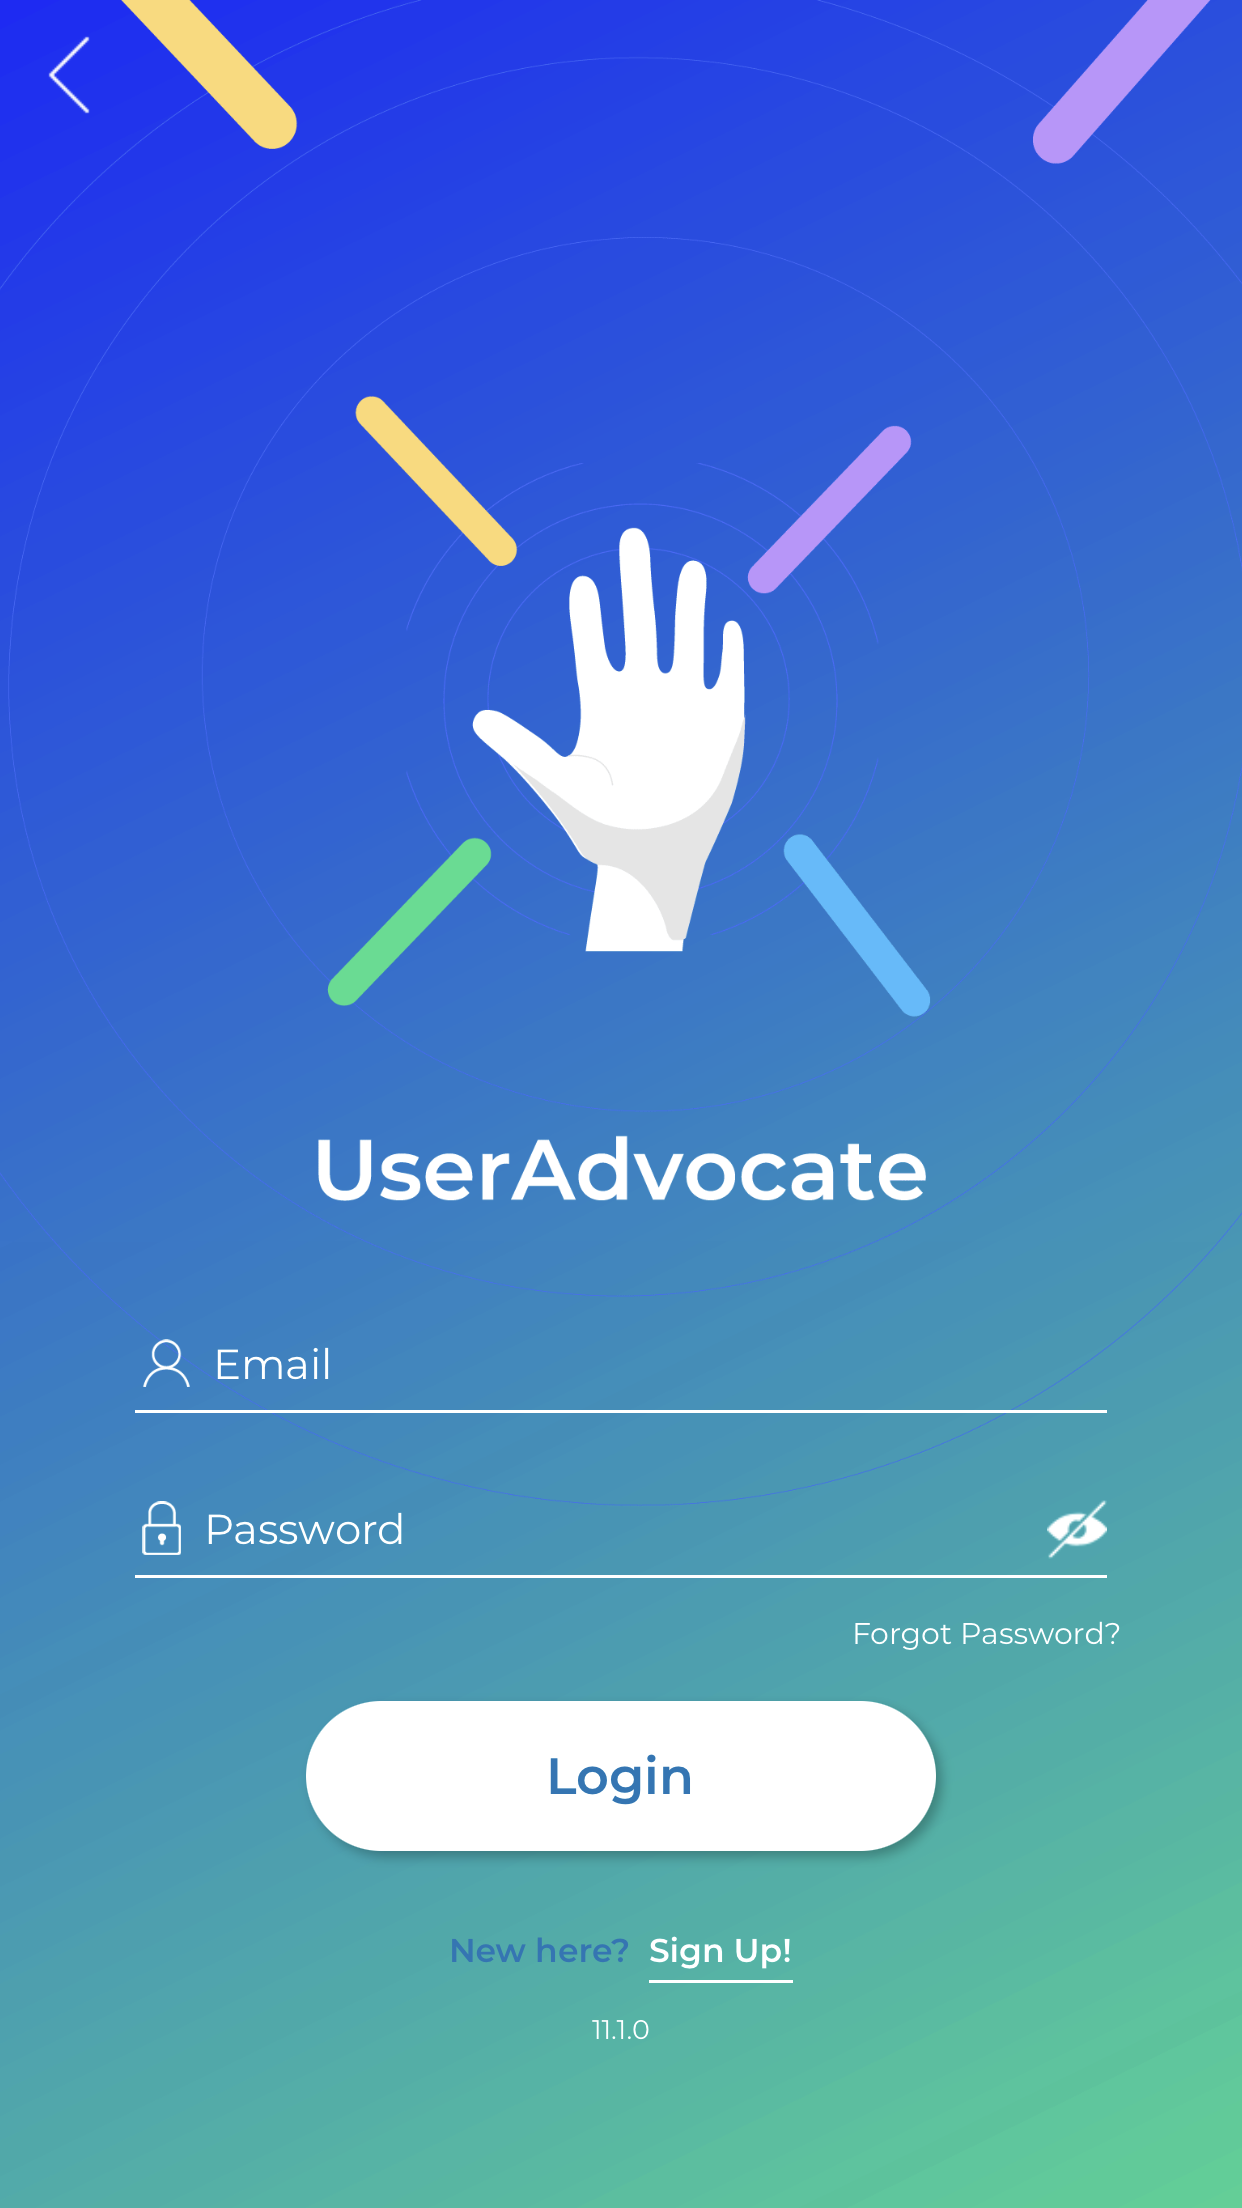
2. Login using the screen shown below. Use the same credentials as you had used for creating your UXArmy account.
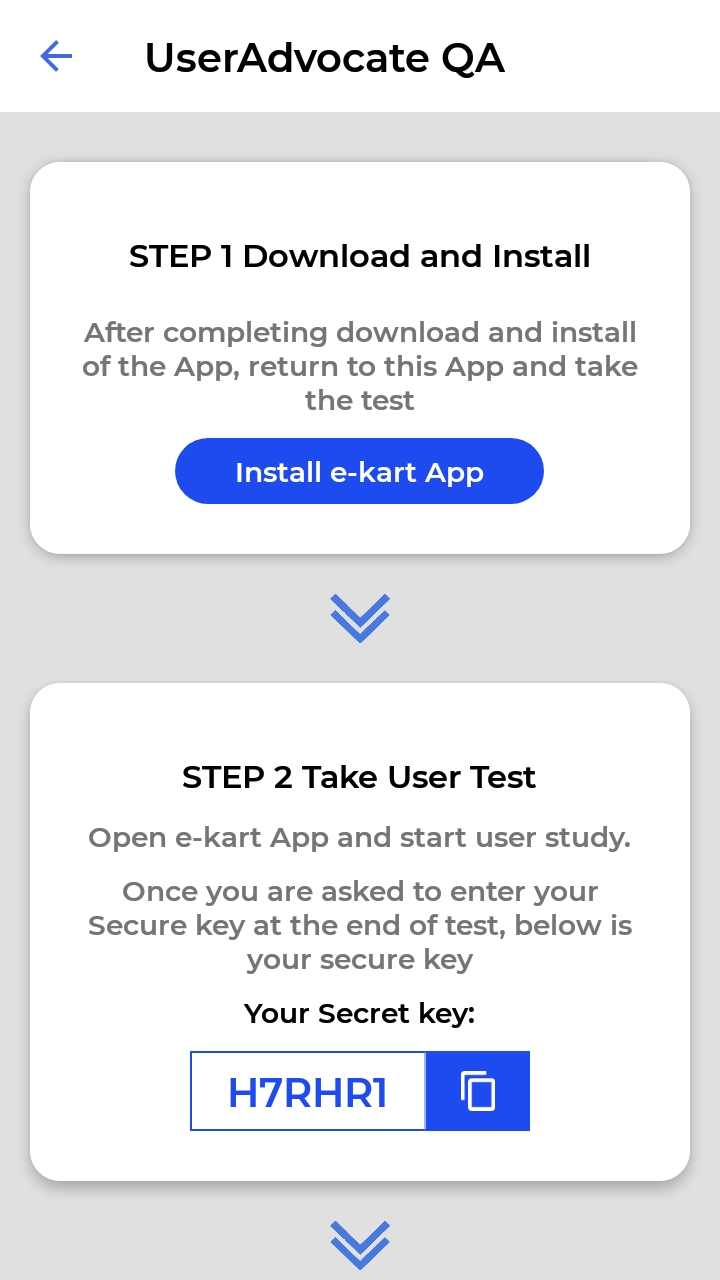
3. After login to the UserAdvocate App, Tap on the user study that is for Android devices. You would see the instructions screen with few steps to follow. Follow the instructions until the App for User study is installed on your phone.
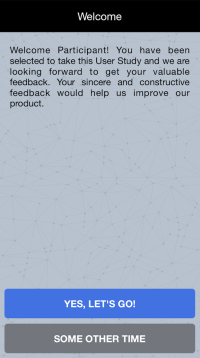
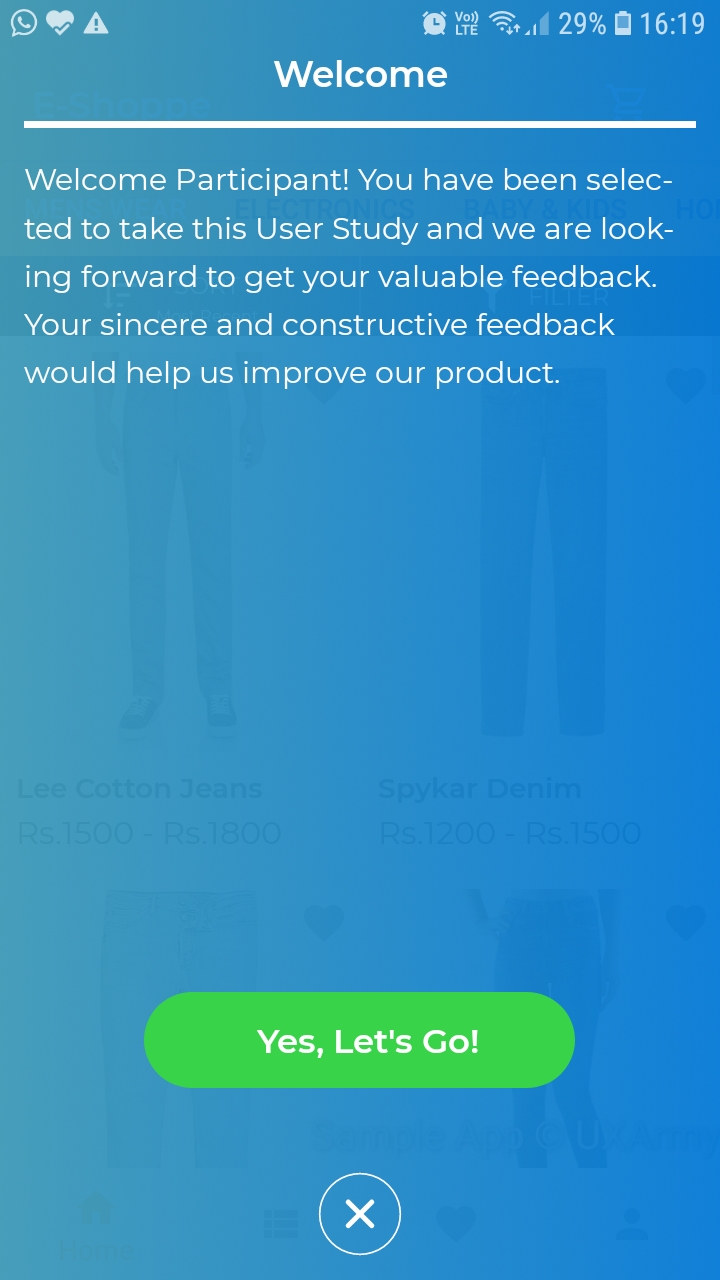
4. Launch the test App. You should see the following screen. Tap on "YES, LET'S Go!"
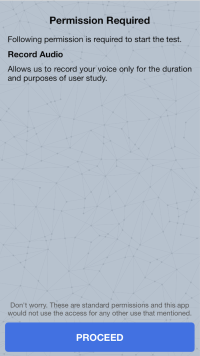
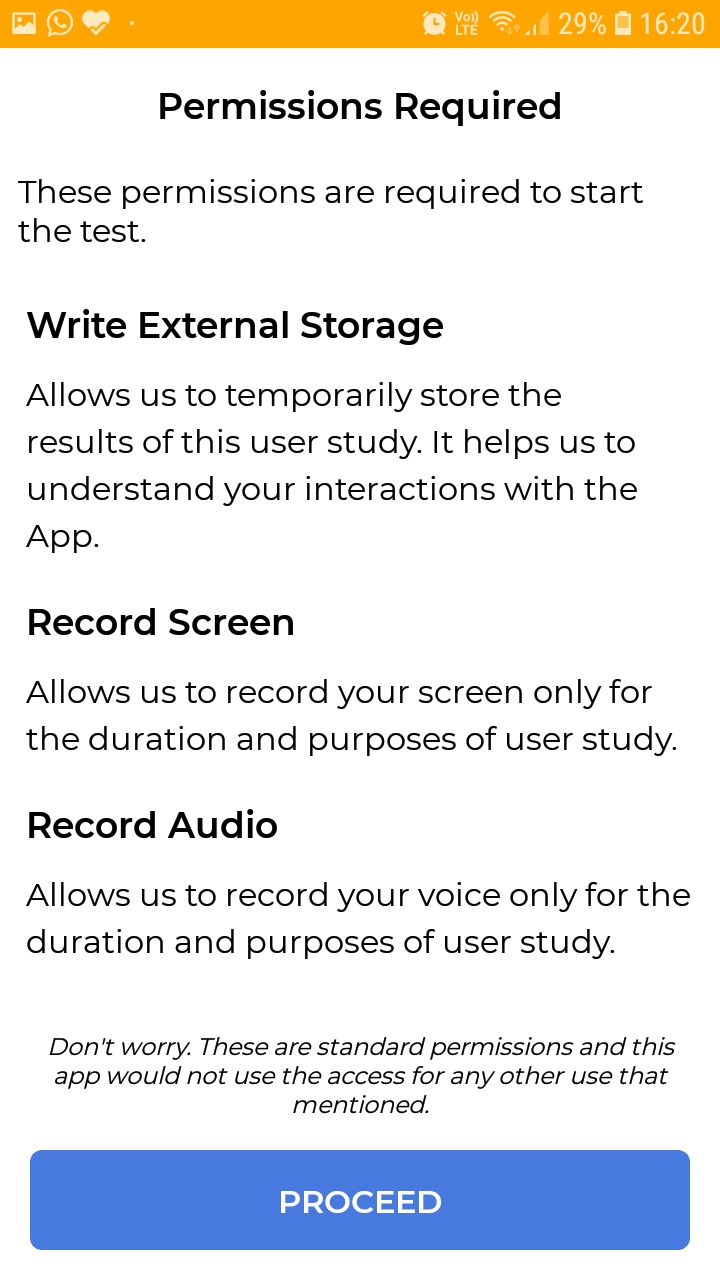
5. The App would ask your permissions to record the screen and audio through your Phone. There is no risk to give these permissions for study purposes, so Tap on PROCEED button.
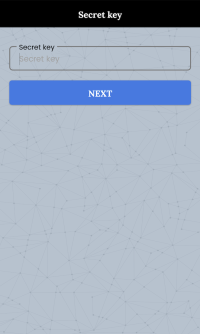
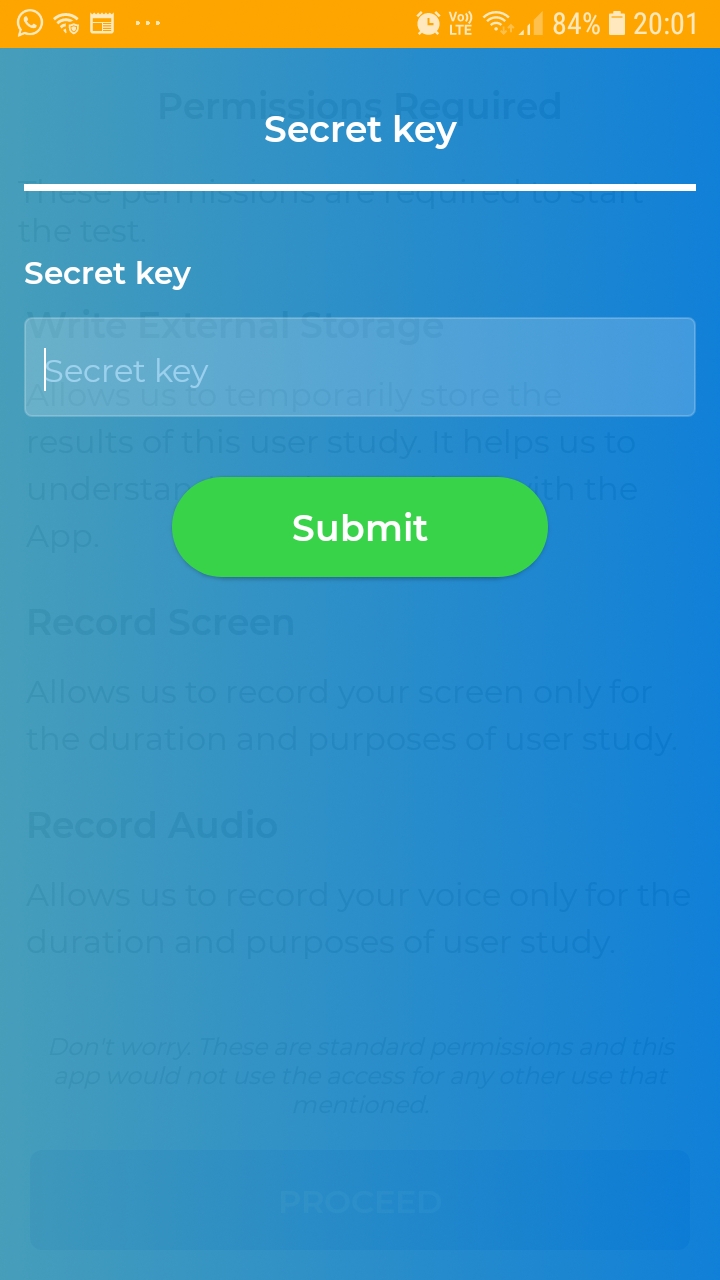
6. After the permissions are granted, the App would ask you to enter your Secret key. Carefully enter your secret key and move to the next step.
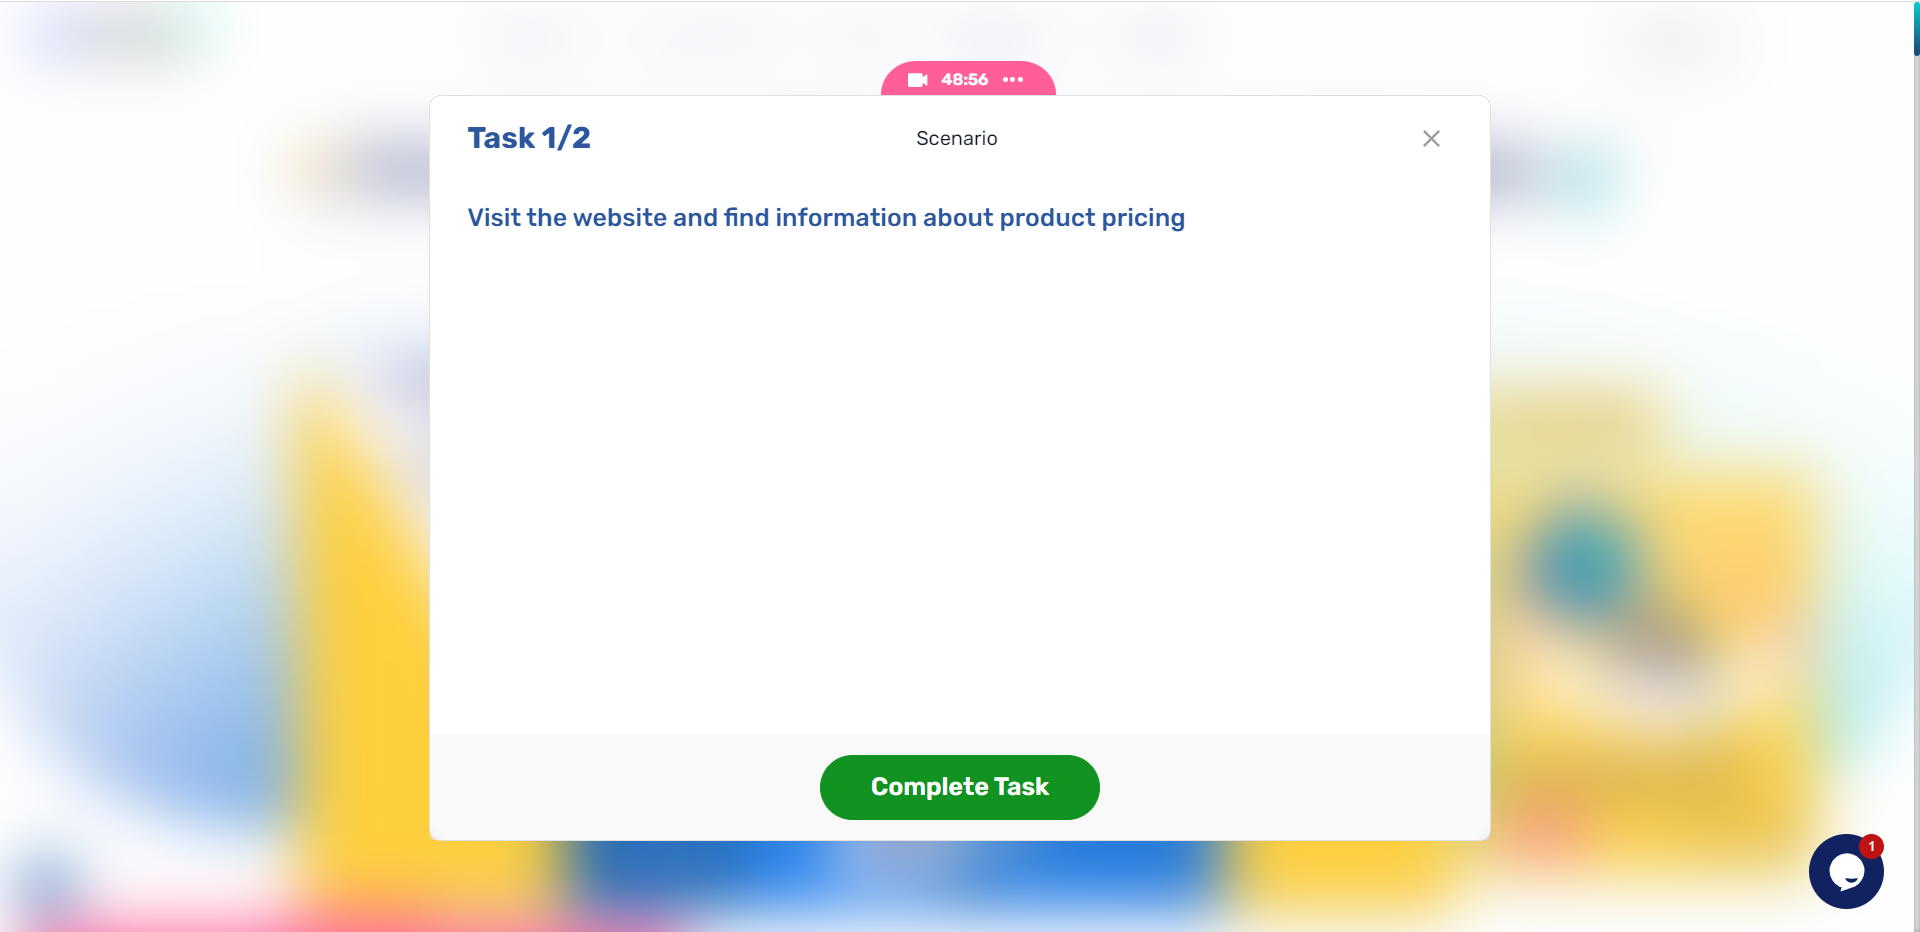
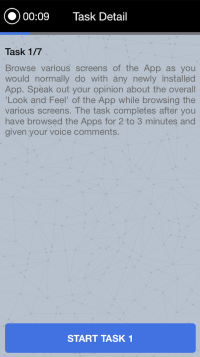
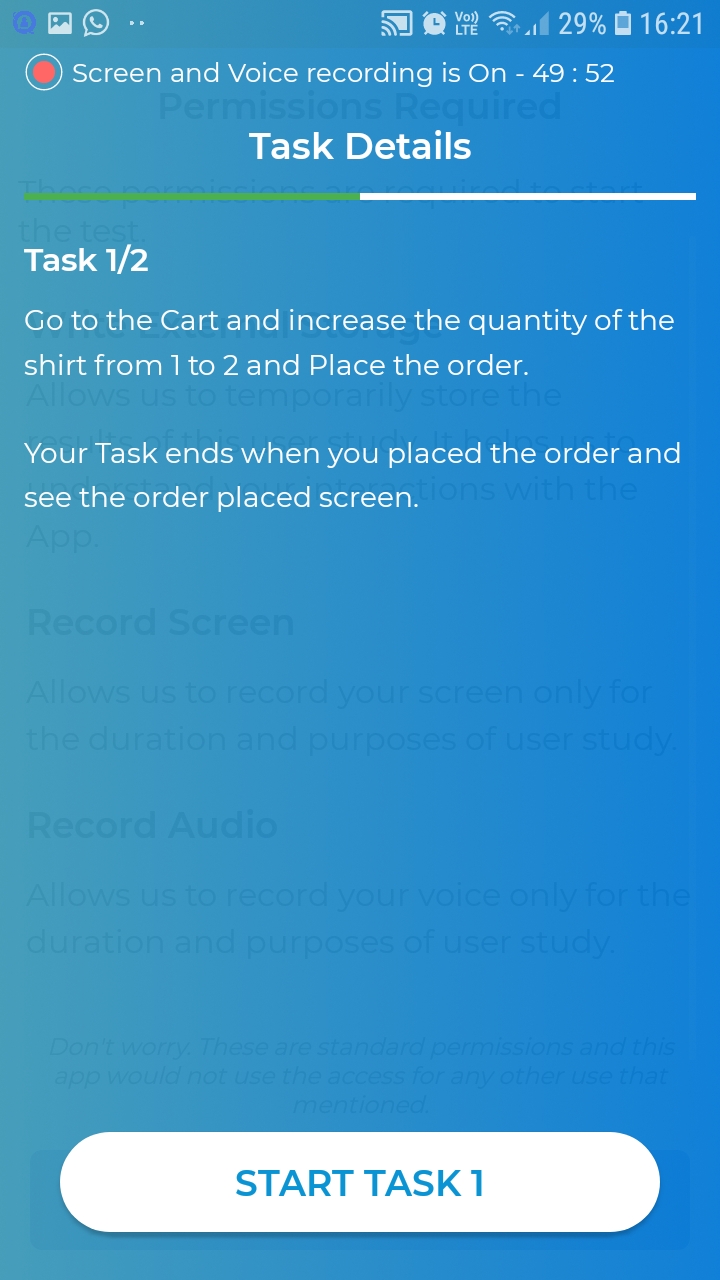
7. The first Task would be displayed now. Read the task (this is a good opportunity to practice speaking, by reading the task loudly). Tap on the button to start the task.
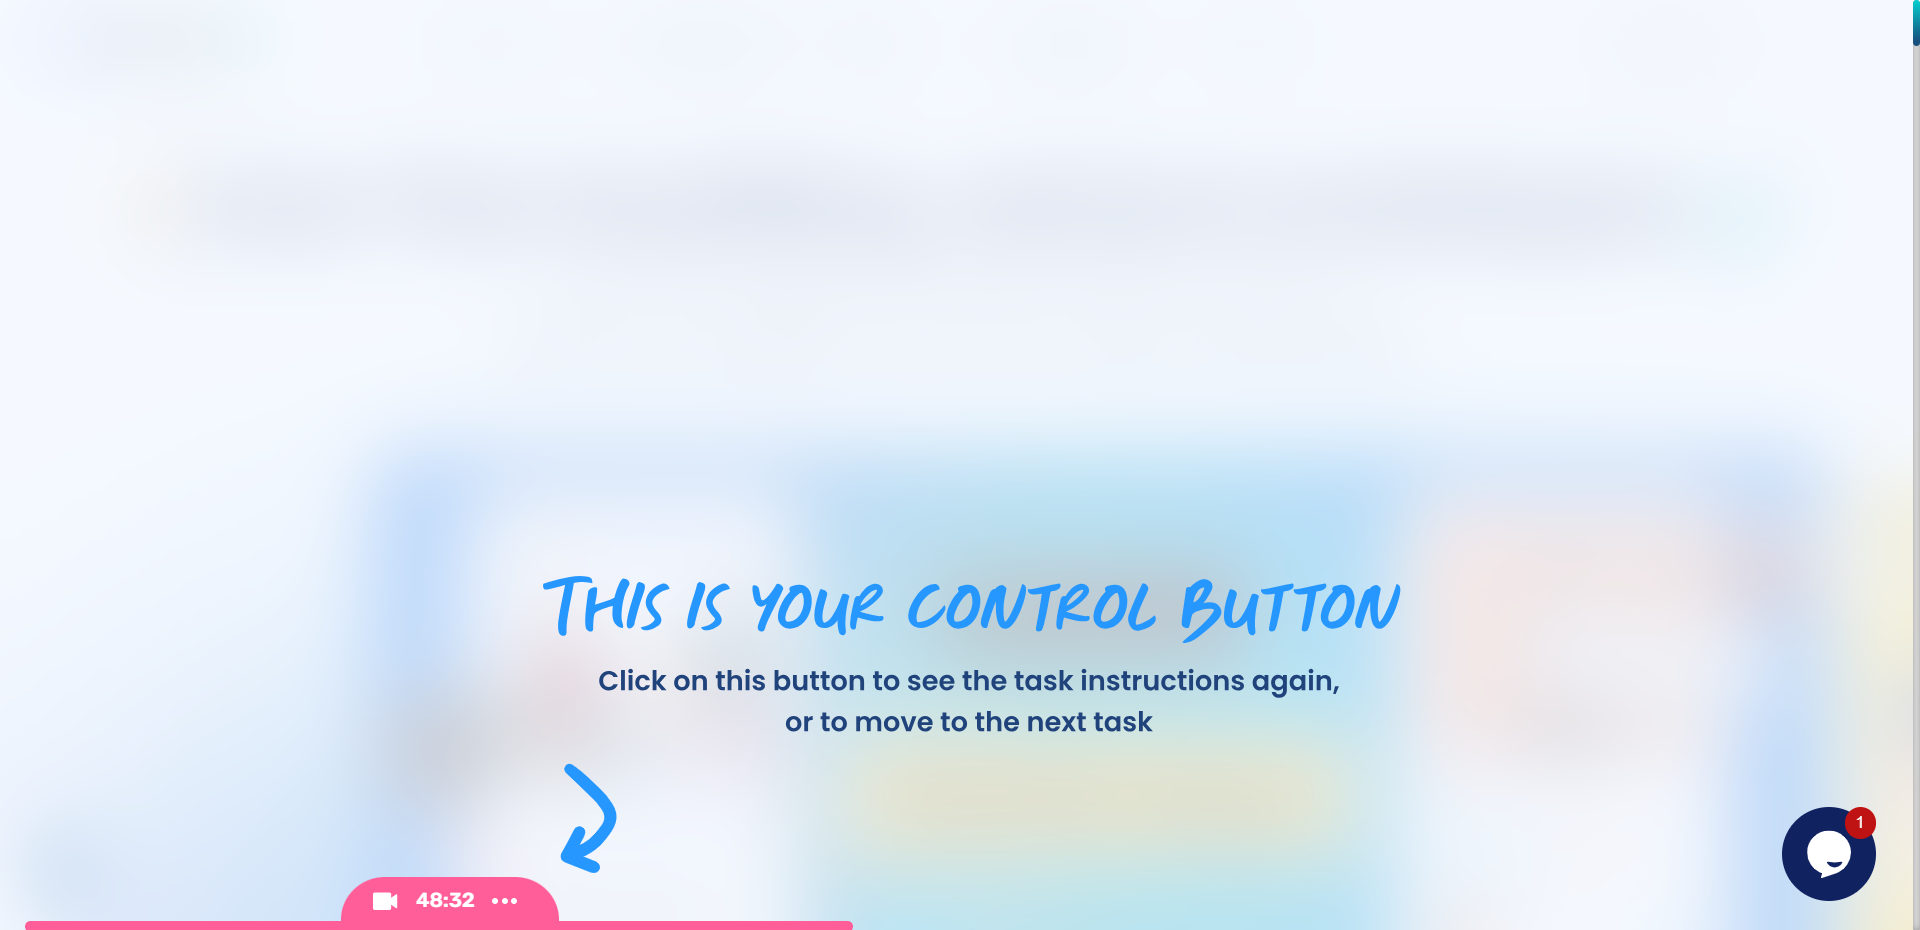
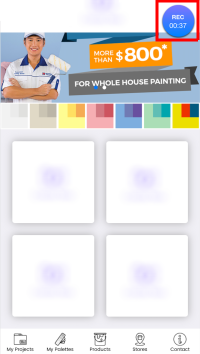
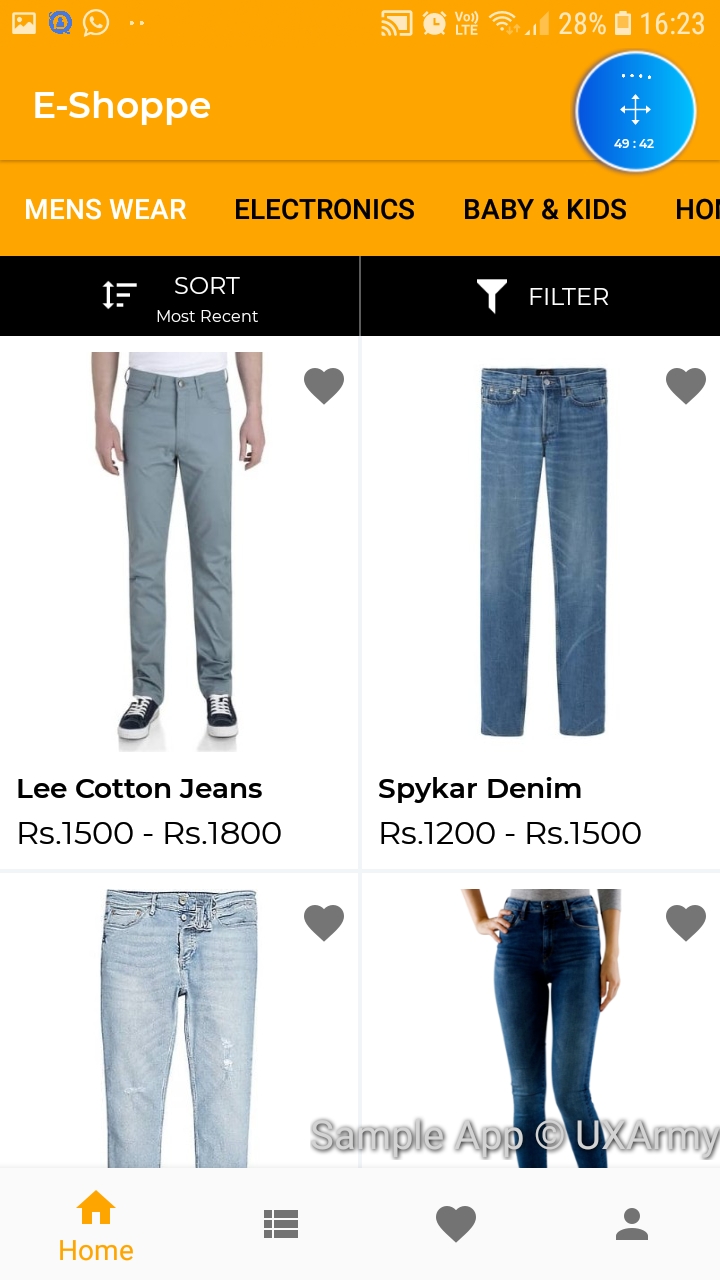
8. The task has started. Perform the action in the App as instructed in the task. In case you have forgotten the task instructions, no worries. You can relook at the task instructions anytime, using the circular control as shown in the screenshot.
9. The task when invoked in the App using circular control looks like in the screen below.

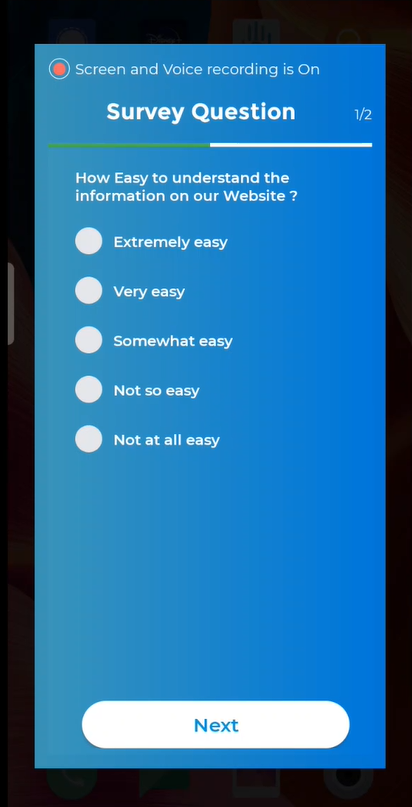
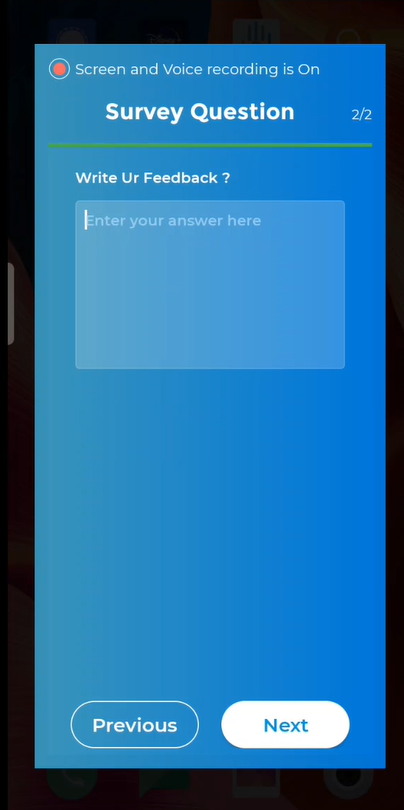
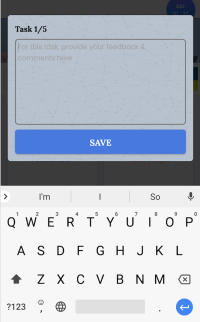
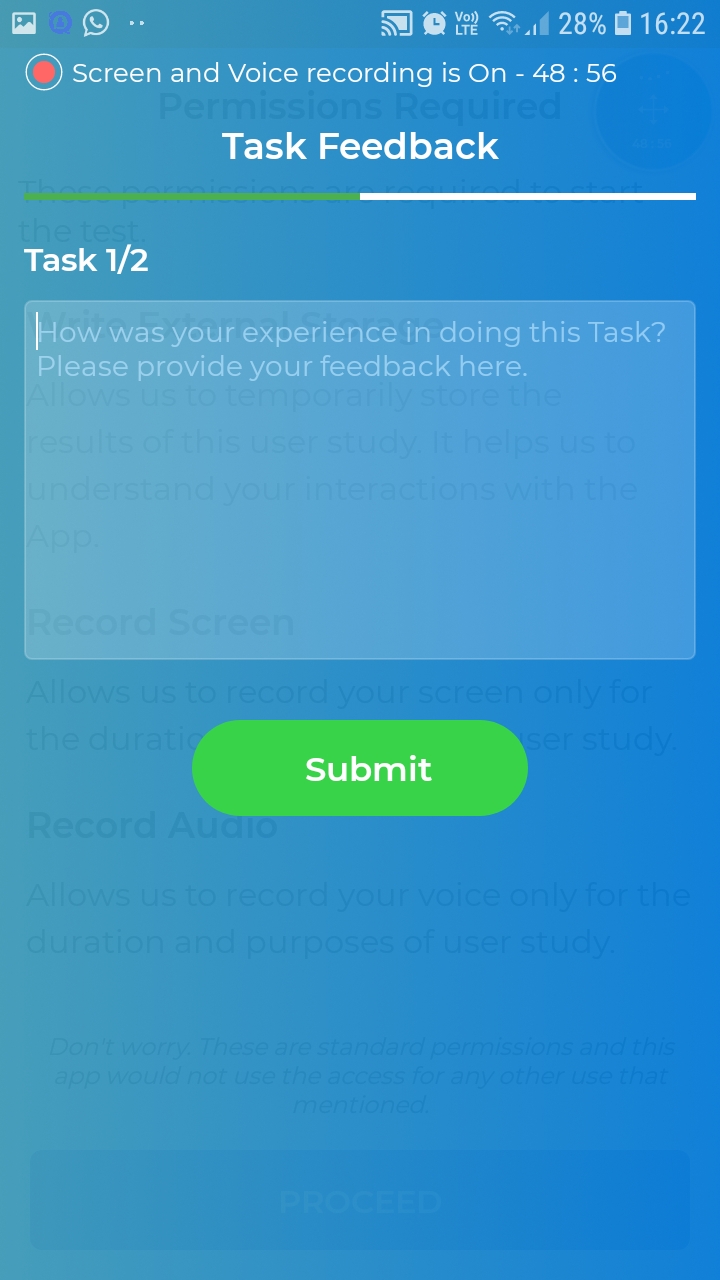
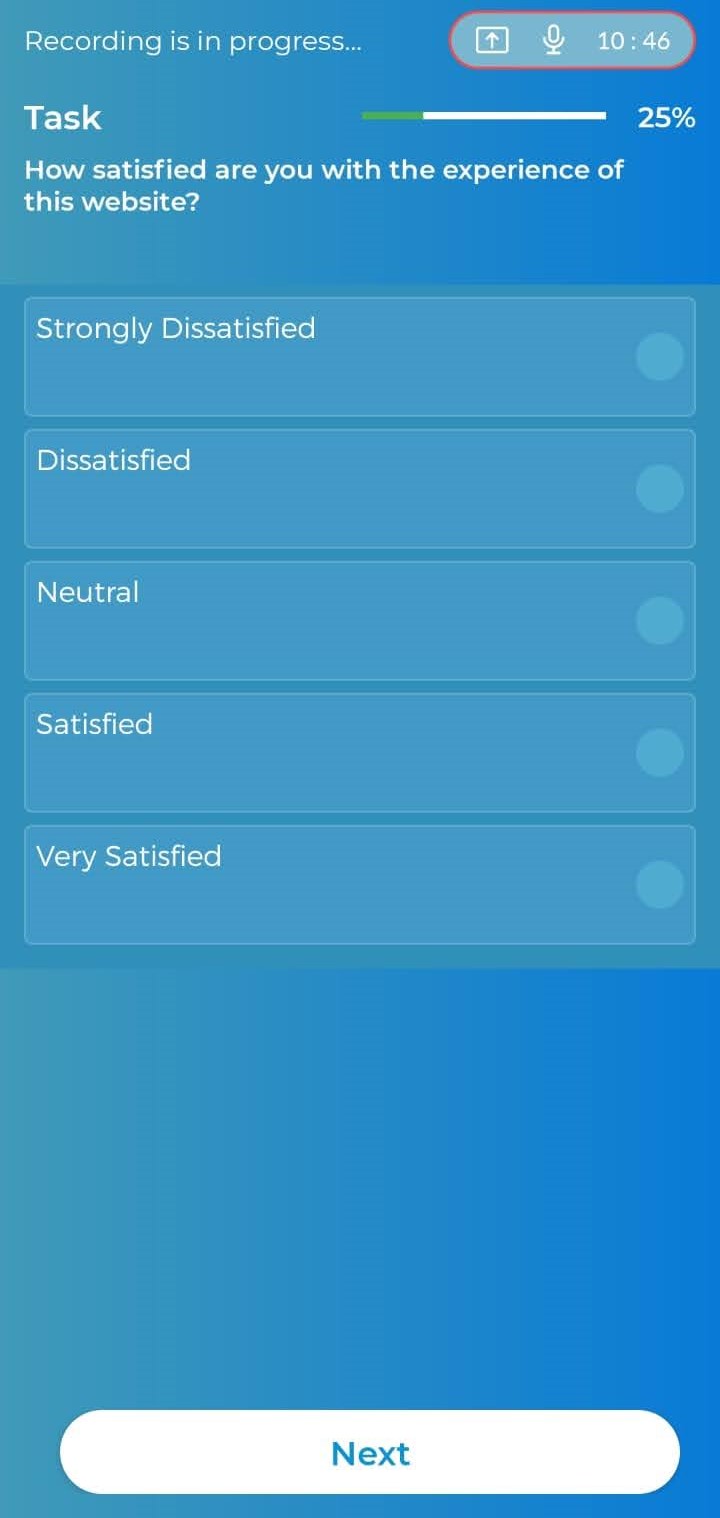
10. Before completing the task, you would be required to input your comments. Remember to speak out your comments as you type. We need your voice as well as text feedback.

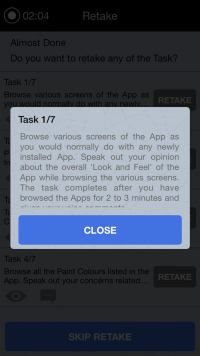
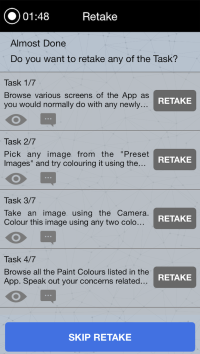
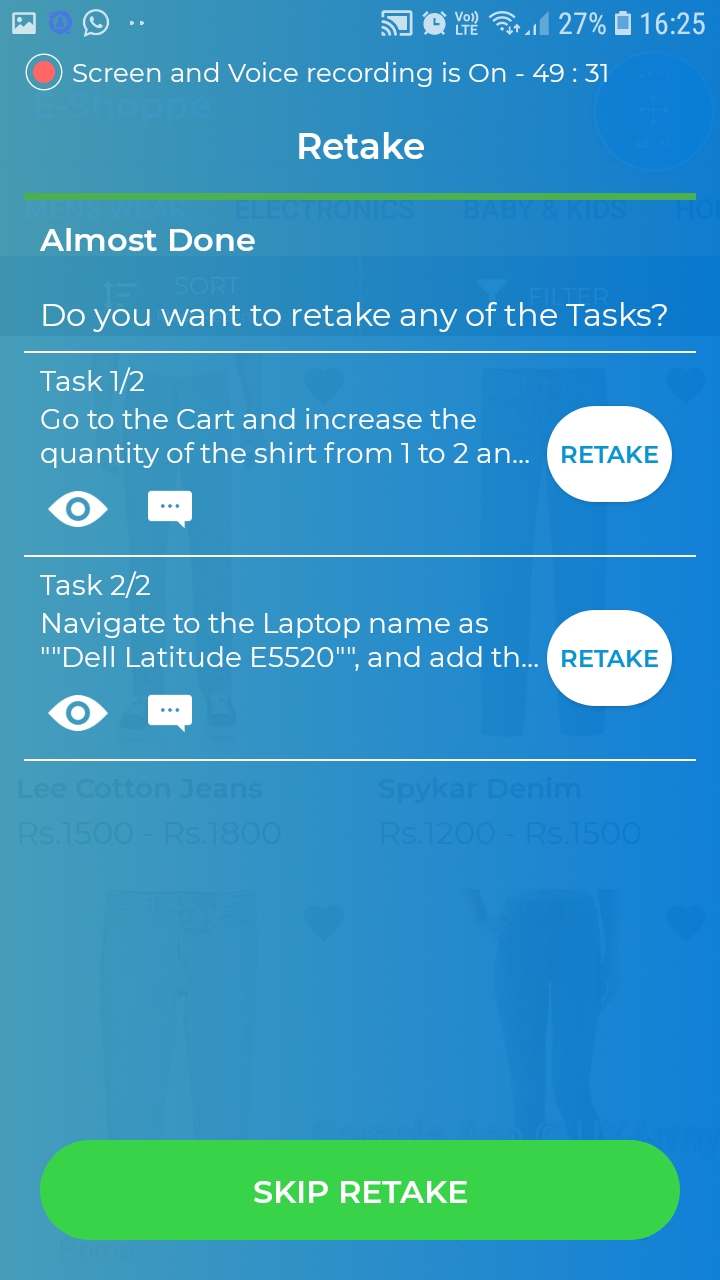
11. After you have completed all Tasks. it's possible that you feel that a particular task could have been done better. Now in this screen, there is an opportunity to Retake any task. Tap the “RETAKE” button against the Task that you want to retake. In case you do not want to retake any Task, Tap "SKIP RETAKE" button.
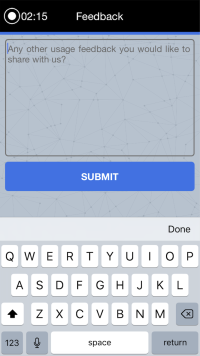
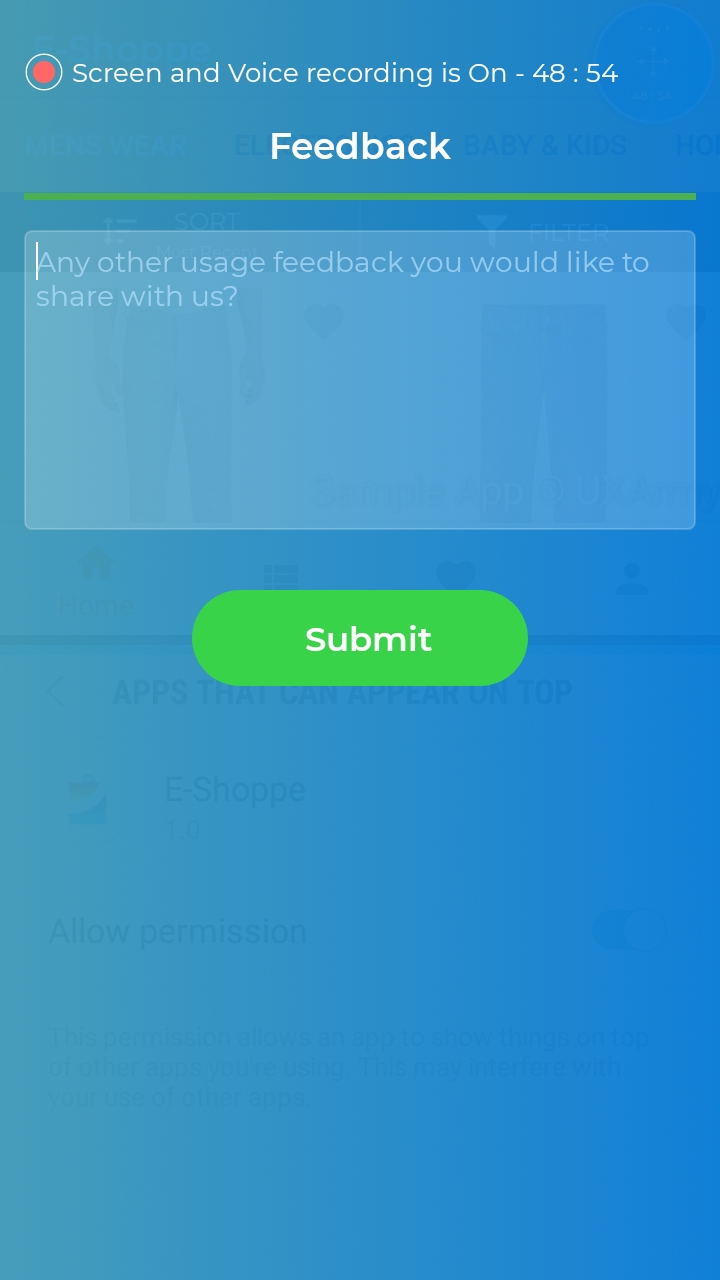
12. Now it's time to give your overall comments about the experience of the App. Fill in your comments and press the SUBMIT button. And yes, by now you would be speaking out your feedback quite well .
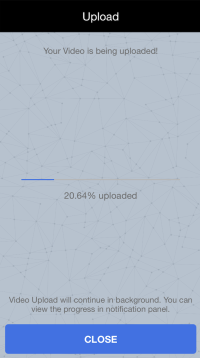
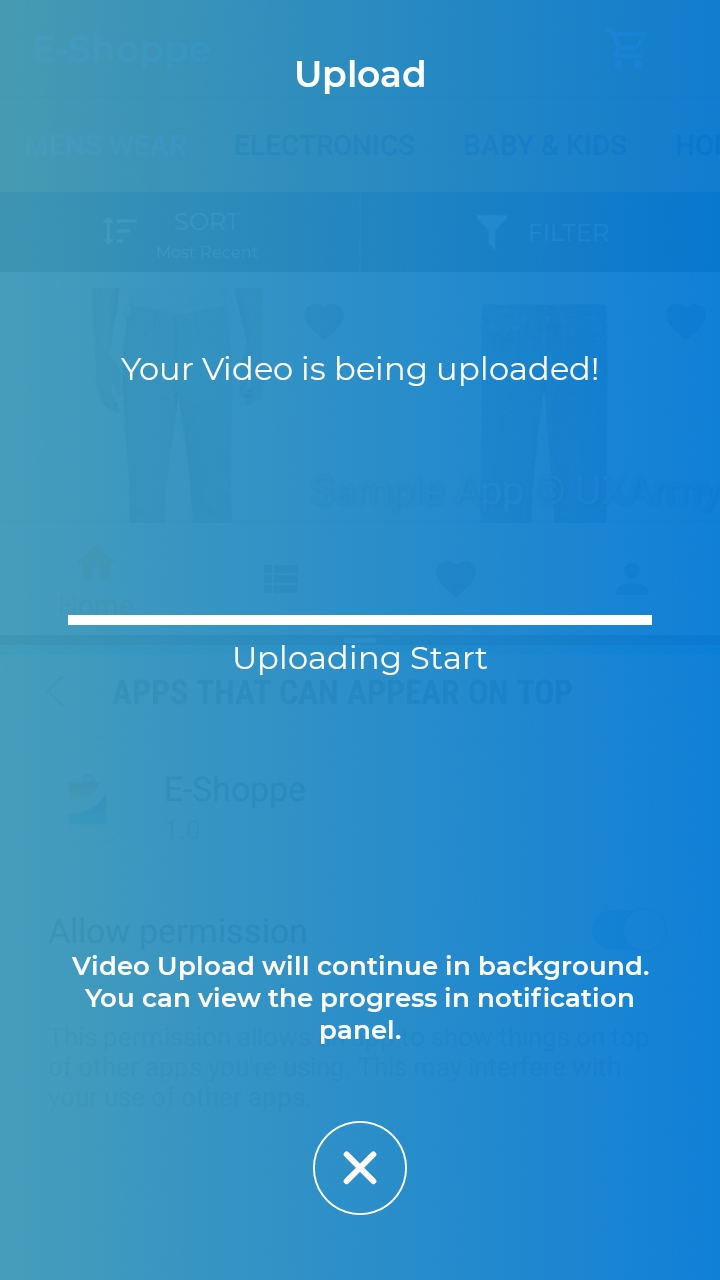
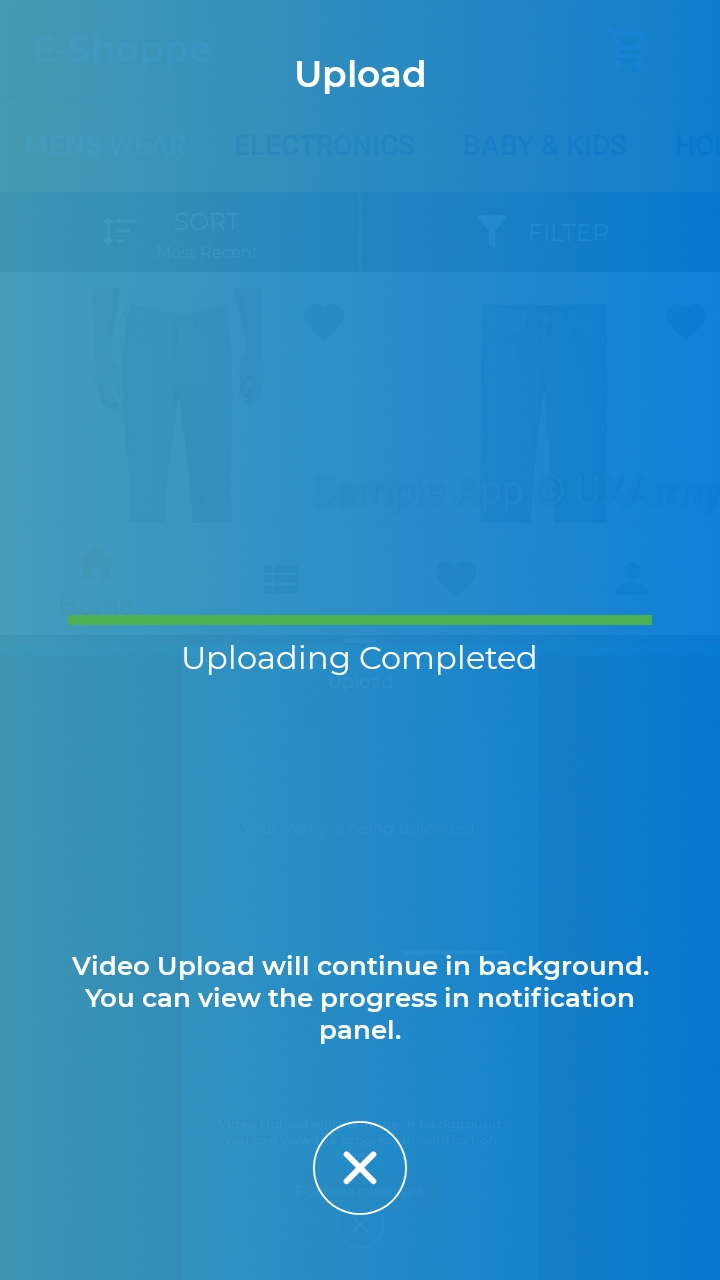
13. The results of the user study would start to upload on the Cloud now. Wait until you hear a positive beep sound and the progress bar is full. That's ALL. You have successfully completed a User study.
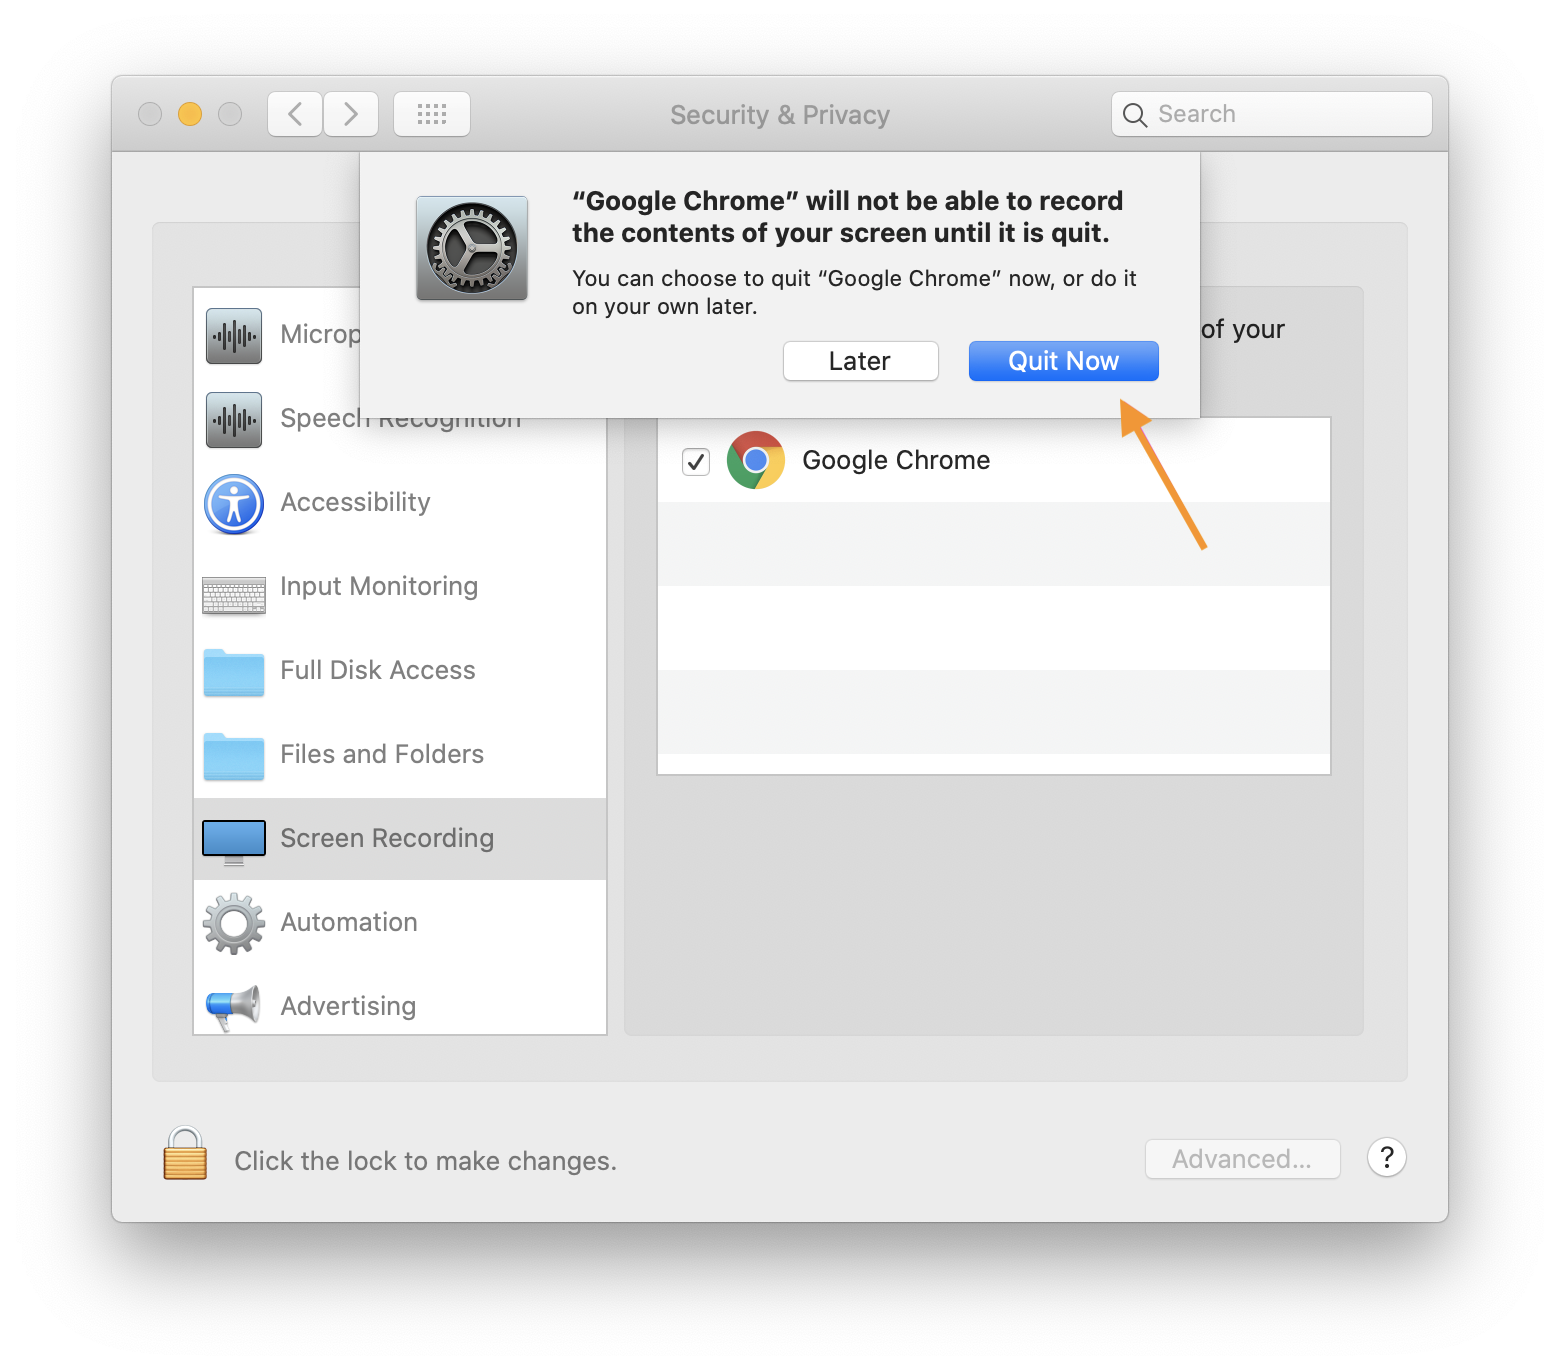
You need to allow screen recording permission for Google Chrome.
1. Click on the “Apple icon” from the left top of the screen
2. Open System Preferences, click the "Security and Privacy"
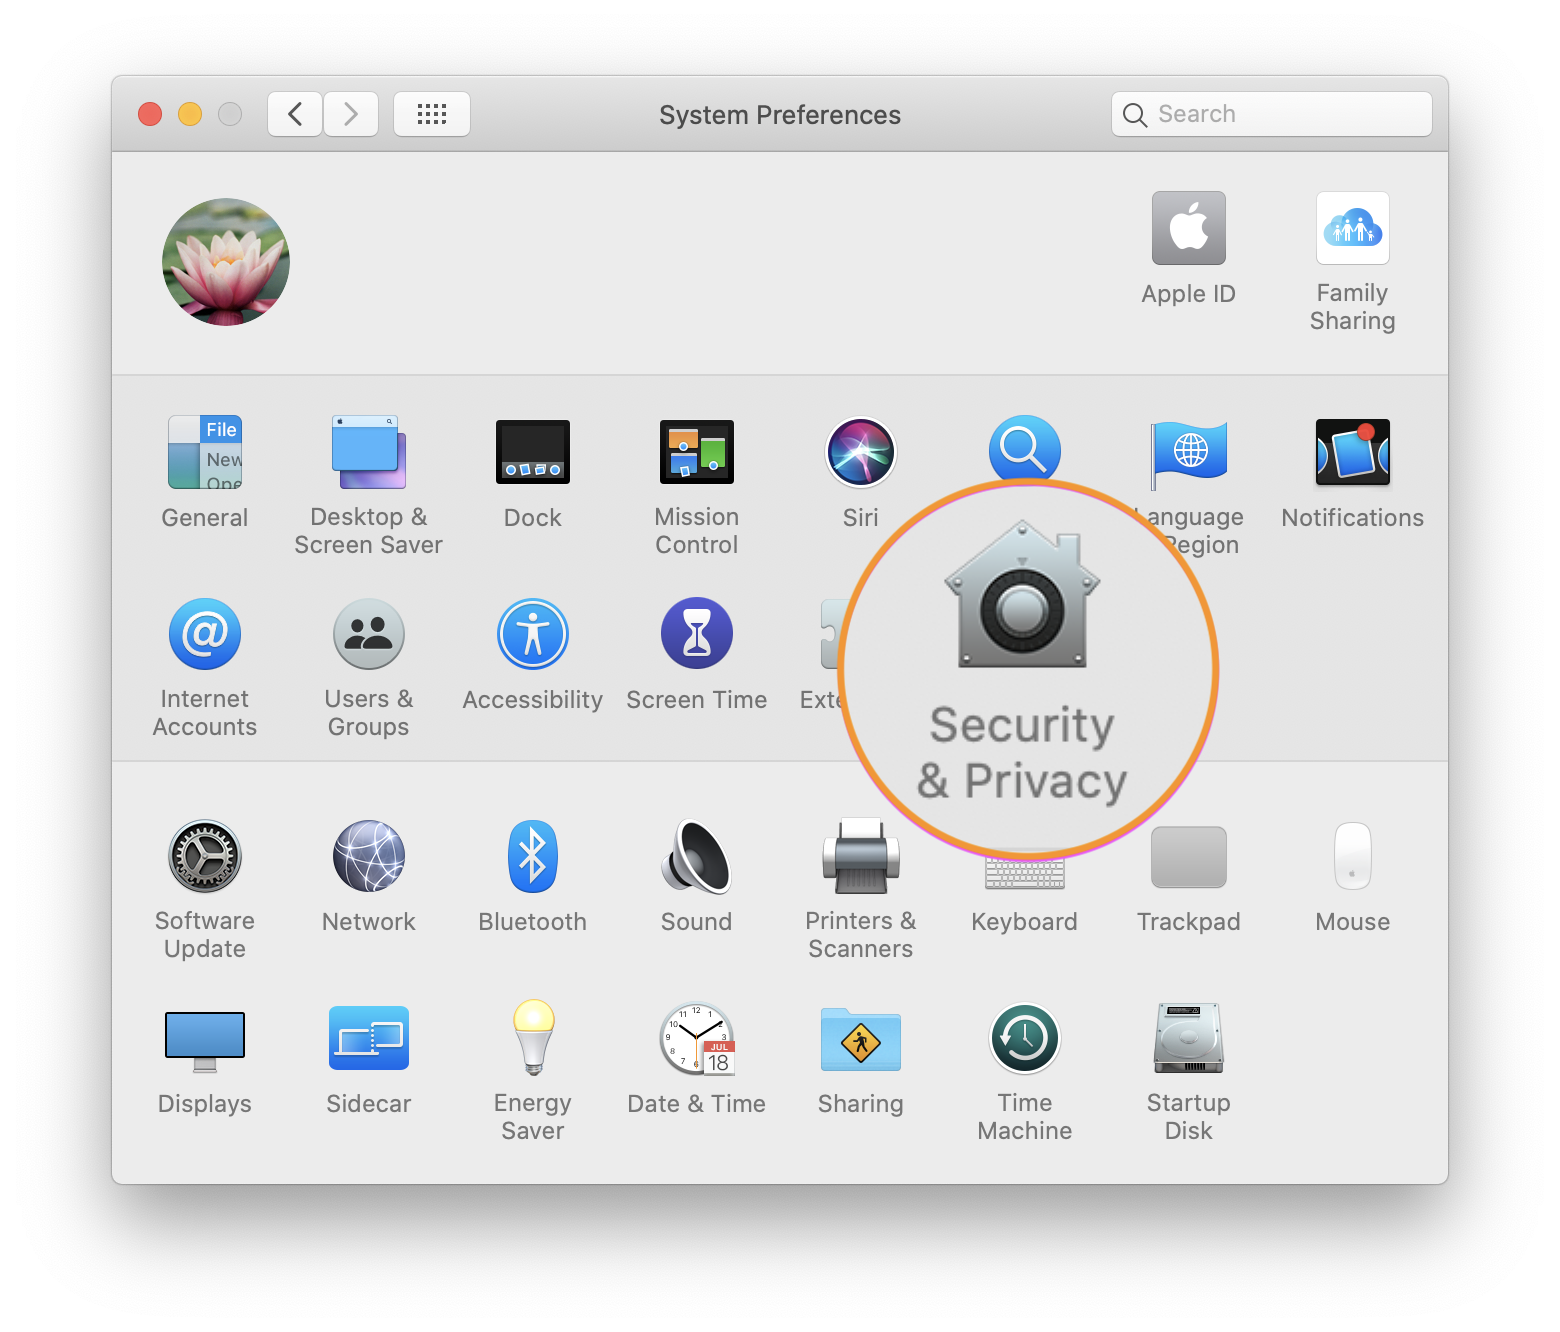
3. Find the "Screen Recording" section, click the box next to Google Chrome to allow Screen Sharing. You may need to click the unlock icon in the bottom-left.
4. Next, click "Quit Now". Quit and restart Google Chrome, now you're ready to take the test.
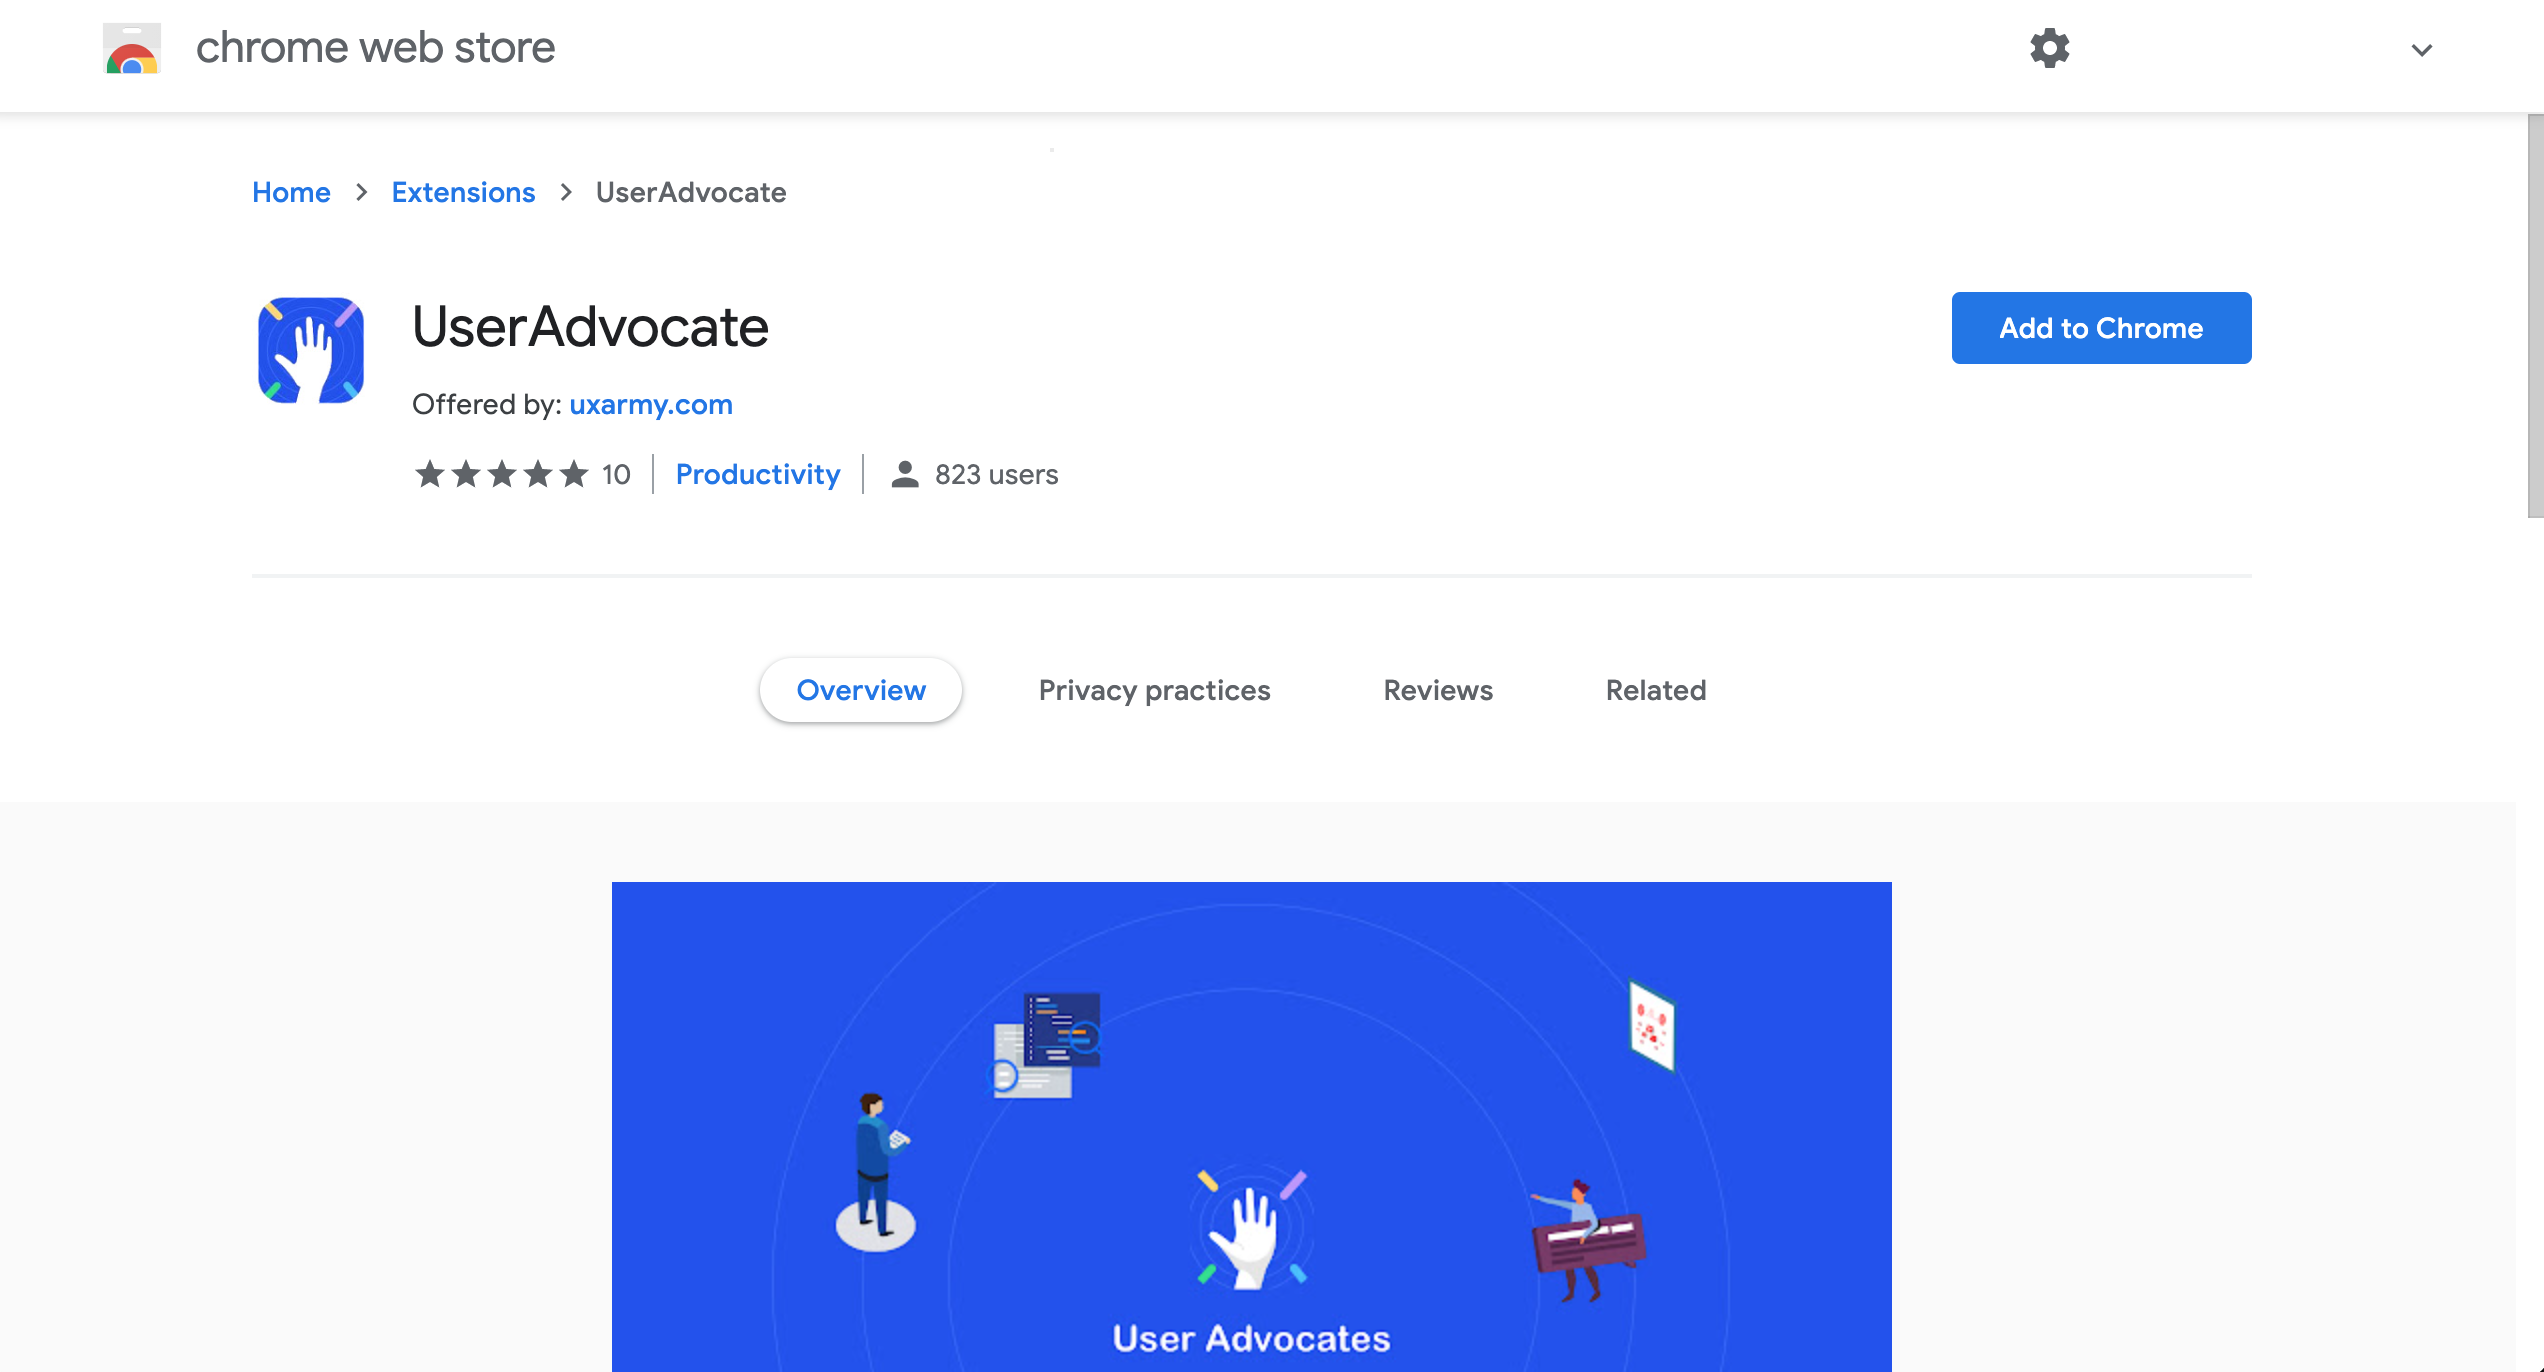
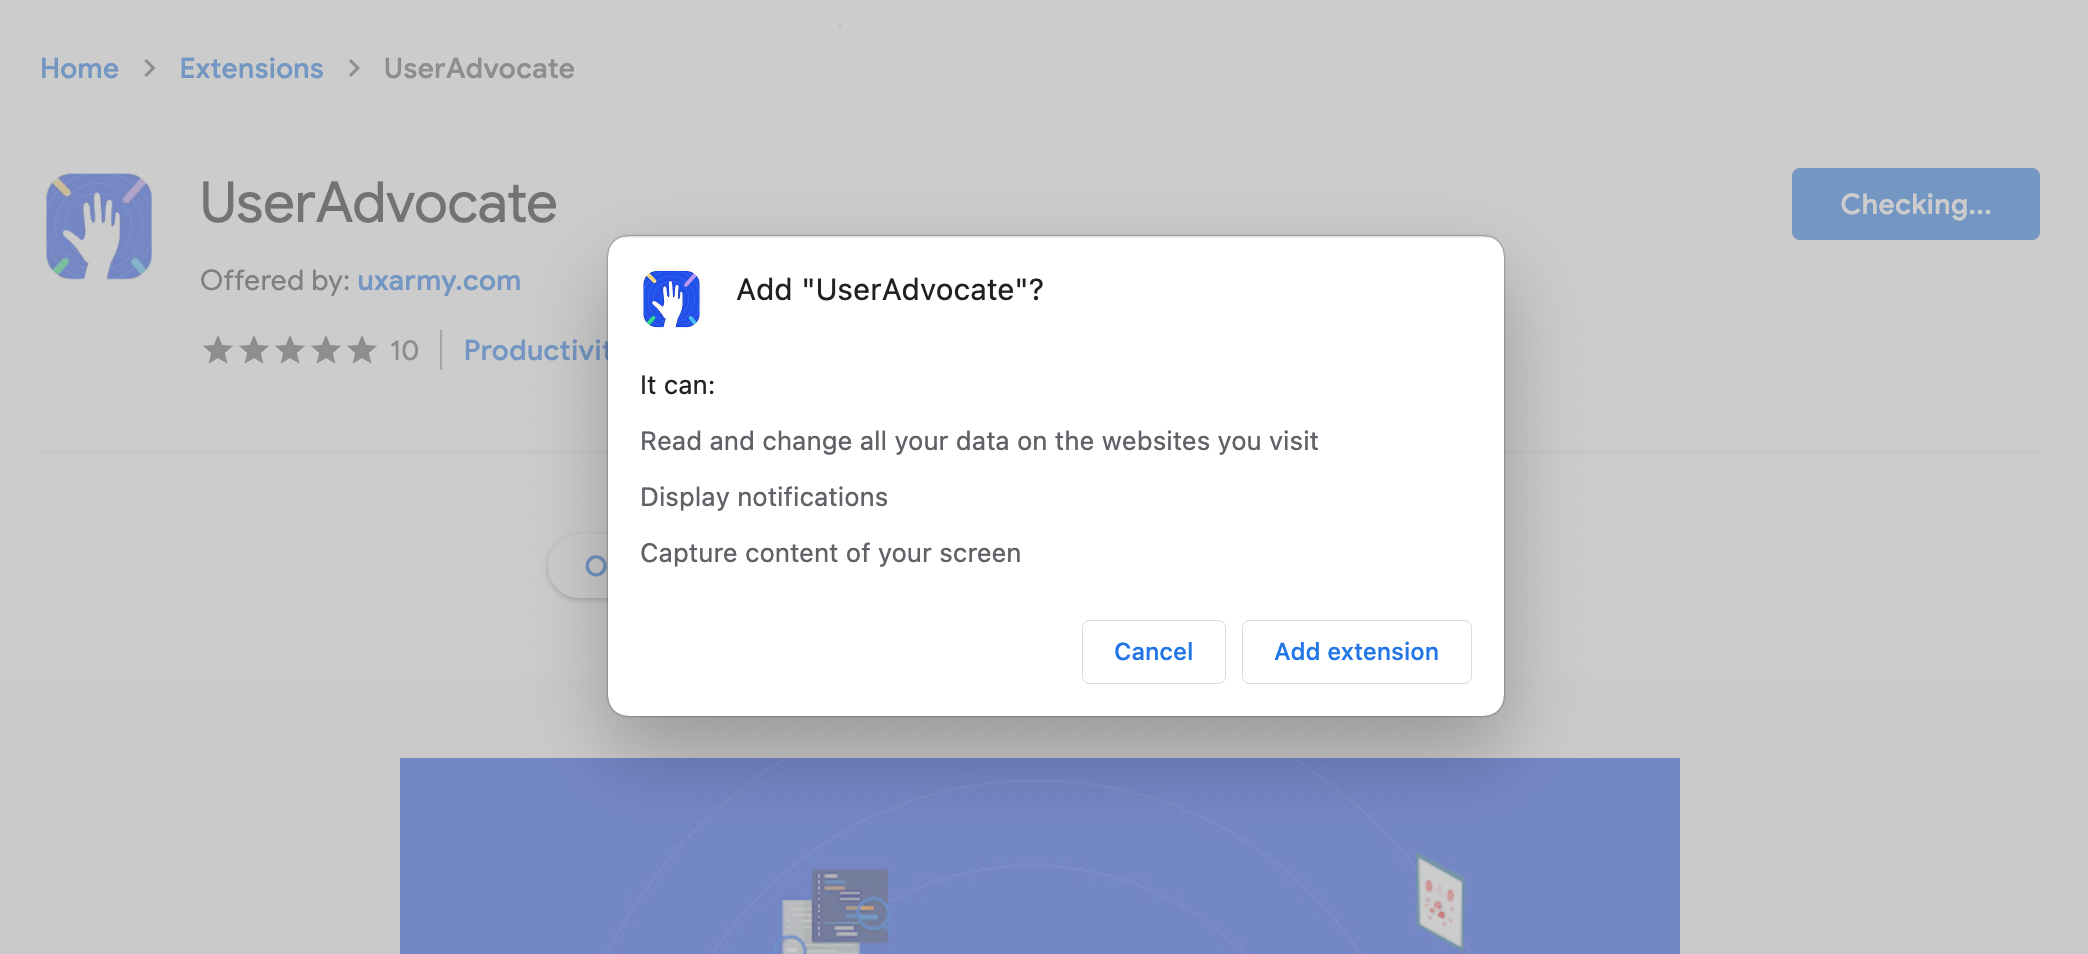
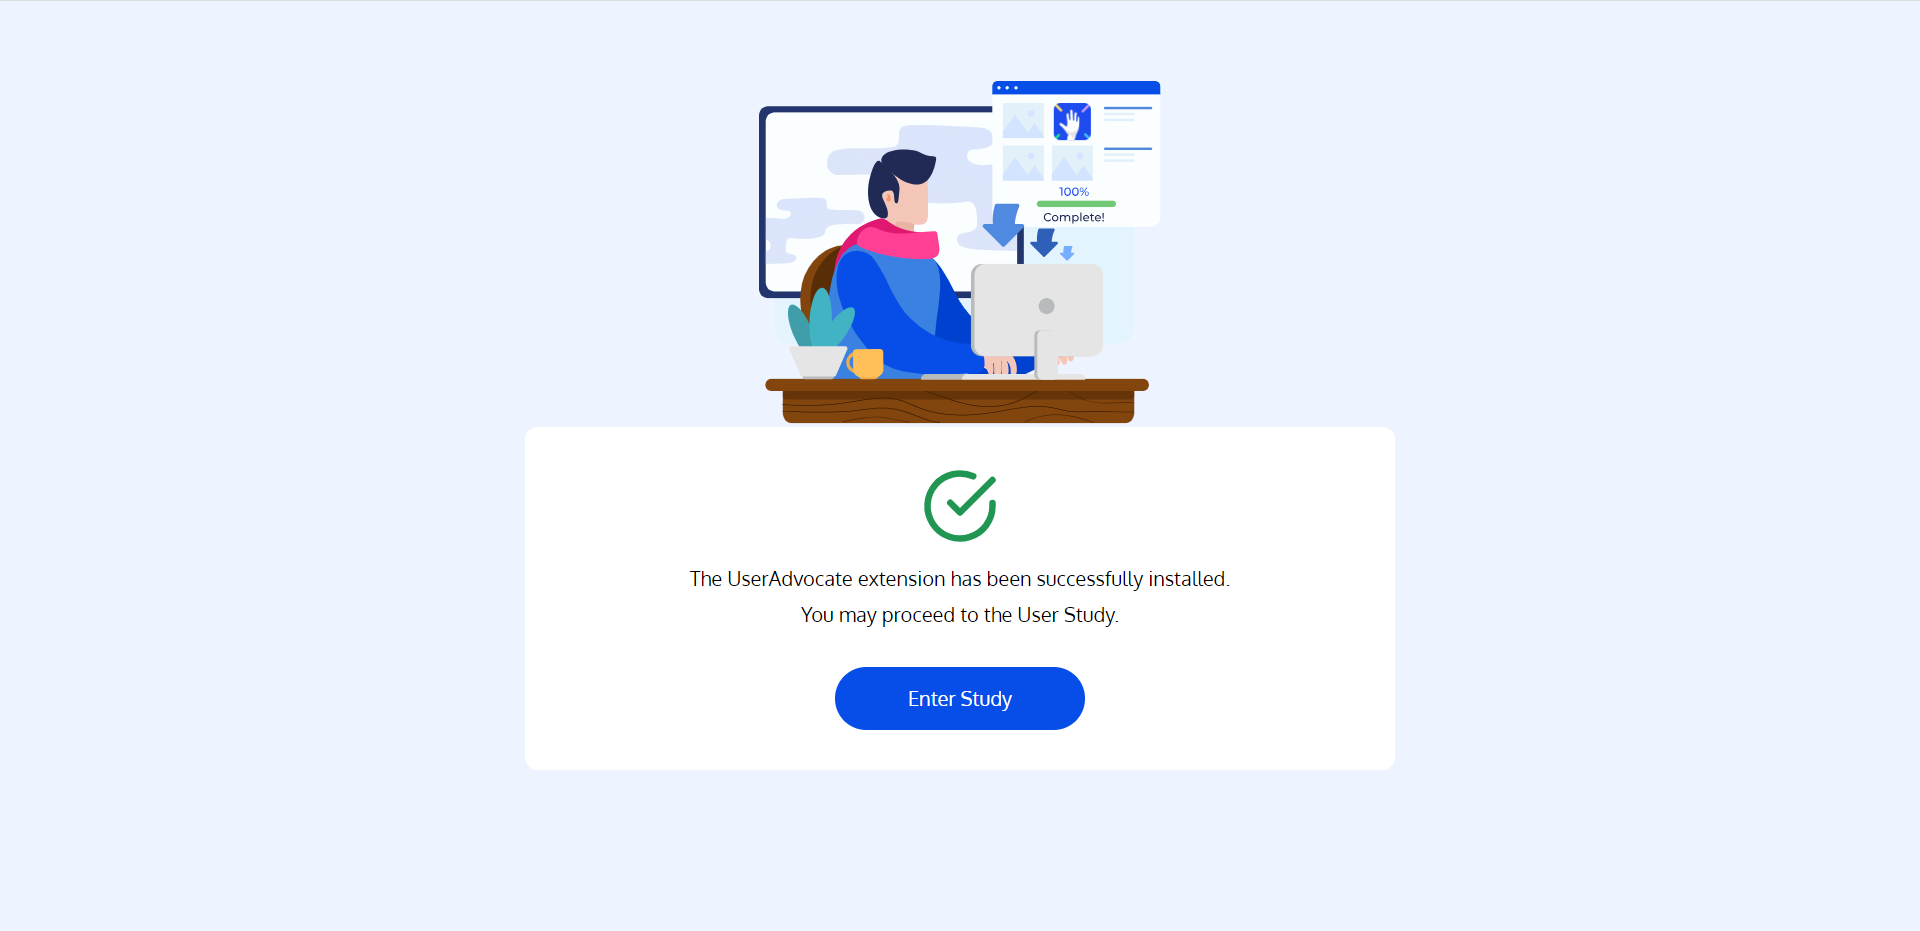
Yes, only once! You’ll be prompted to download the UserAdvocate Extension into the Google Chrome browser on your computer when you start the User Study.
Not at the moment. We are still building support for other browsers.
Yes, The purpose of a user study is to understand your usability feedback of the Website in the best way possible. Voice feedback along with Screen Sharing helps us to make meaningful conclusions about the Design shortcomings and things that you like/dislike about the test Website. So, We strongly recommend you allow this permission to increase your chances of getting rewarded. A submission without any voice feedback is most likely to get disapproved by our client, and you will be requested to re-take the test.
Try the following steps as recommended by Google:
Change a site's camera & microphone permissions
If you're using a Chrome device at work or school, your network administrator can set camera and microphone settings for you. In that case, you can't change them here.
Learn about using a managed Chrome device..
No, we don't support Private window / Incognito mode to take the user study.
No. For user's security reasons, Google doesn't allow any extension to work in Guest account.
Open the UserAdvocate App. Ensure you are connected to a stable internet connection. Wi-Fi recommended. (Click on Android or iOS if you haven’t installed the app)
For Existing UserAdvocates: Login to the App using your login credentials. If you are unable to login, reset your password using ‘Forgot password’.
For New Users: Sign up on the application by following the steps laid out in the“Sign Up” tutorial.
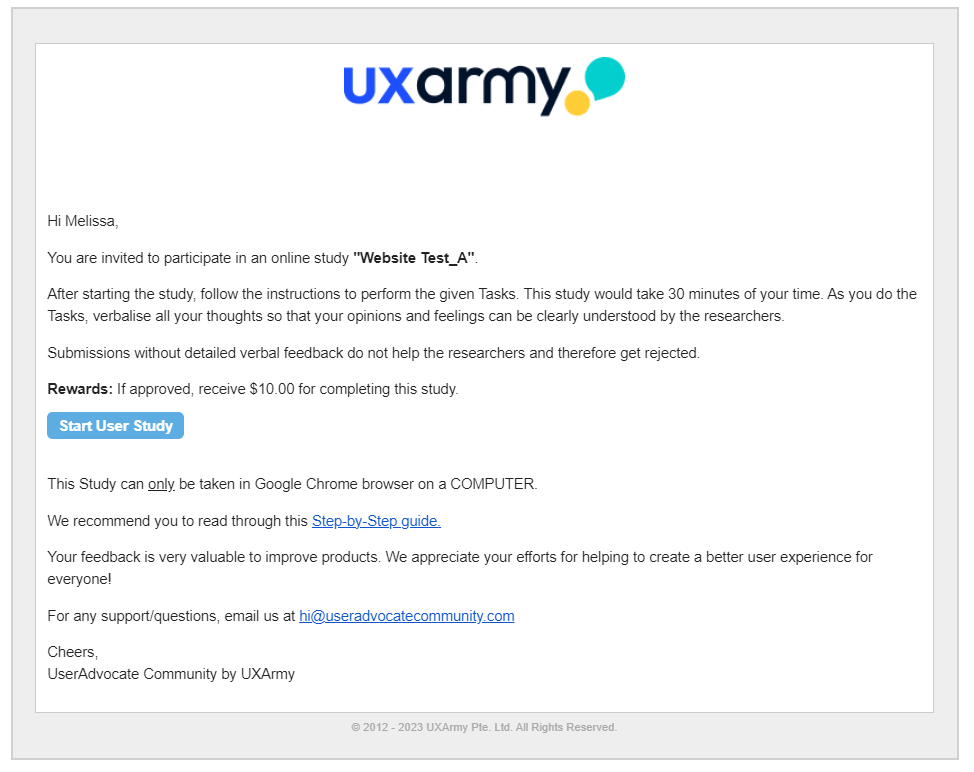
For those accessing test link through email: Open your email account and click on the button’ Start User Study’.

Before starting some of the tests, you may be asked to fill in screener questions which will determine whether you are a good fit for the test required.
Please follow the instructions below :
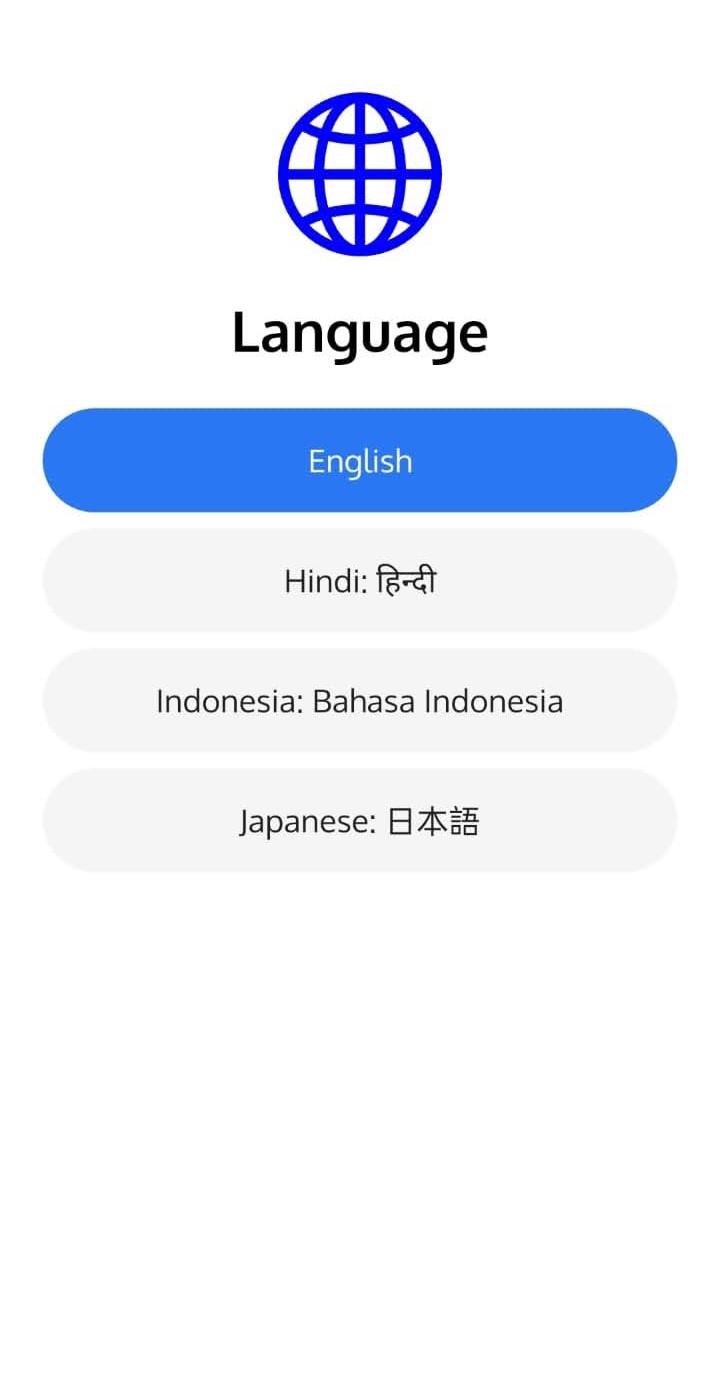
Step 1 : Select the language among options, if asked
Step 2 : After selecting your preferred language, click on ‘Let’s Go’ to see if you are a match for the required test.

Step 3 : Answer the questions asked to you on screen and select among the available options. Answer the questions and move on to the next question by clicking ‘Next’.
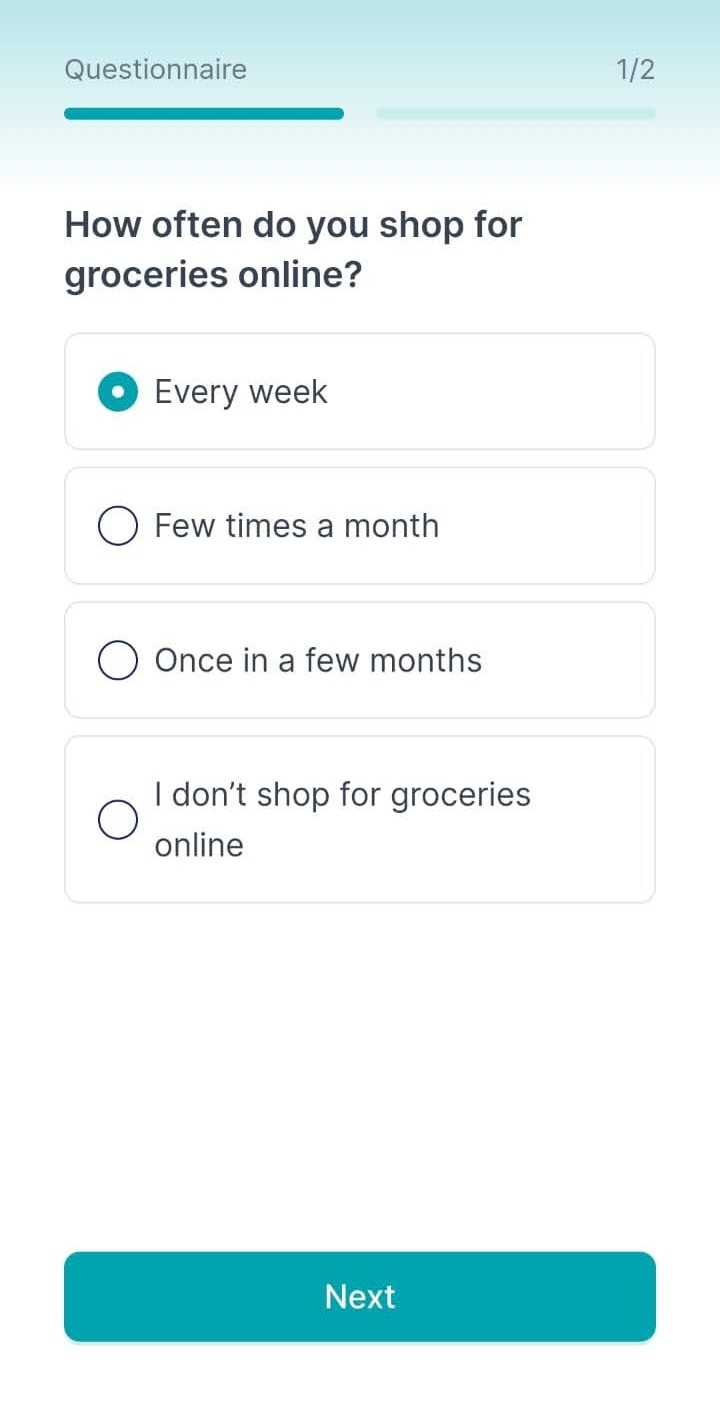
Step 4 : After completing the questions, you will be informed whether you are selected or not.

OR
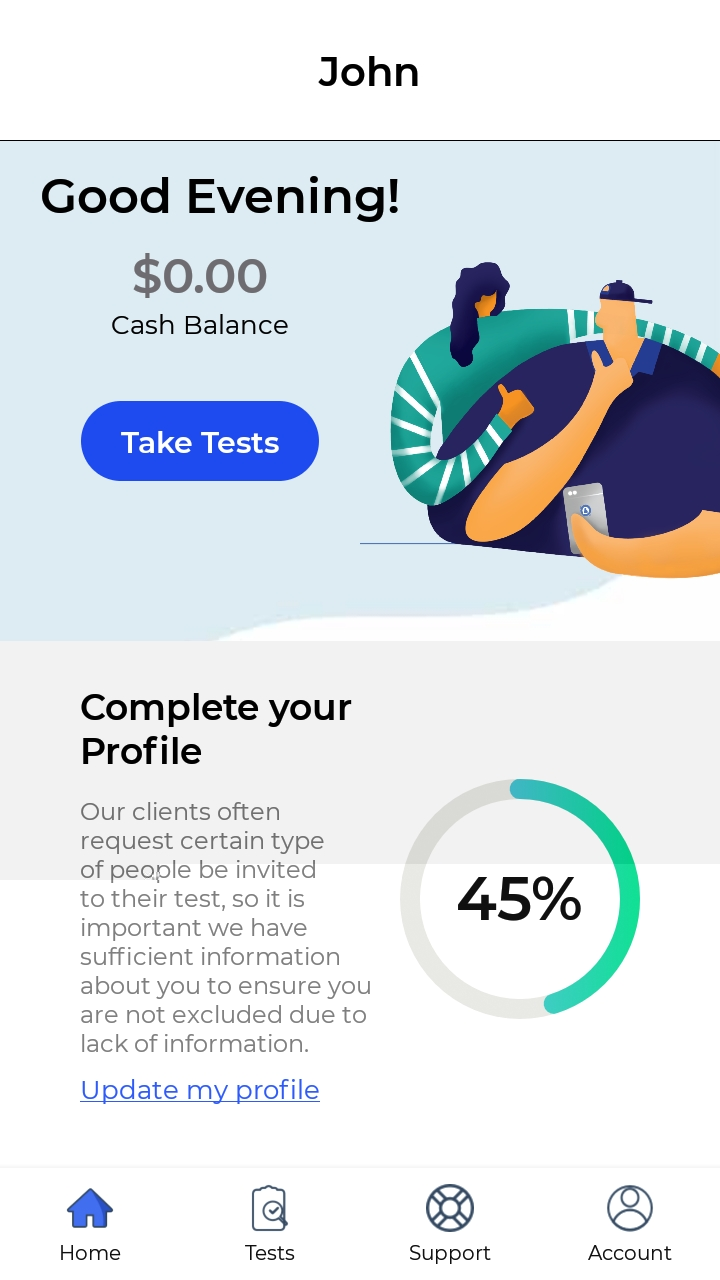
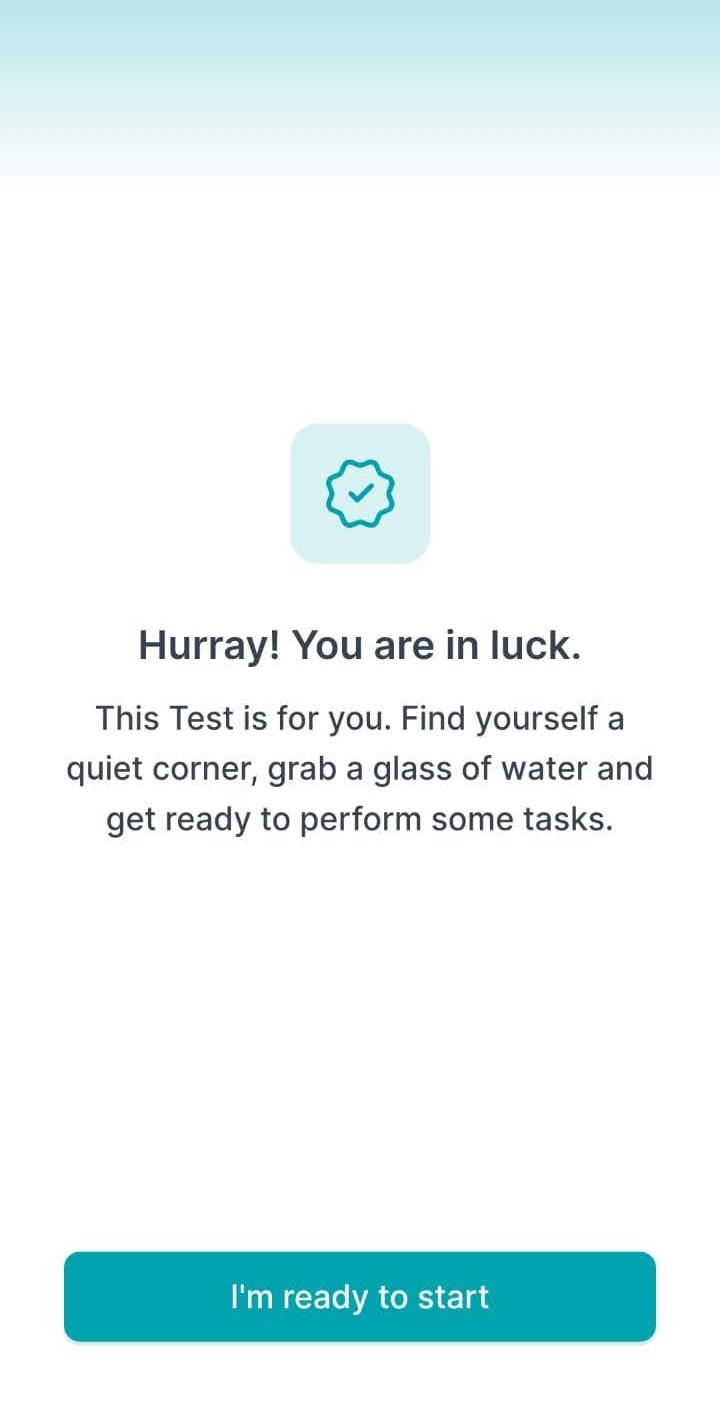
Once you are logged in, you will be directed to the ‘Tests’ tab where you will be able to see the available tests.

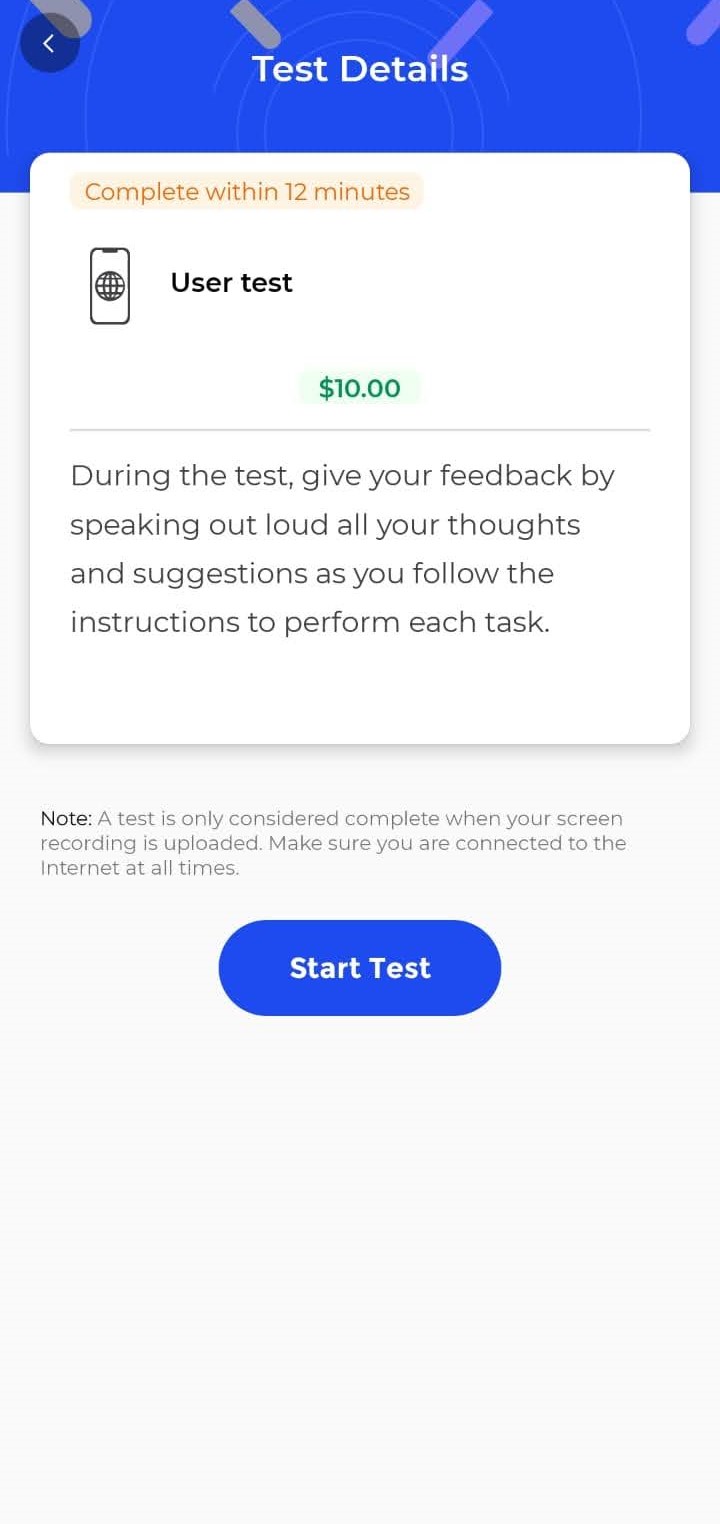
Note: The purpose of a Test is for the client to understand how you use the website and what you think / feel about it.
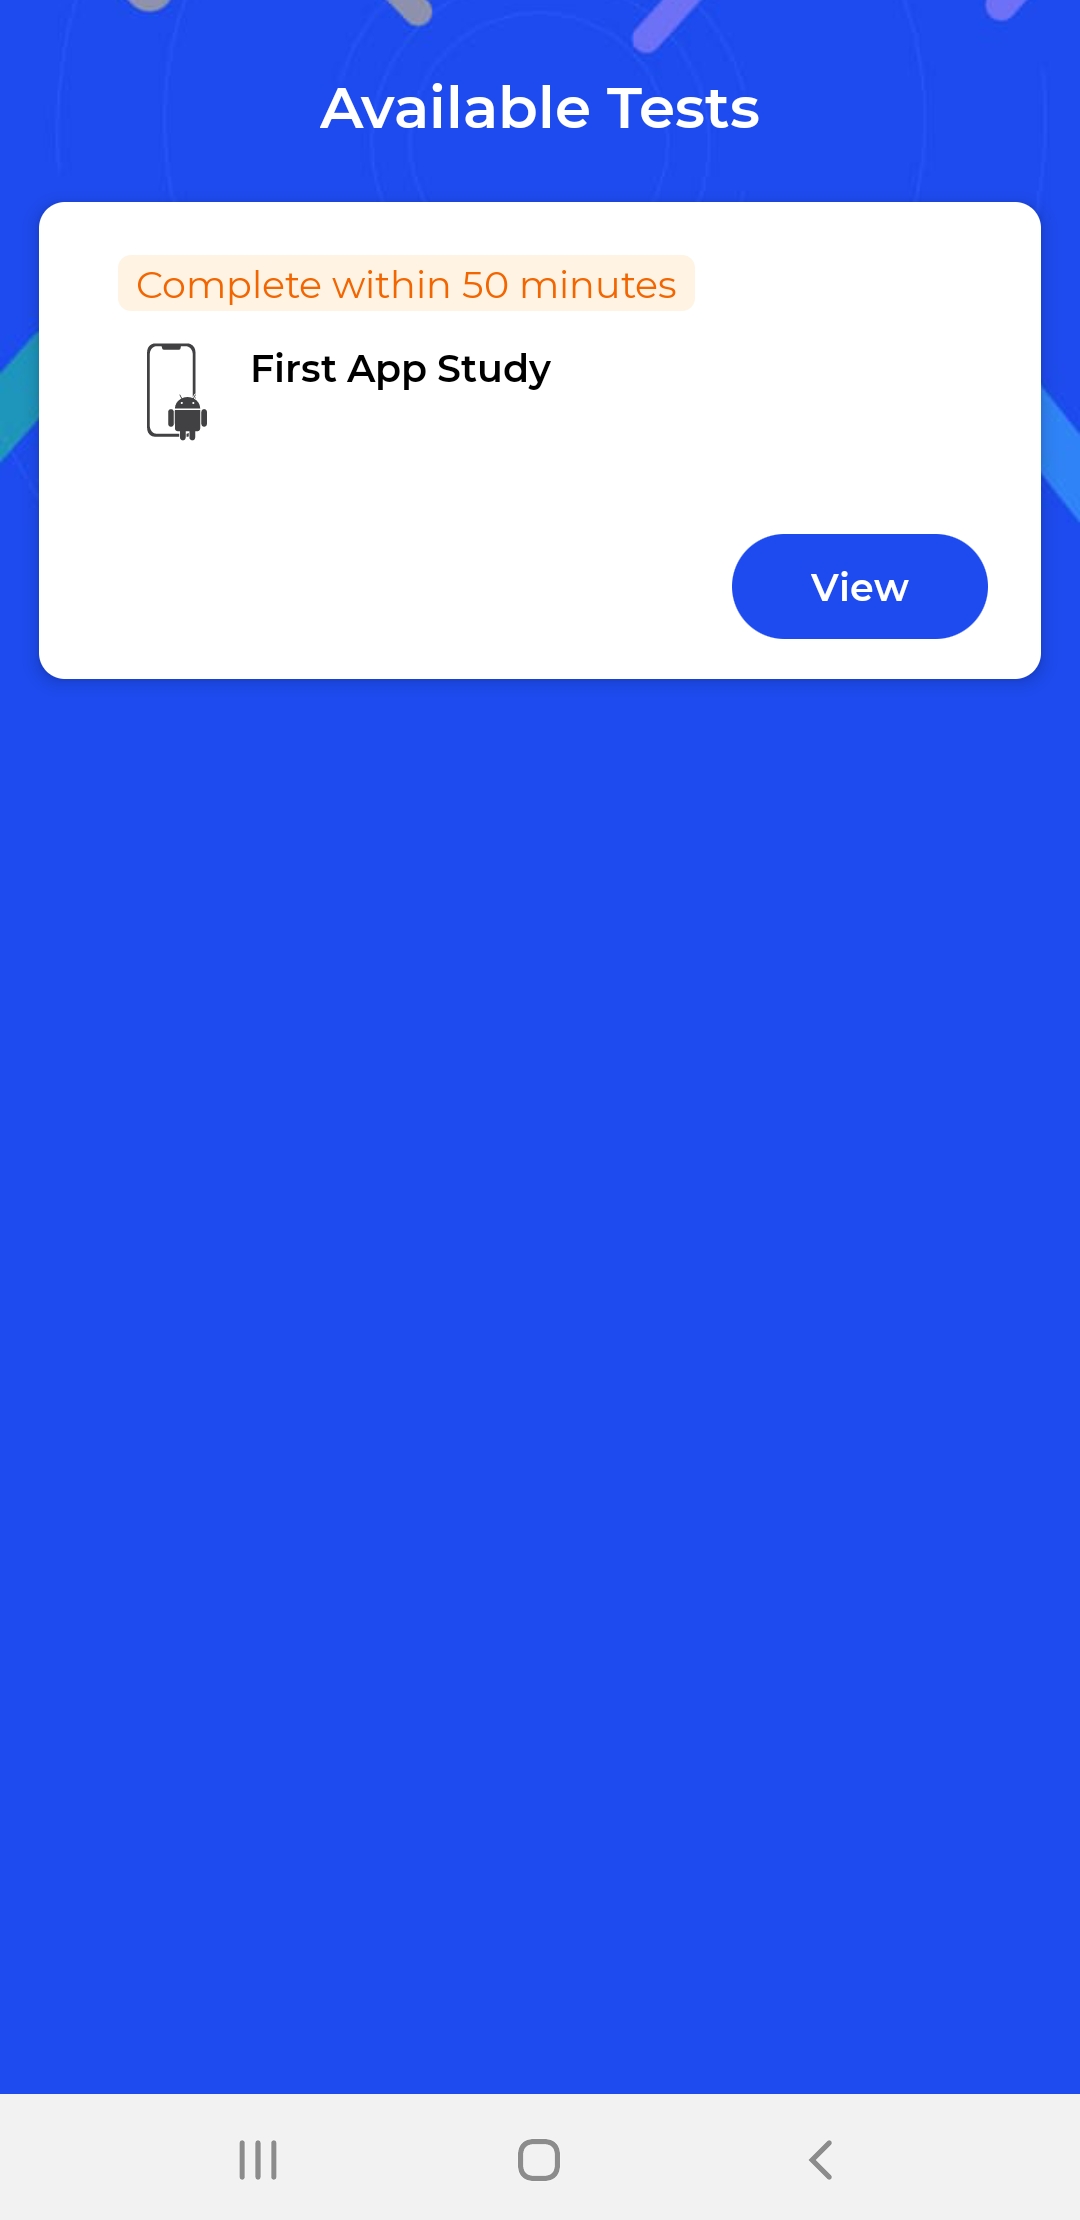
Click on the “Tests” tab on the bottom of the home screen and you will be able to see available tests you are eligible to take. To start the test, click on ‘View’.
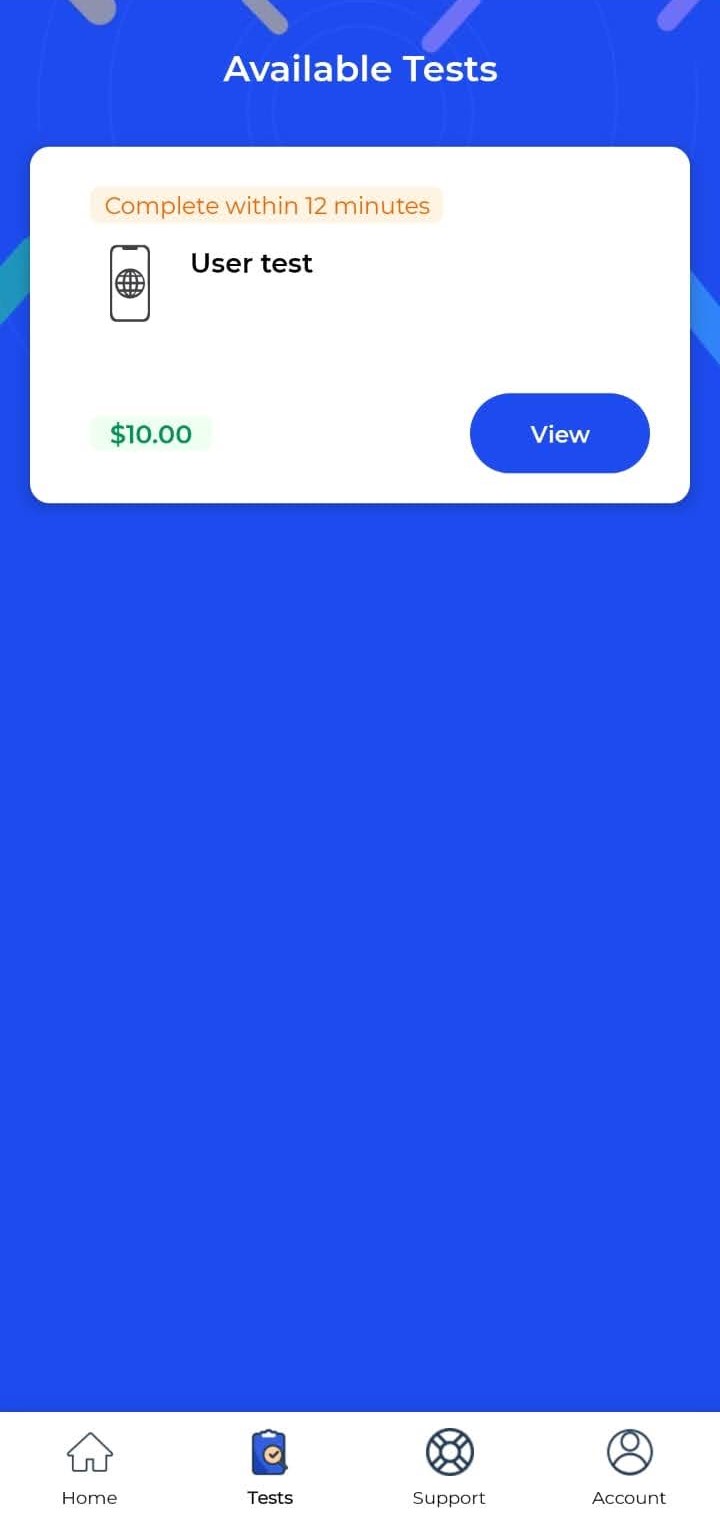
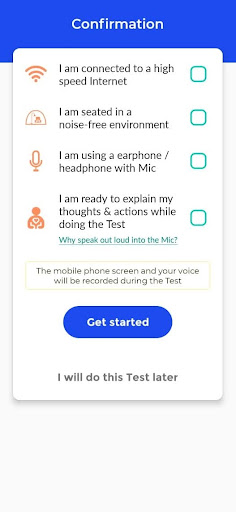
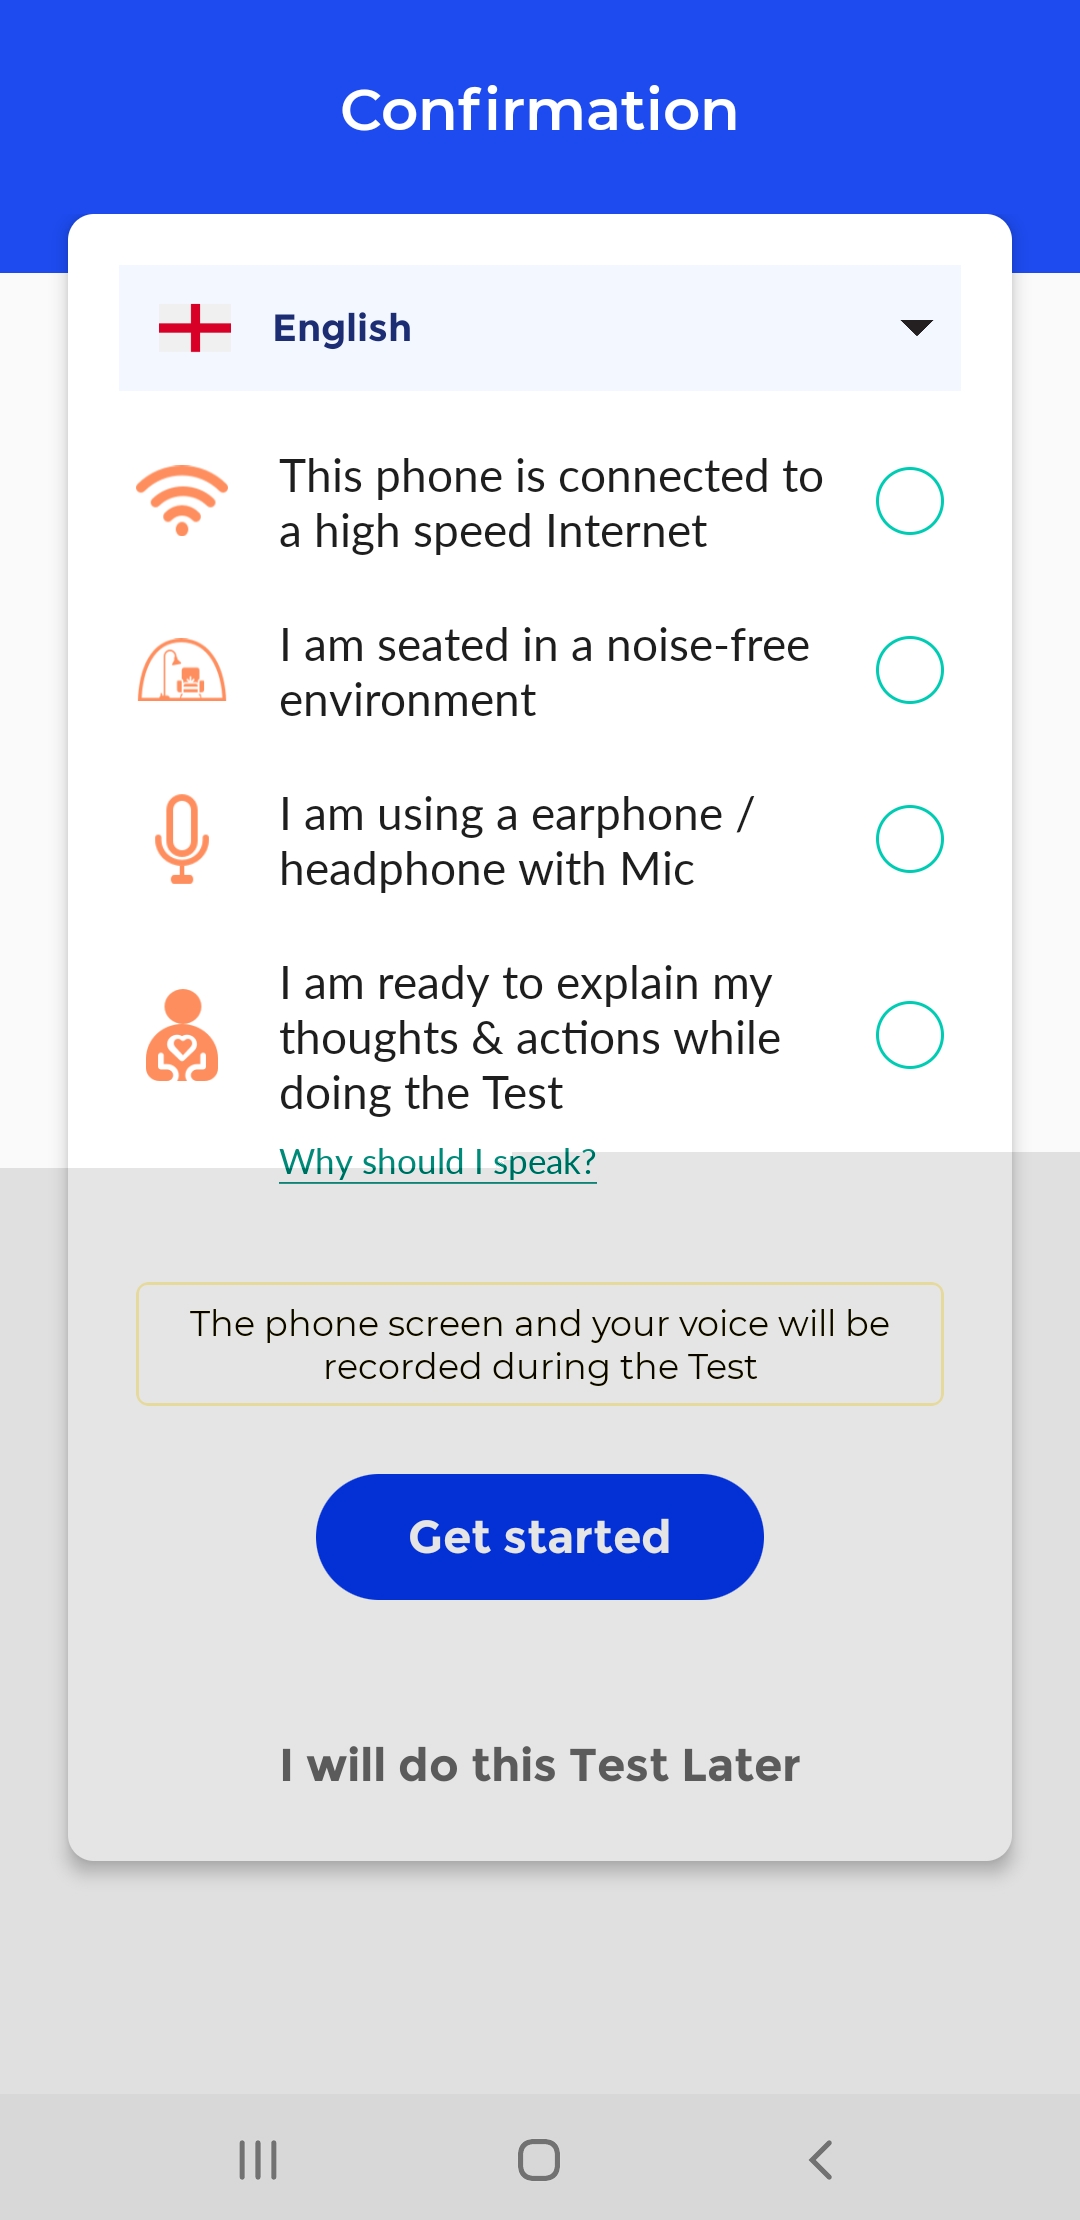
Note : Make sure that you’re seated comfortably in a quiet environment before entering the test.
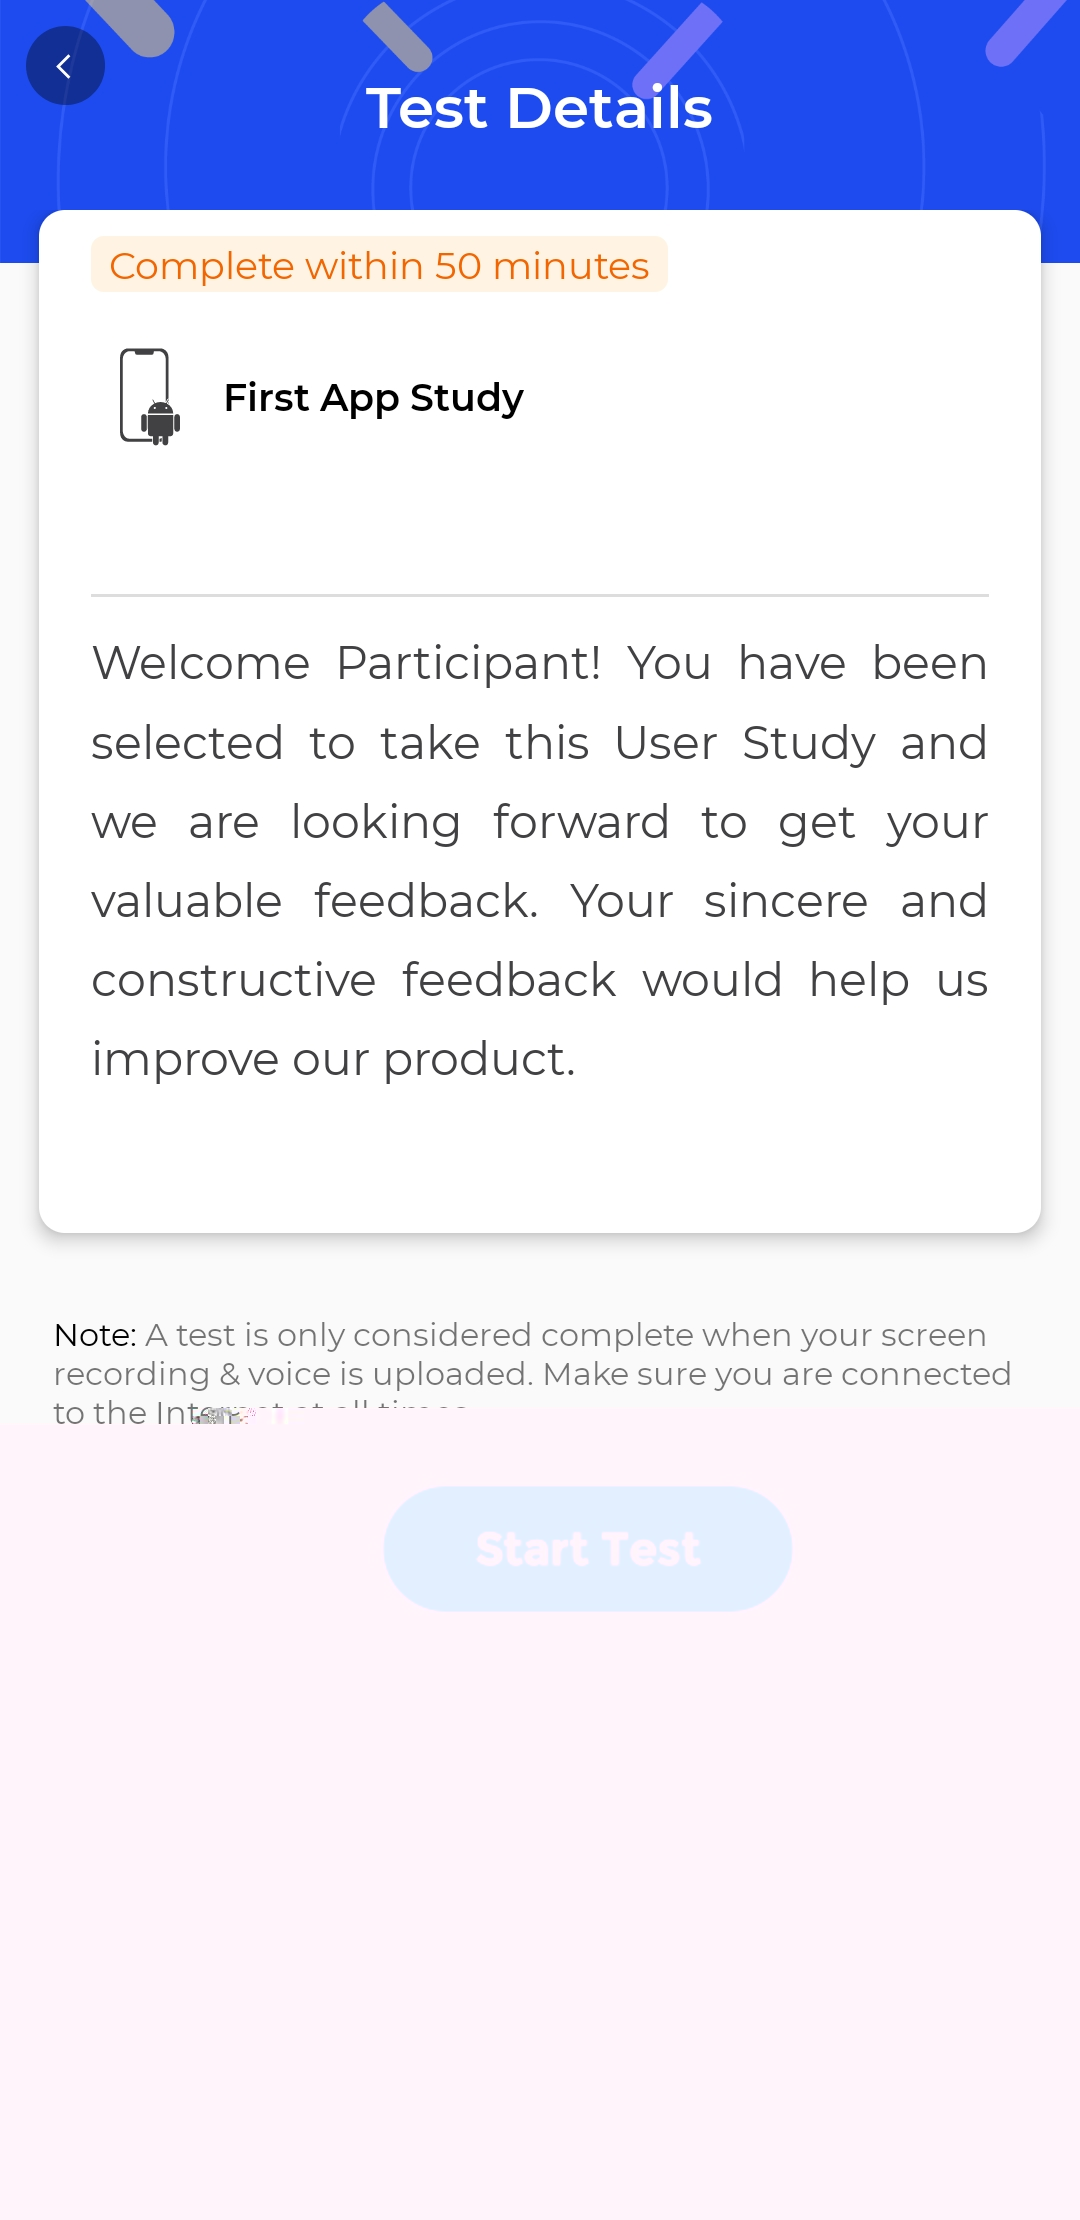
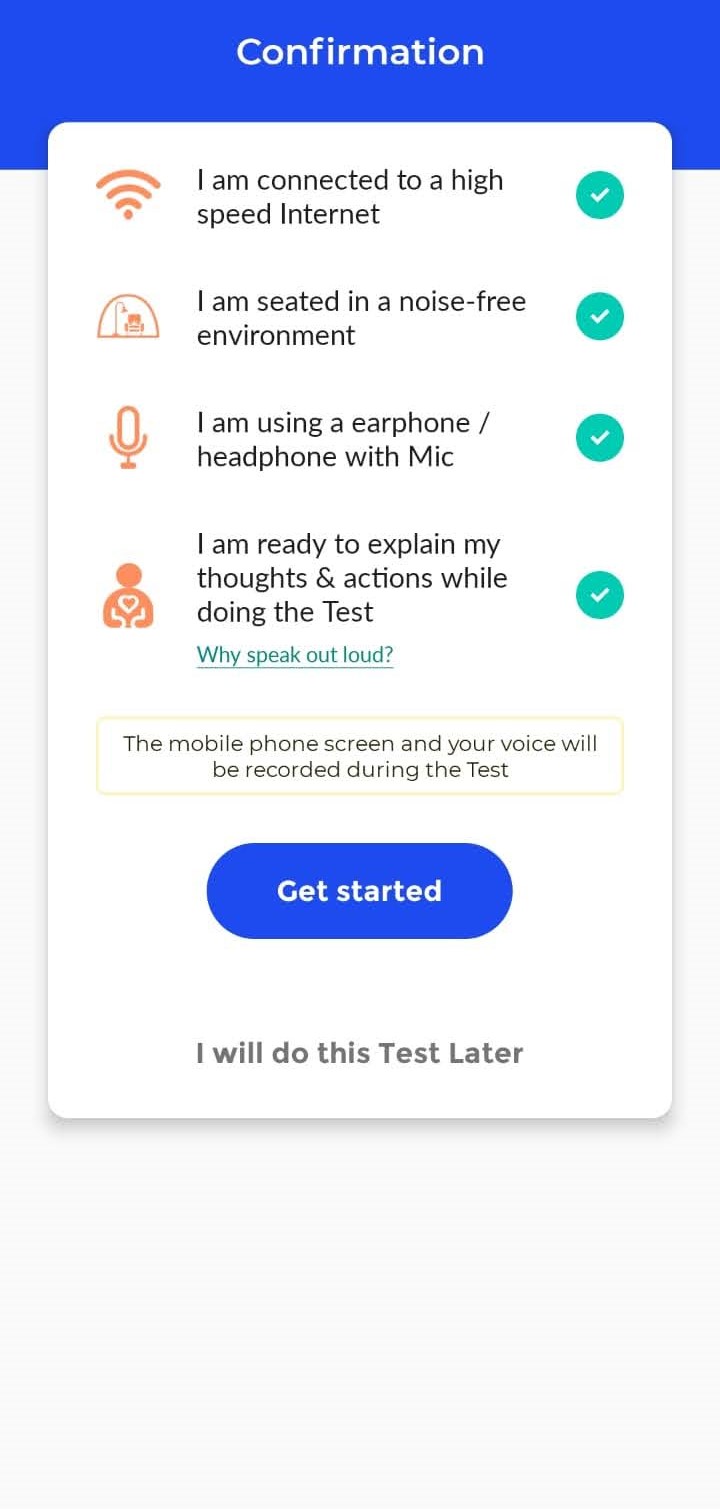
You will be directed to a “Confirmation” page that will check your readiness. Please check all the boxes to confirm a ready check. Post that, click on ‘Get started’ to begin.
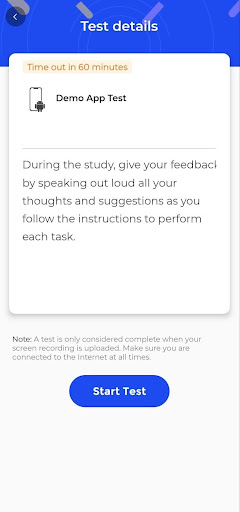
Tap on “Start Test” to take the test when you're ready. Feel free to speak out your thoughts and suggestions while taking the test.
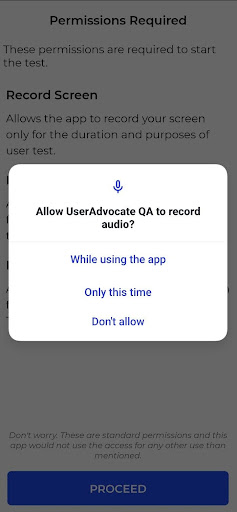
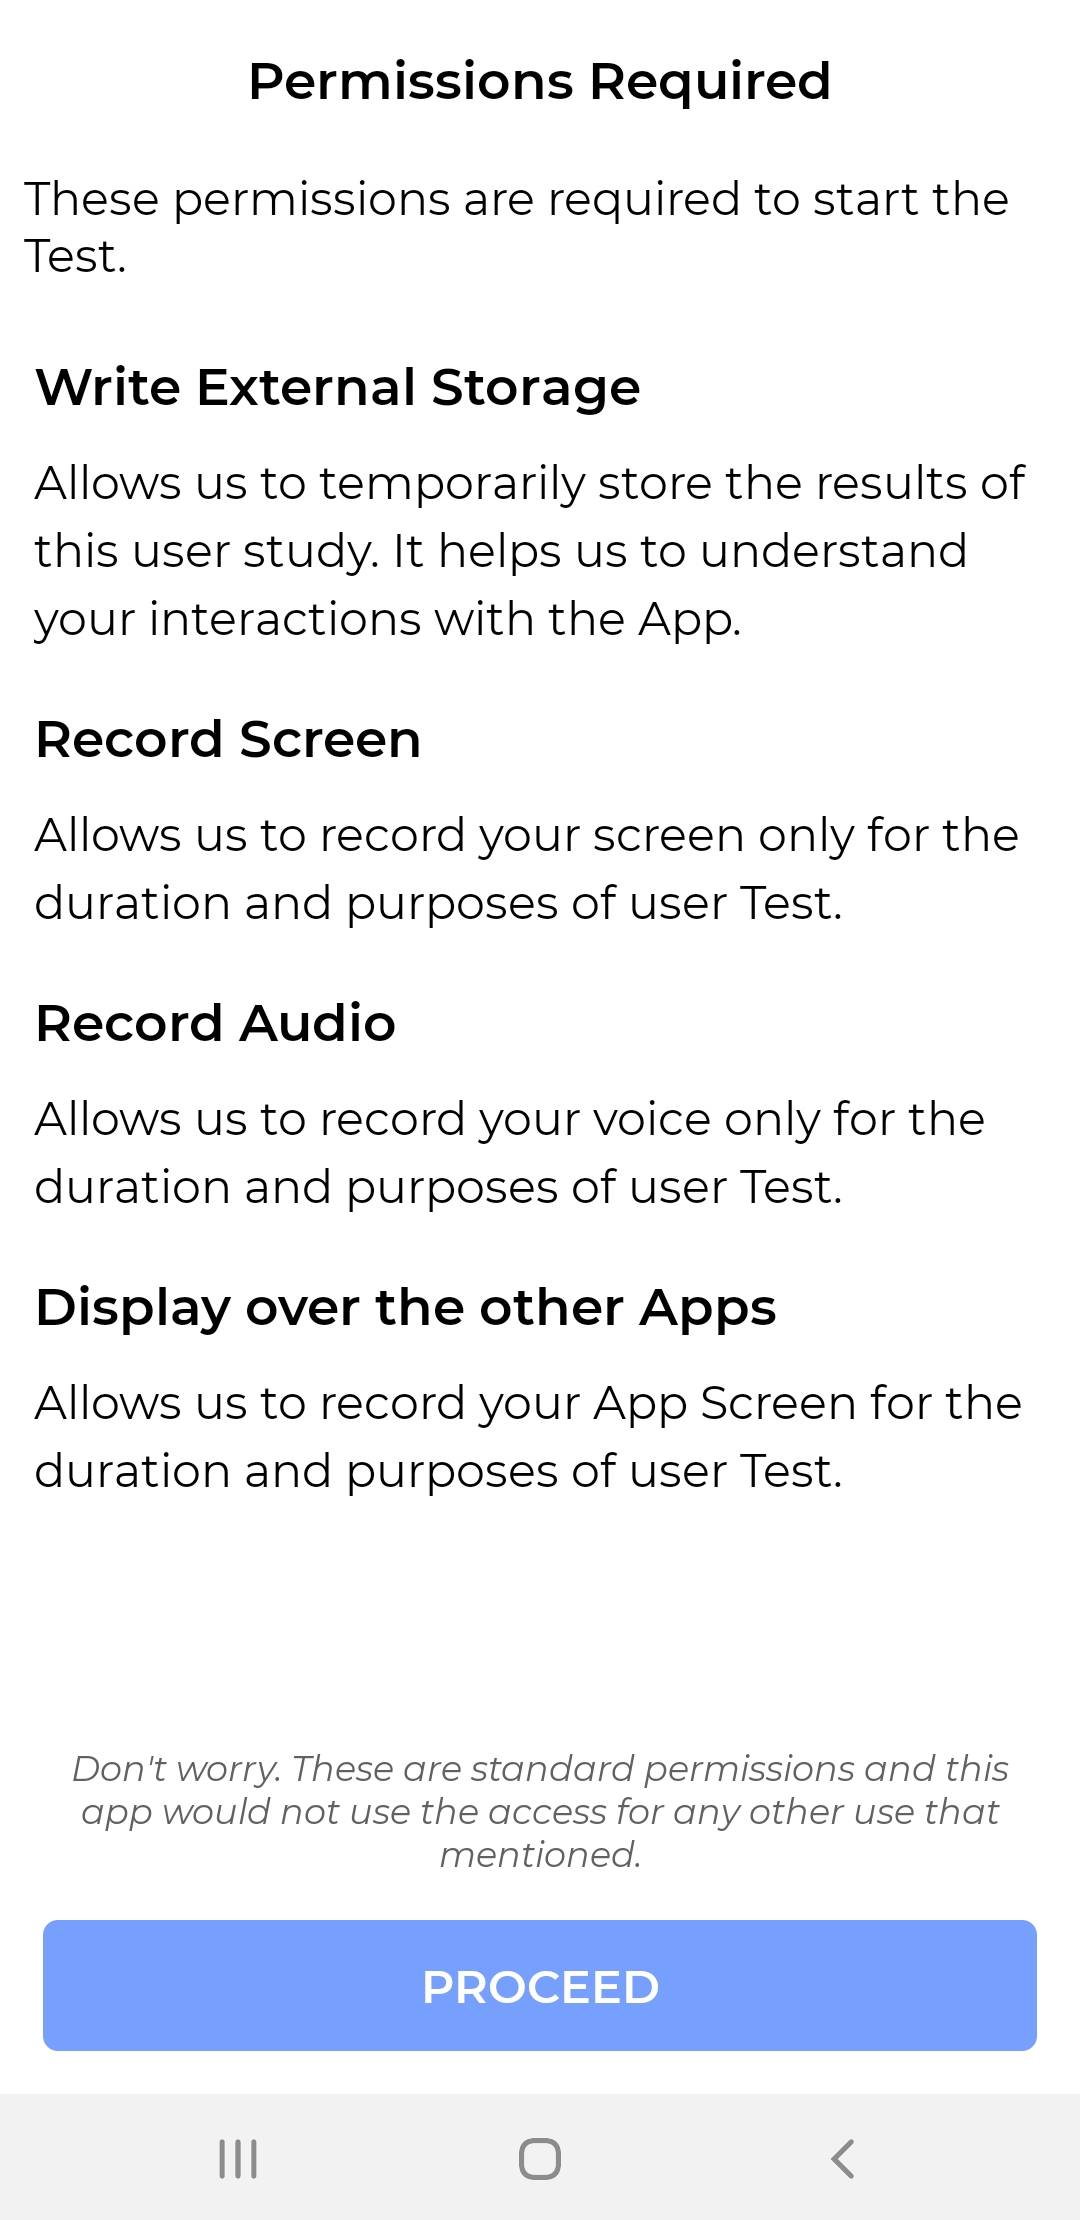
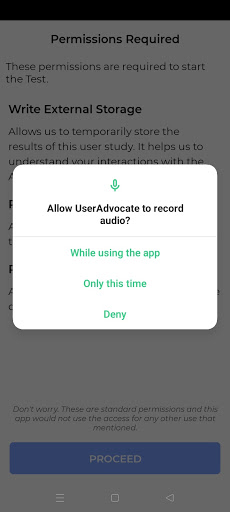
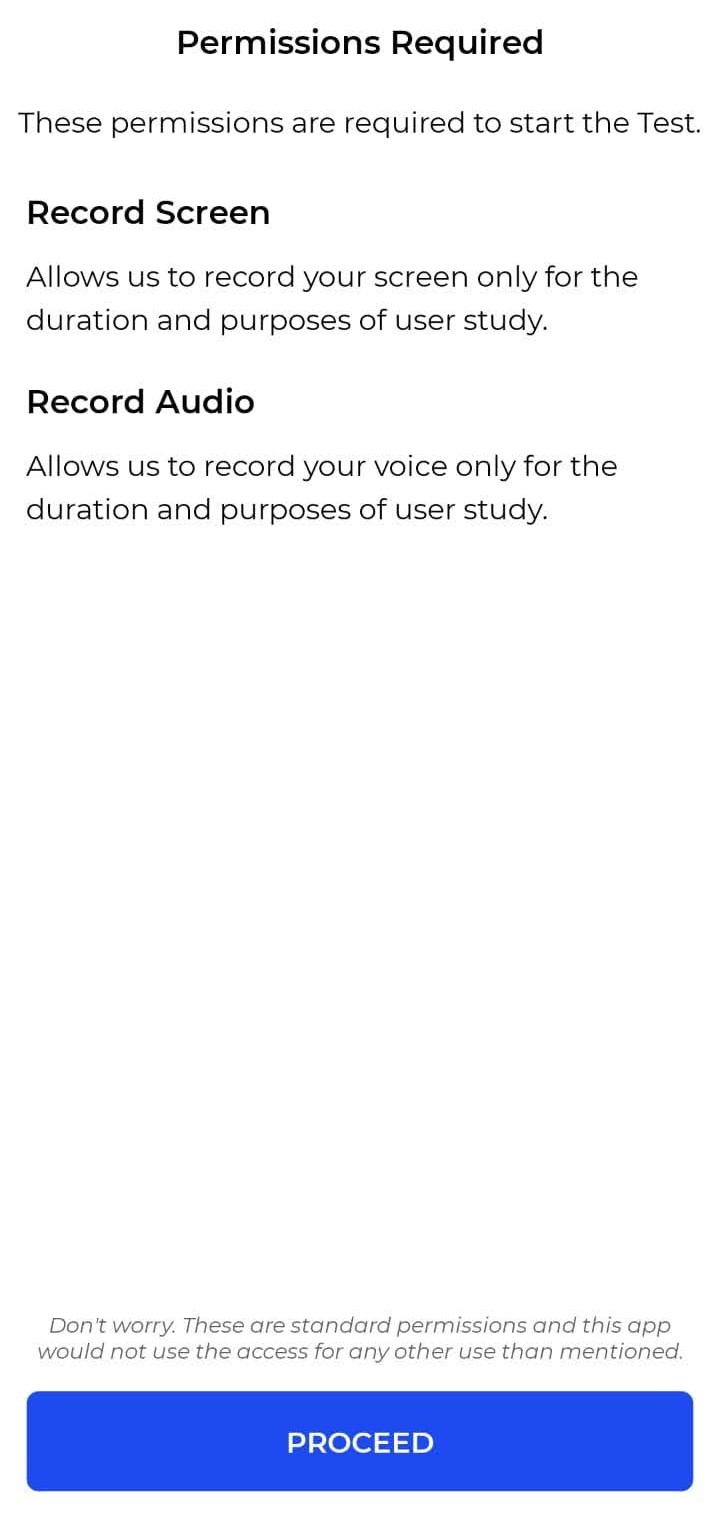
Allow permissions to record the screen and audio and click on ‘Proceed’ to move forward.
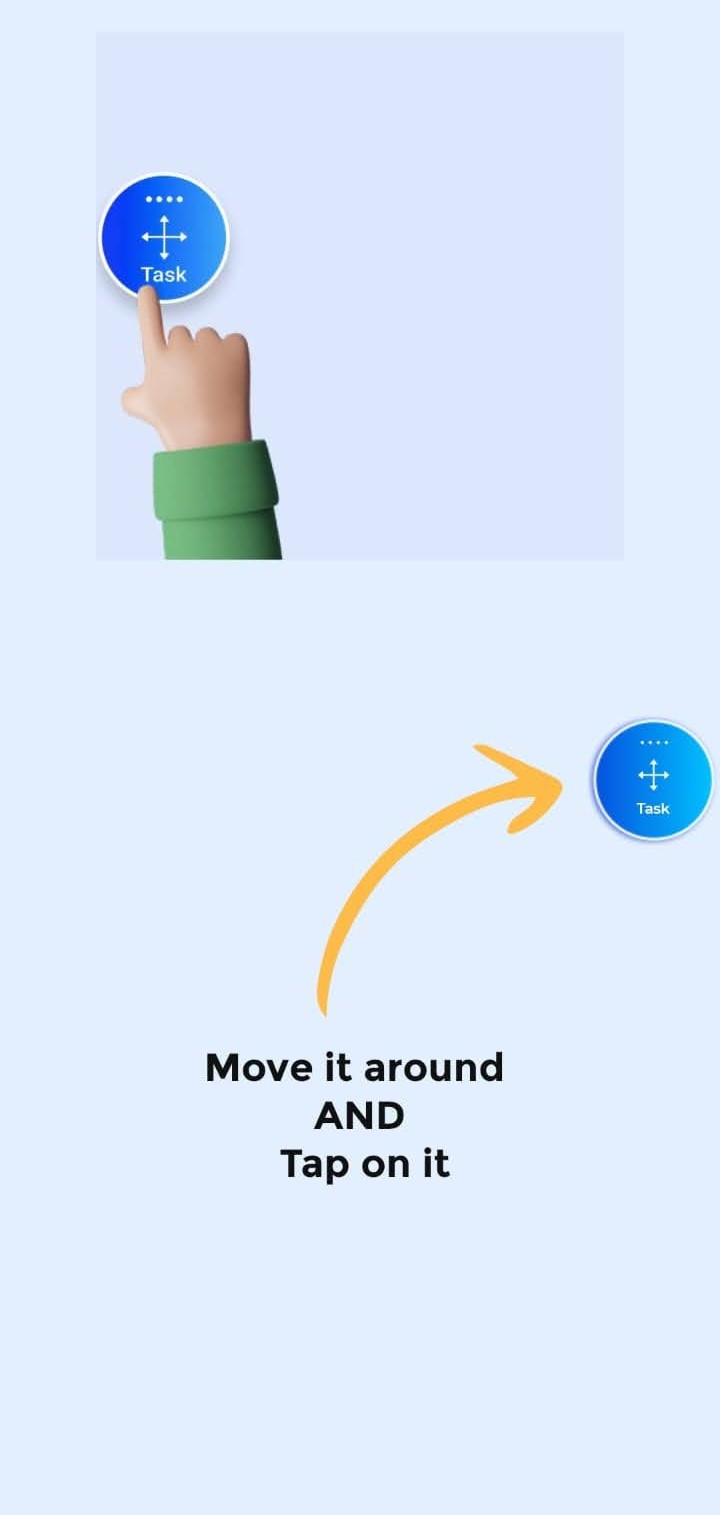
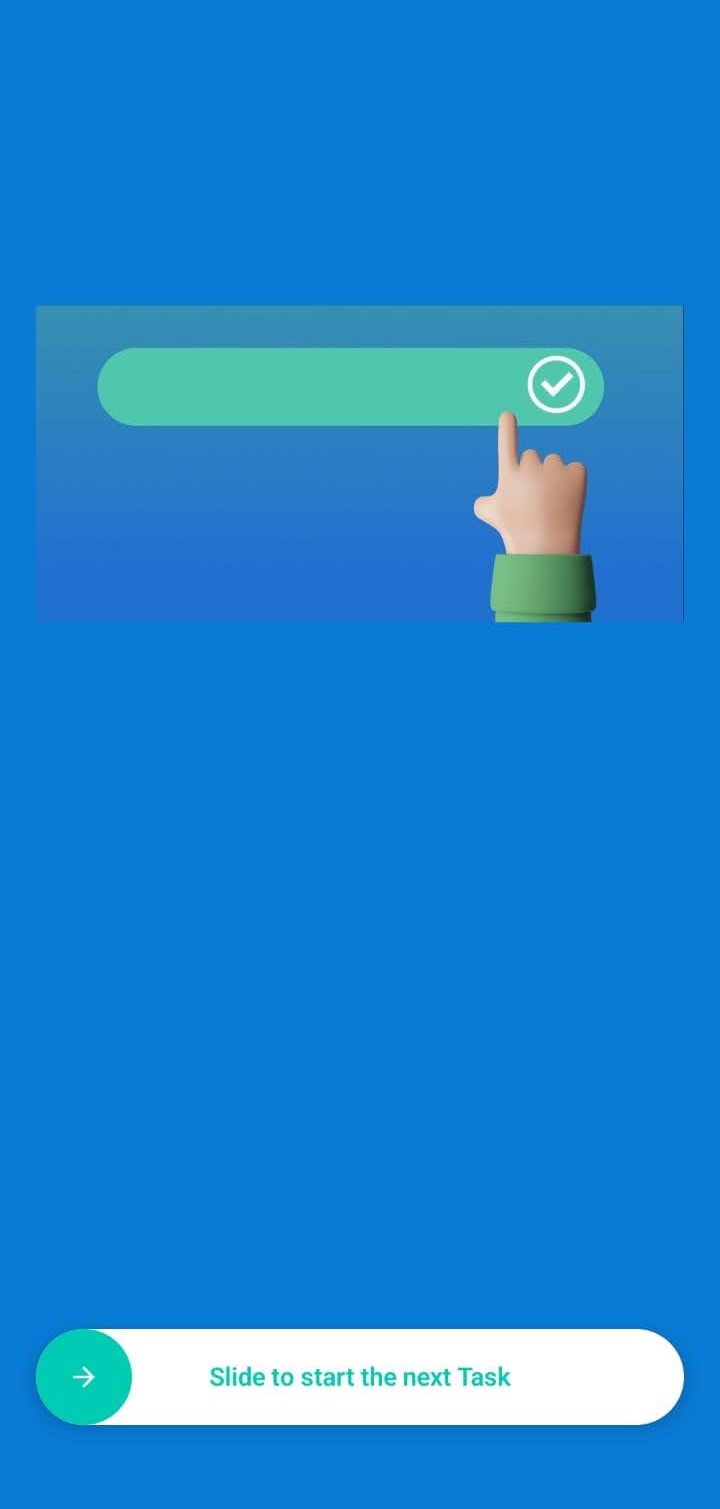
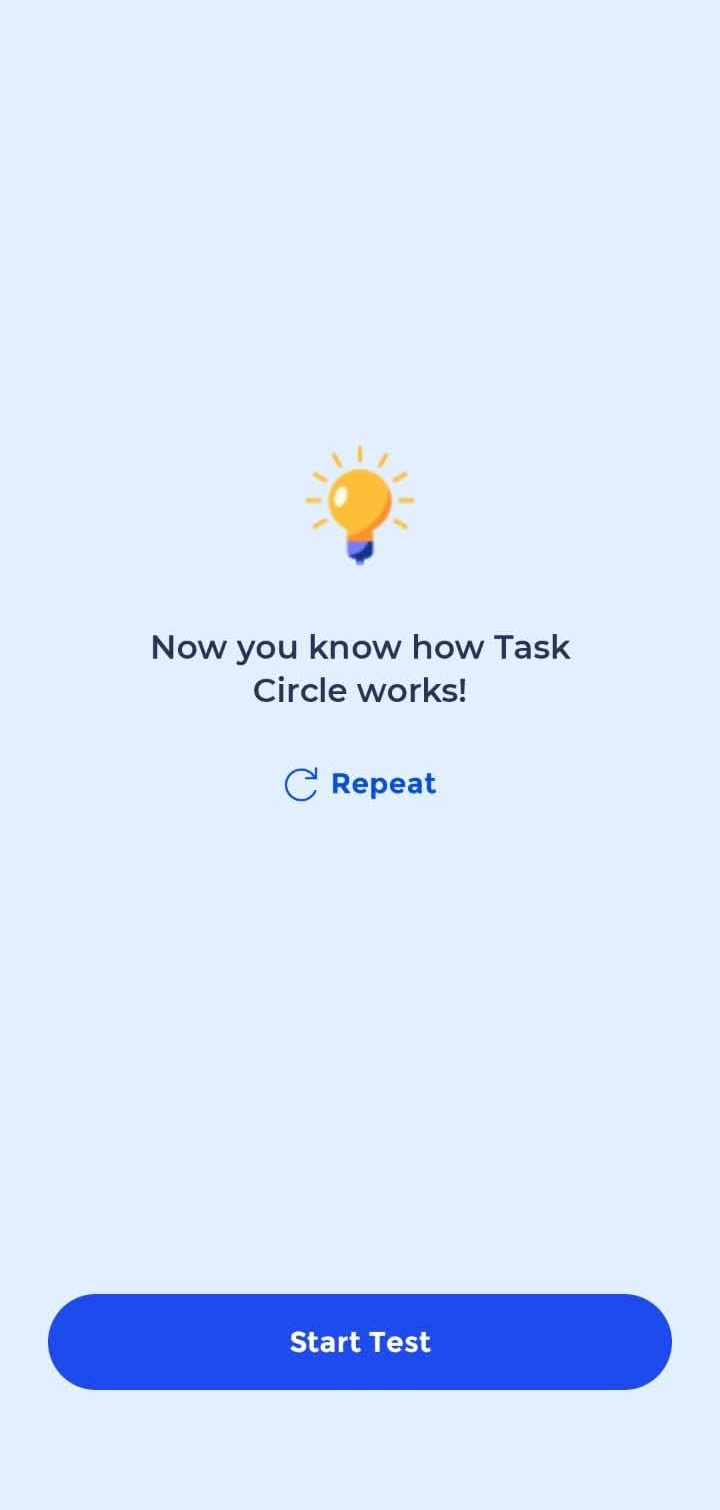
Use the help of Task Circle to navigate through the page and view task instructions and for moving to the next task.
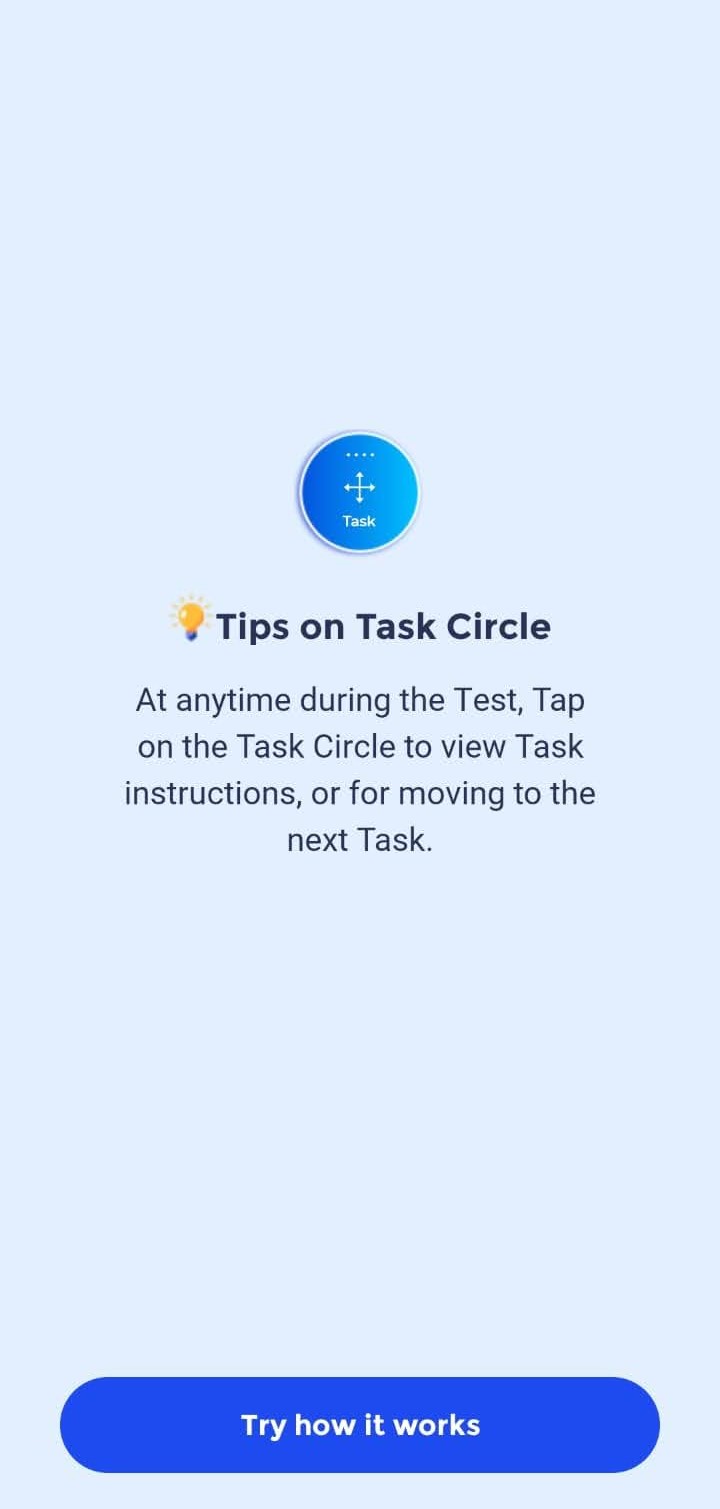
Use your cursor to tap and move around the task circle. Take a small demo to see how you can navigate through the page. Tap on ‘Start Test’ to begin.
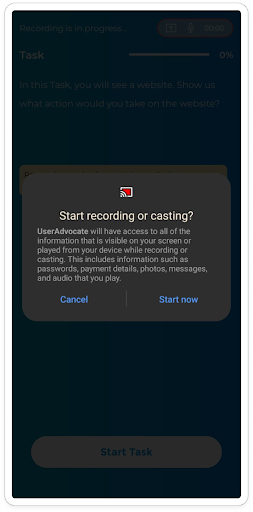
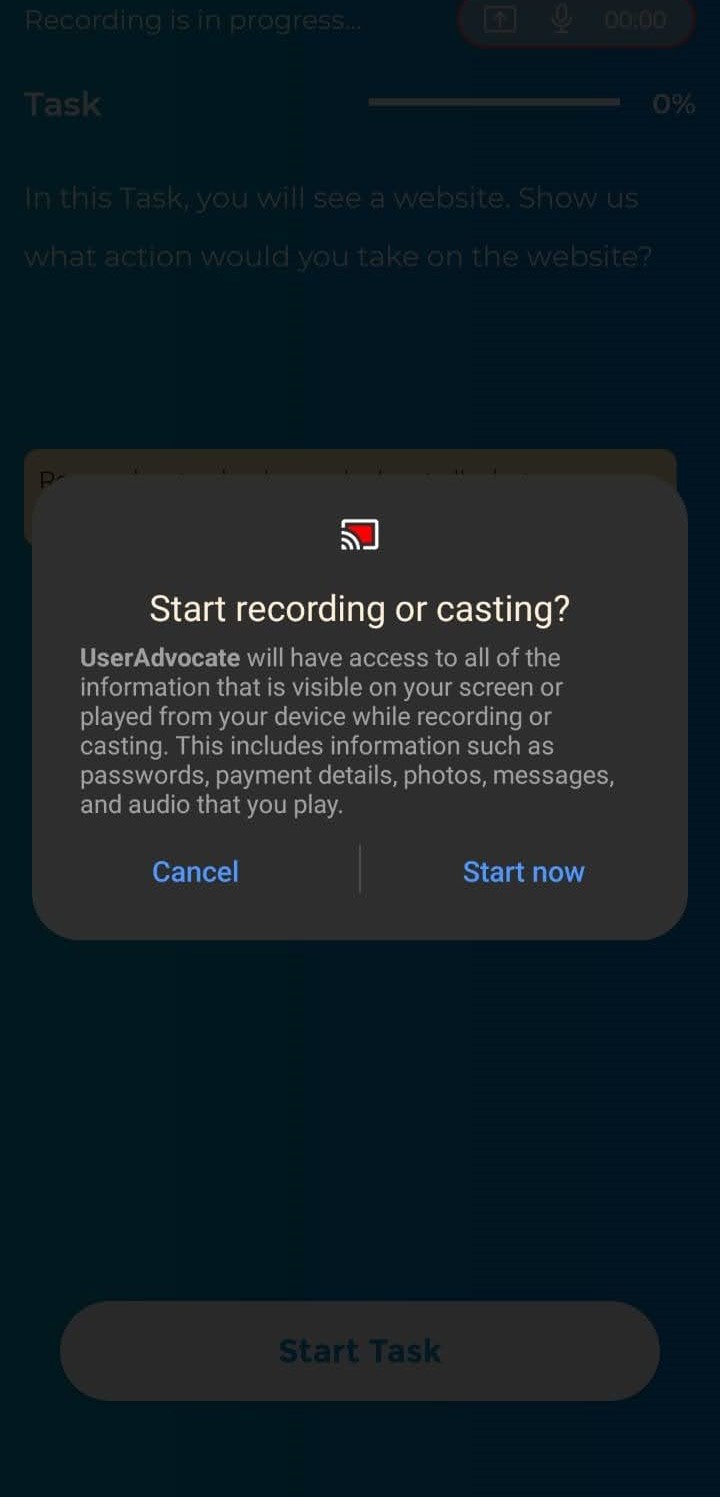
The next step is to allow recording or casting on your device to allow permissions to begin the test. Click on ‘Start now’.
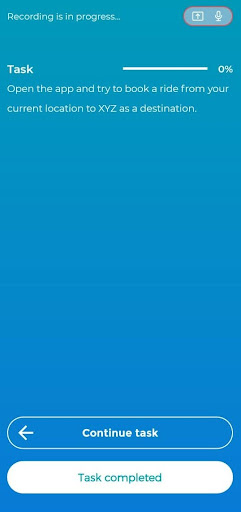
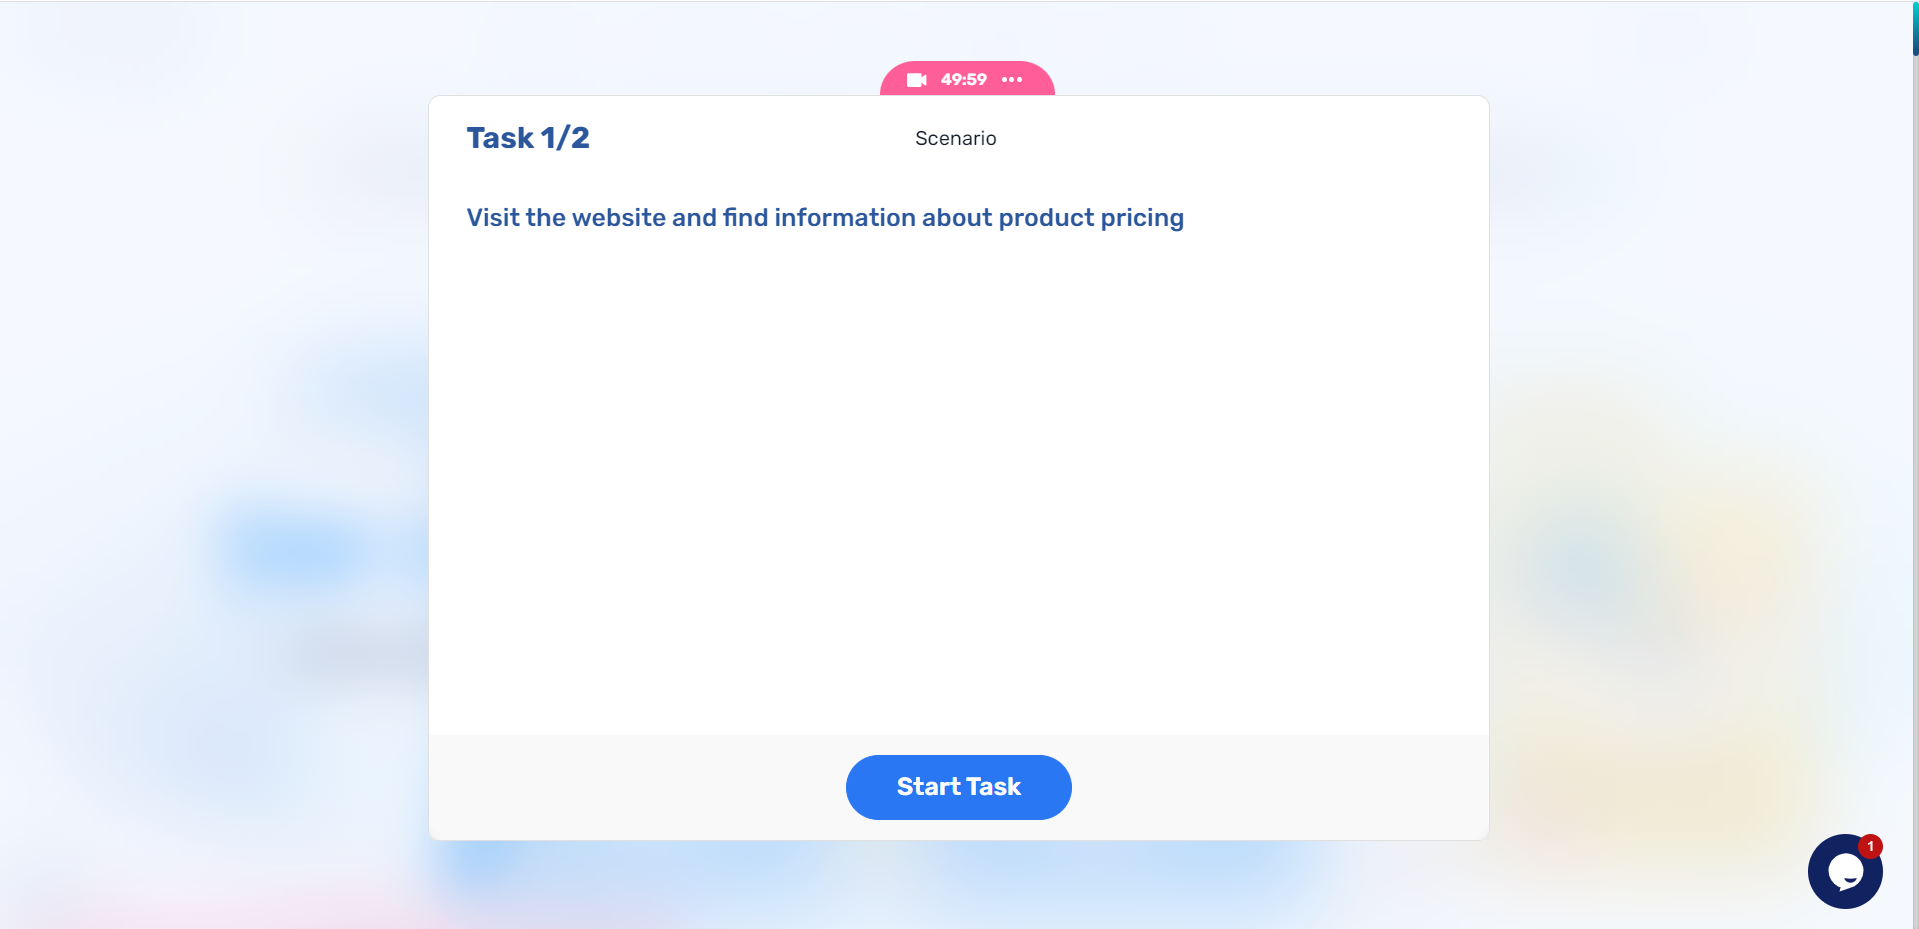
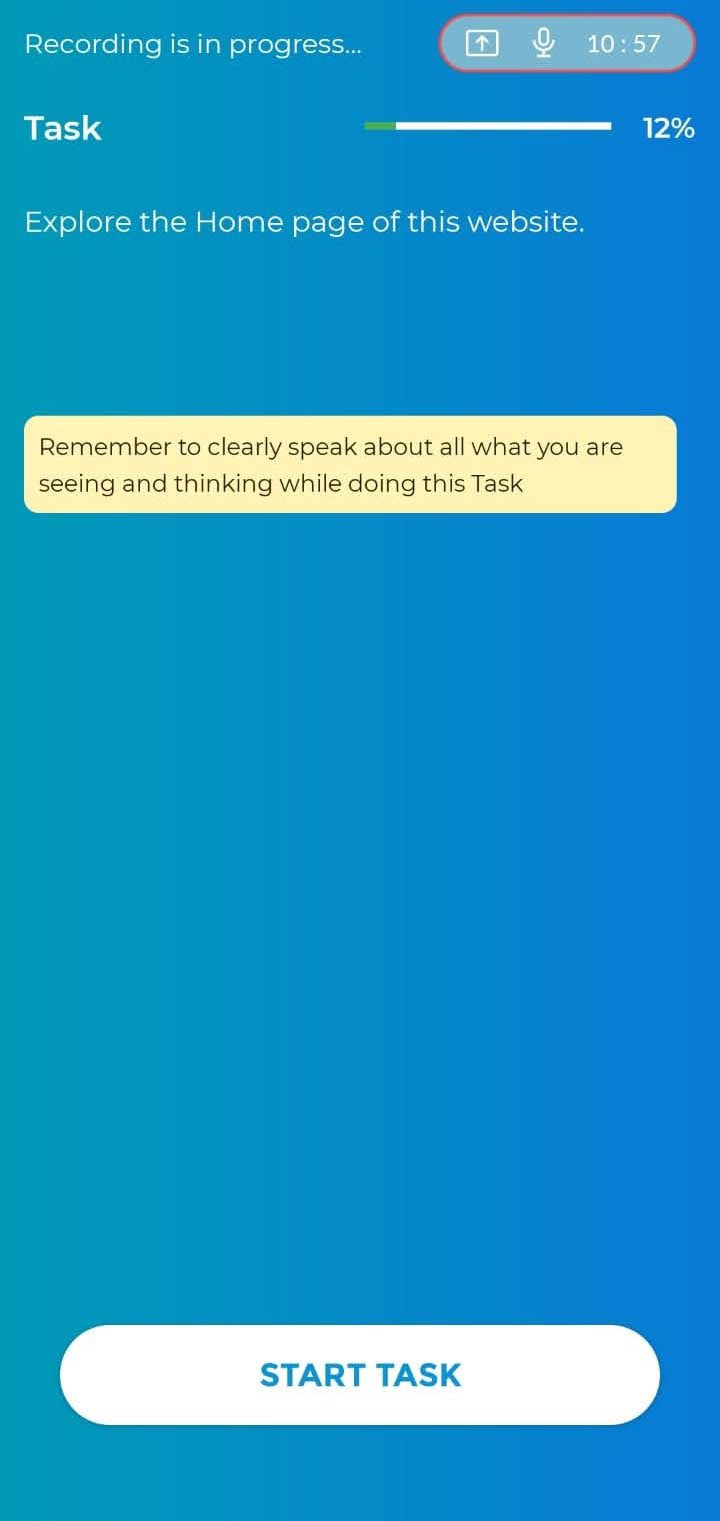
You will be asked to perform a few tasks based on the website link displayed on your screen. Task instructions will be stated on how to take the test and what is expected from your feedback.
Click on the ‘Start task’ button to begin your task.
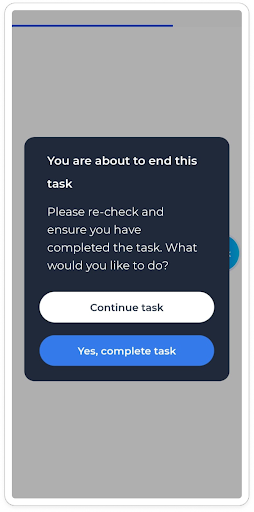
After taking the test, you can proceed to the next task by sliding on the bar.
Note : You can check the progress of the test duration by looking at the completion bar above.
Complete all the tasks in a similar manner and click on ‘Next’ to proceed.
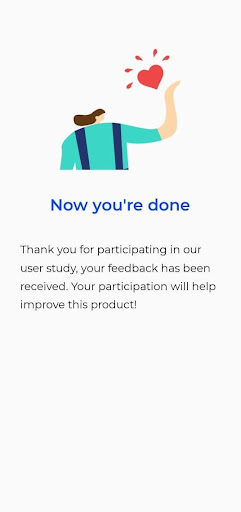
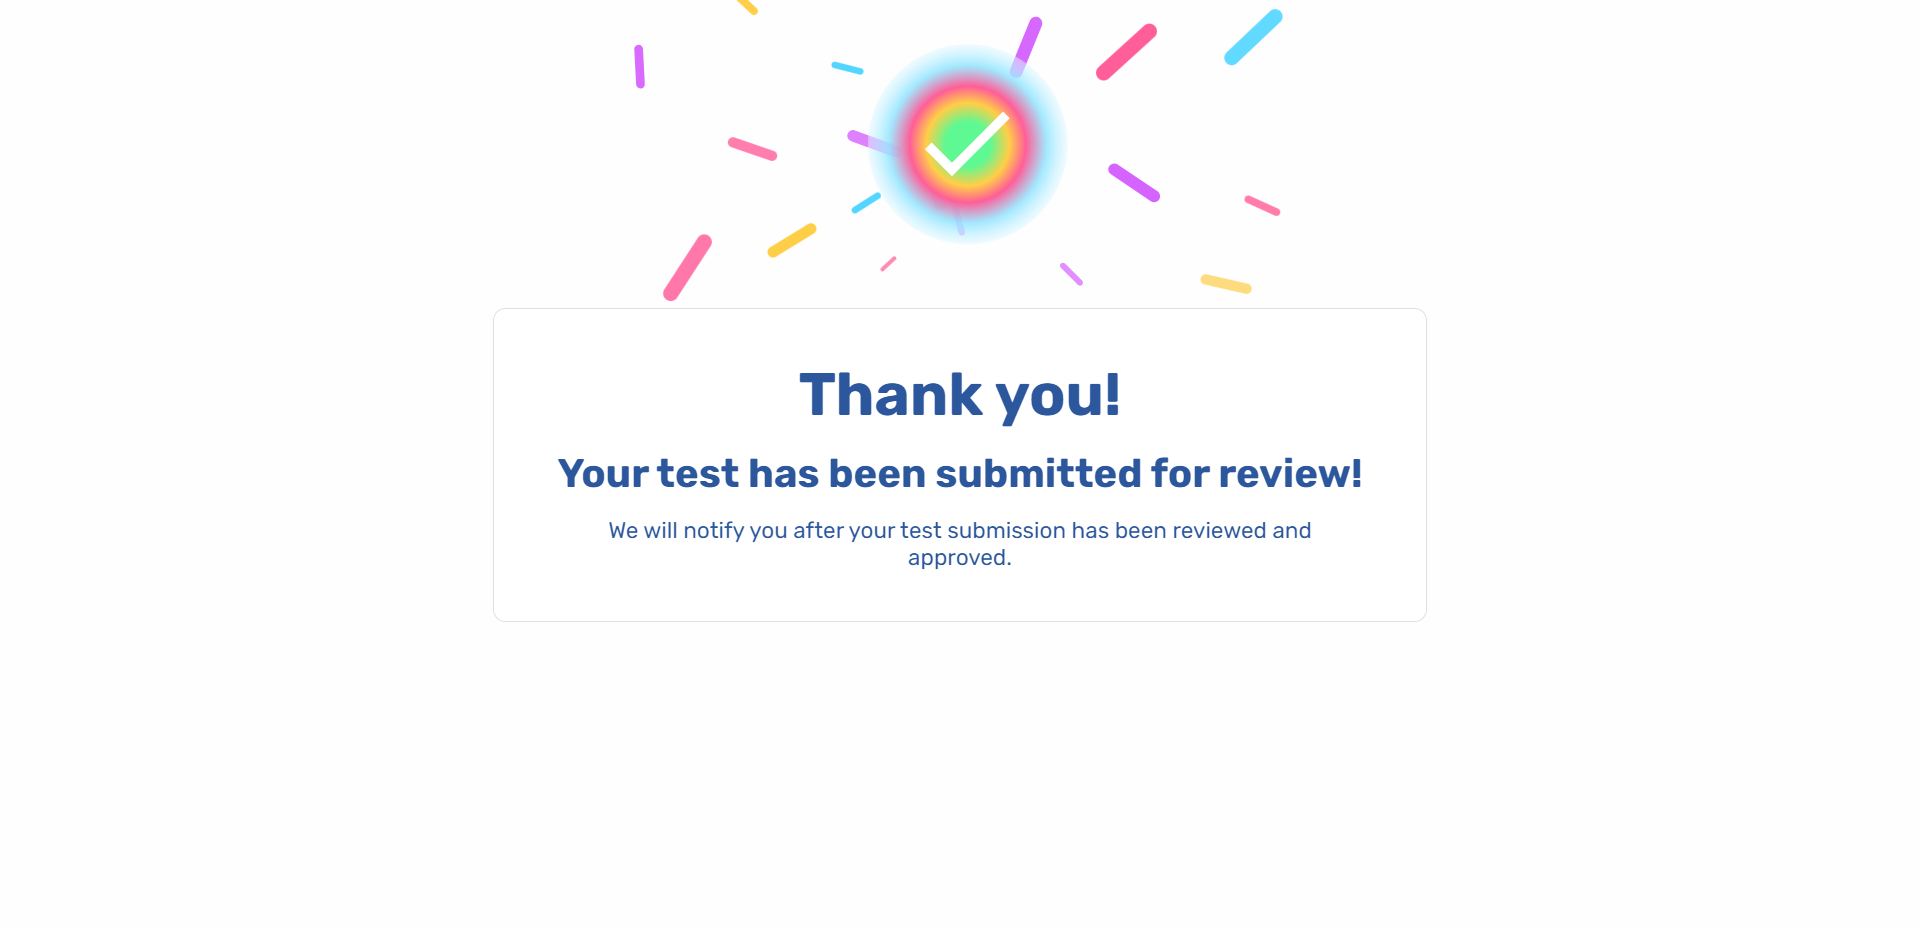
After completing all tasks you will see a screen to ‘Submit Test’ and you’re successfully completed the test!
Good job.
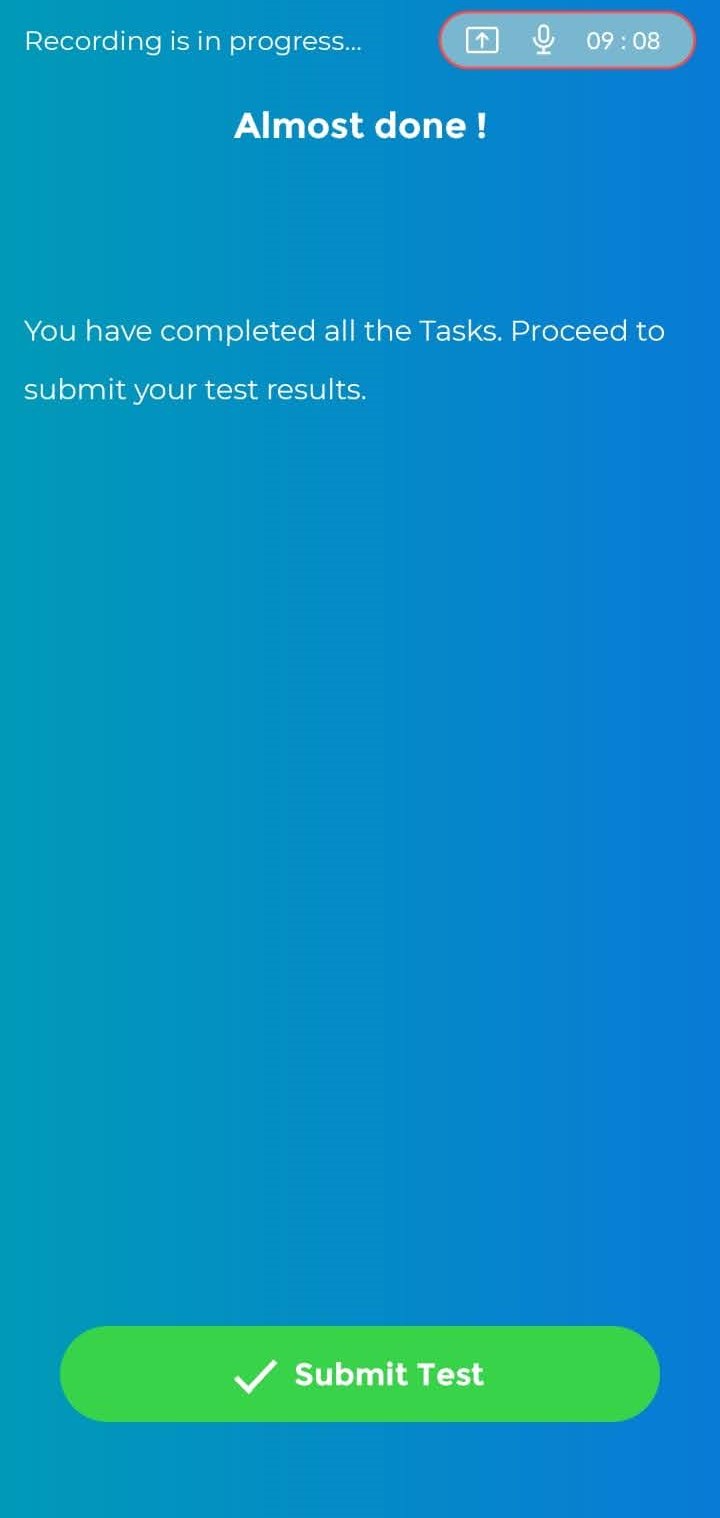
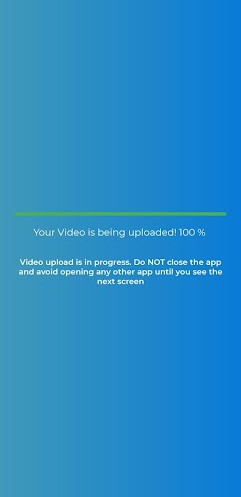
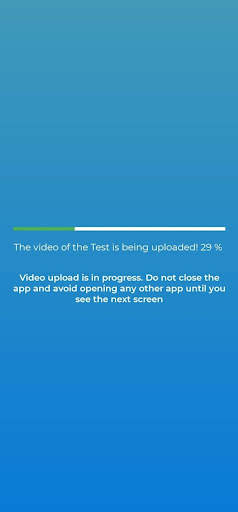
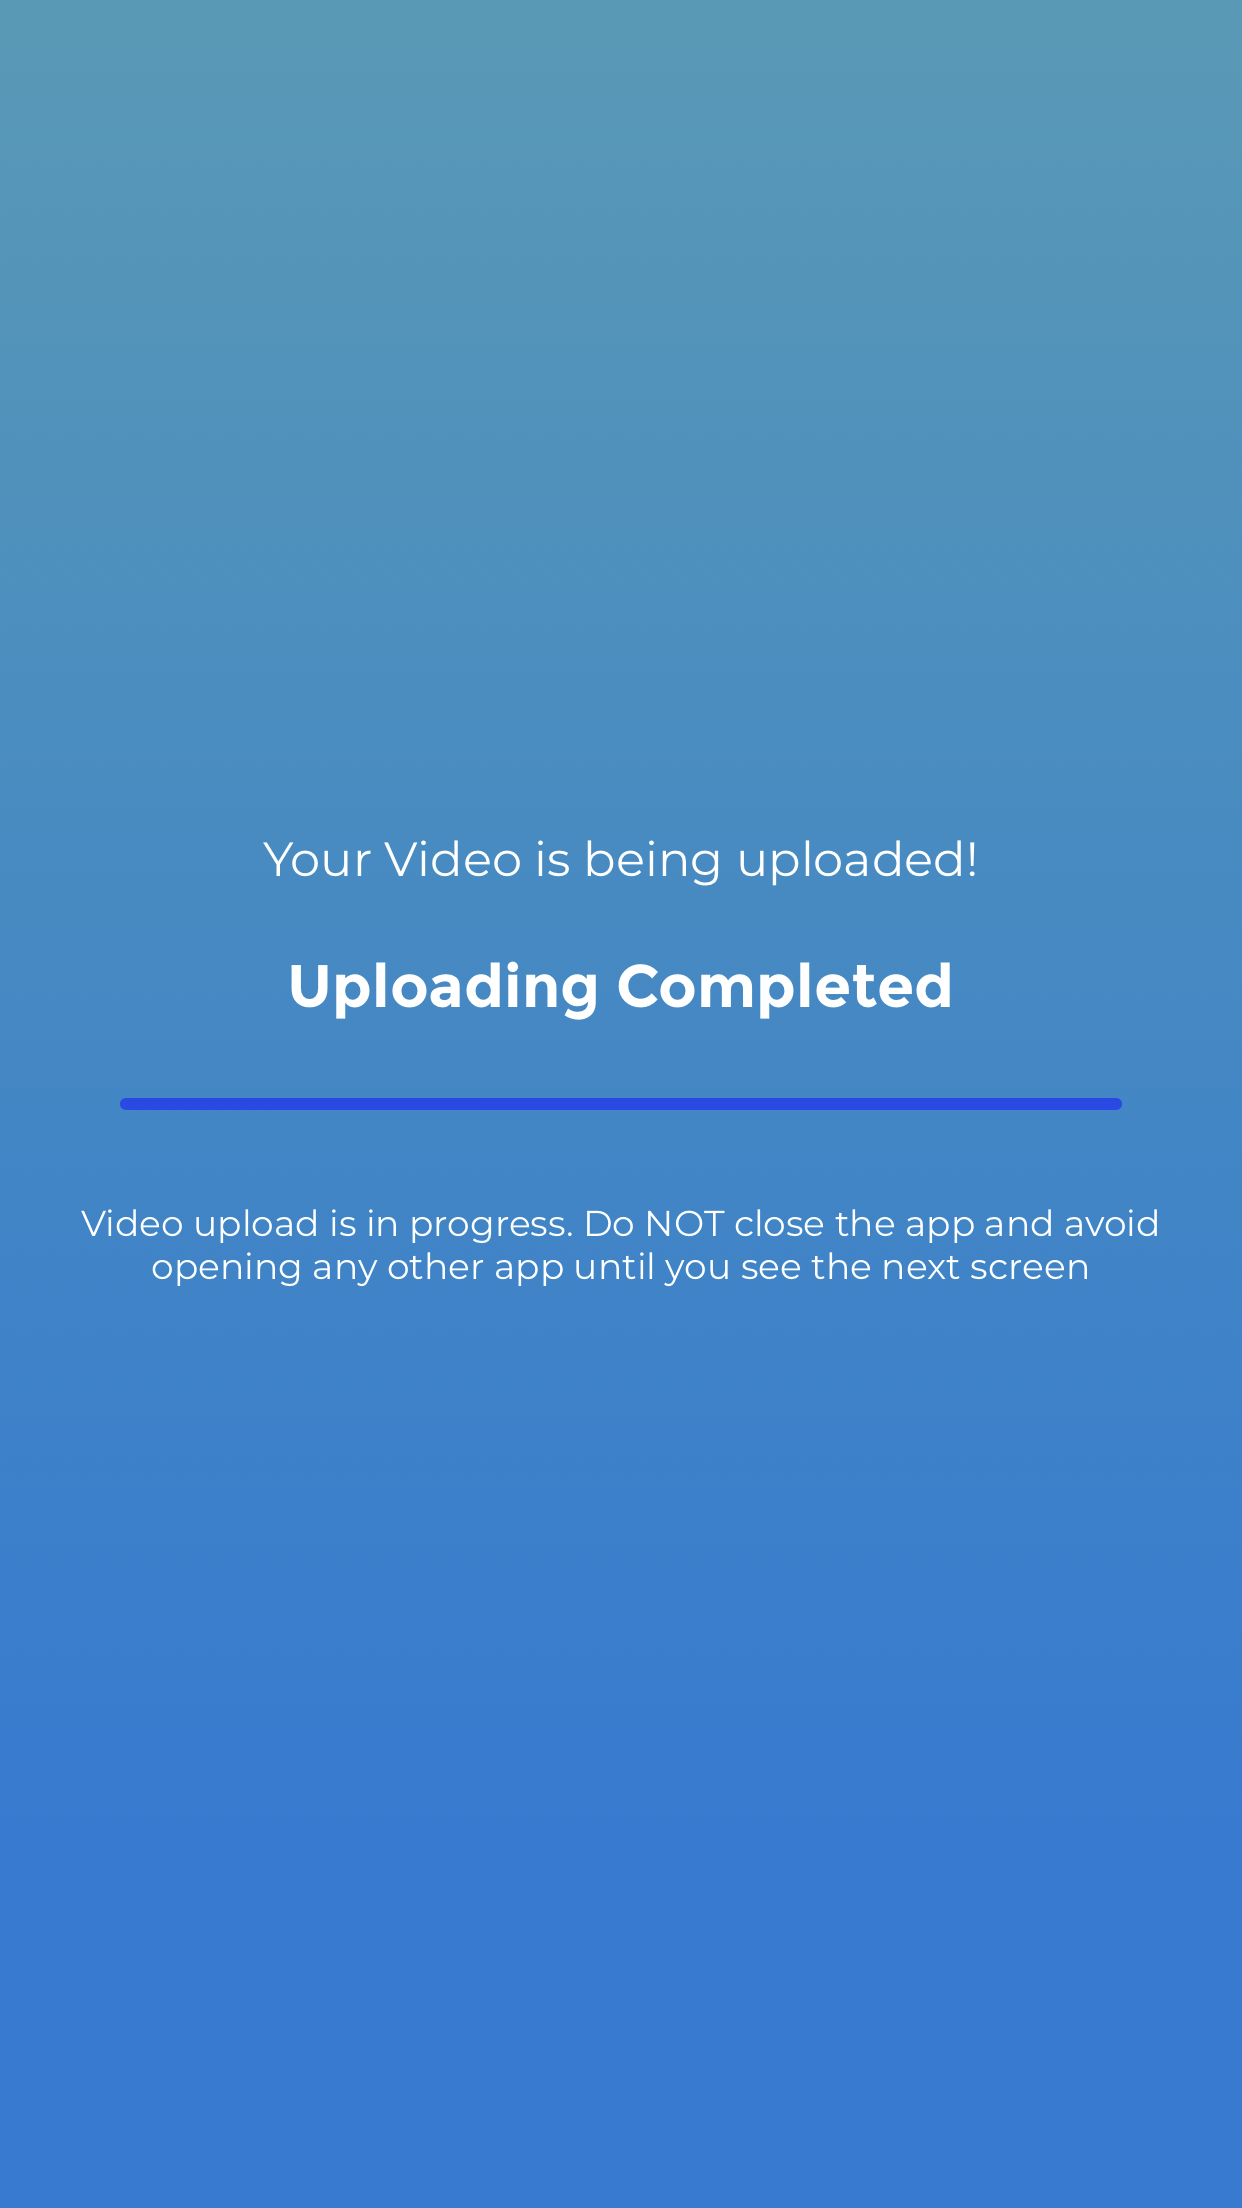
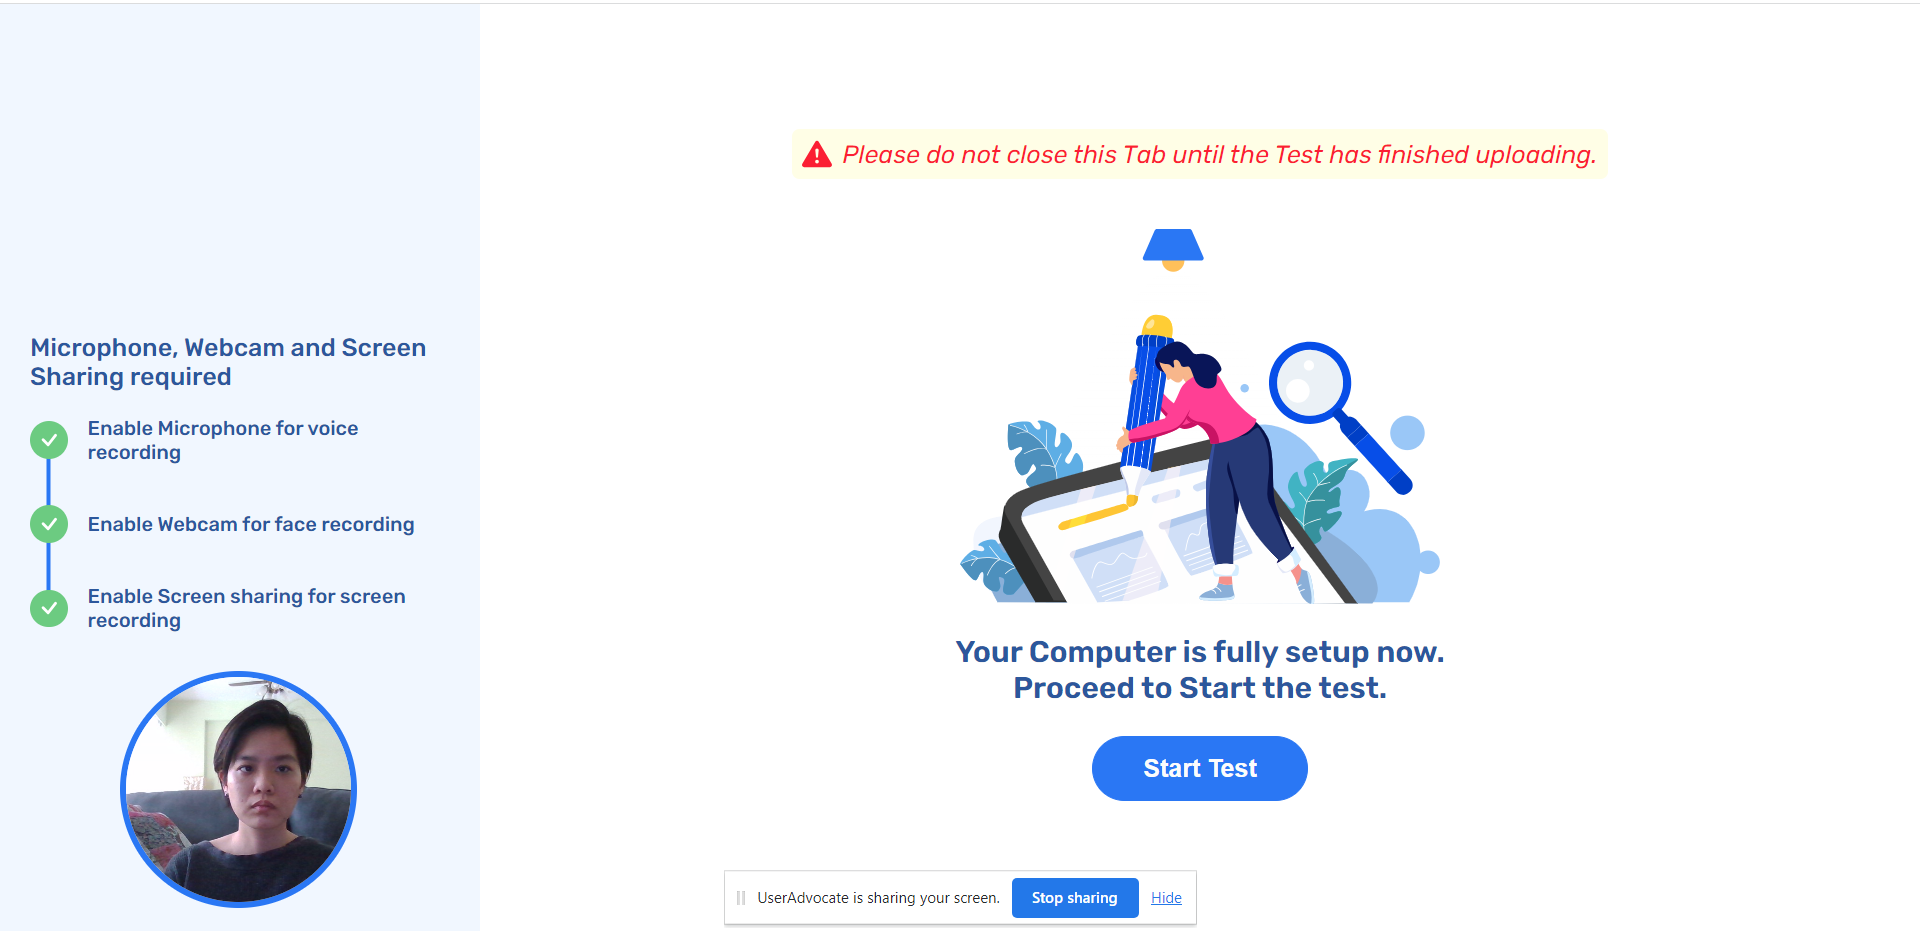
Note : The App will start uploading the screen recording. Allow the recording to fully upload before closing the app. On some networks, the upload might take some time.
Your test will only be uploaded once 100% of your recording is successfully uploaded on the platform. Please be patient with it.
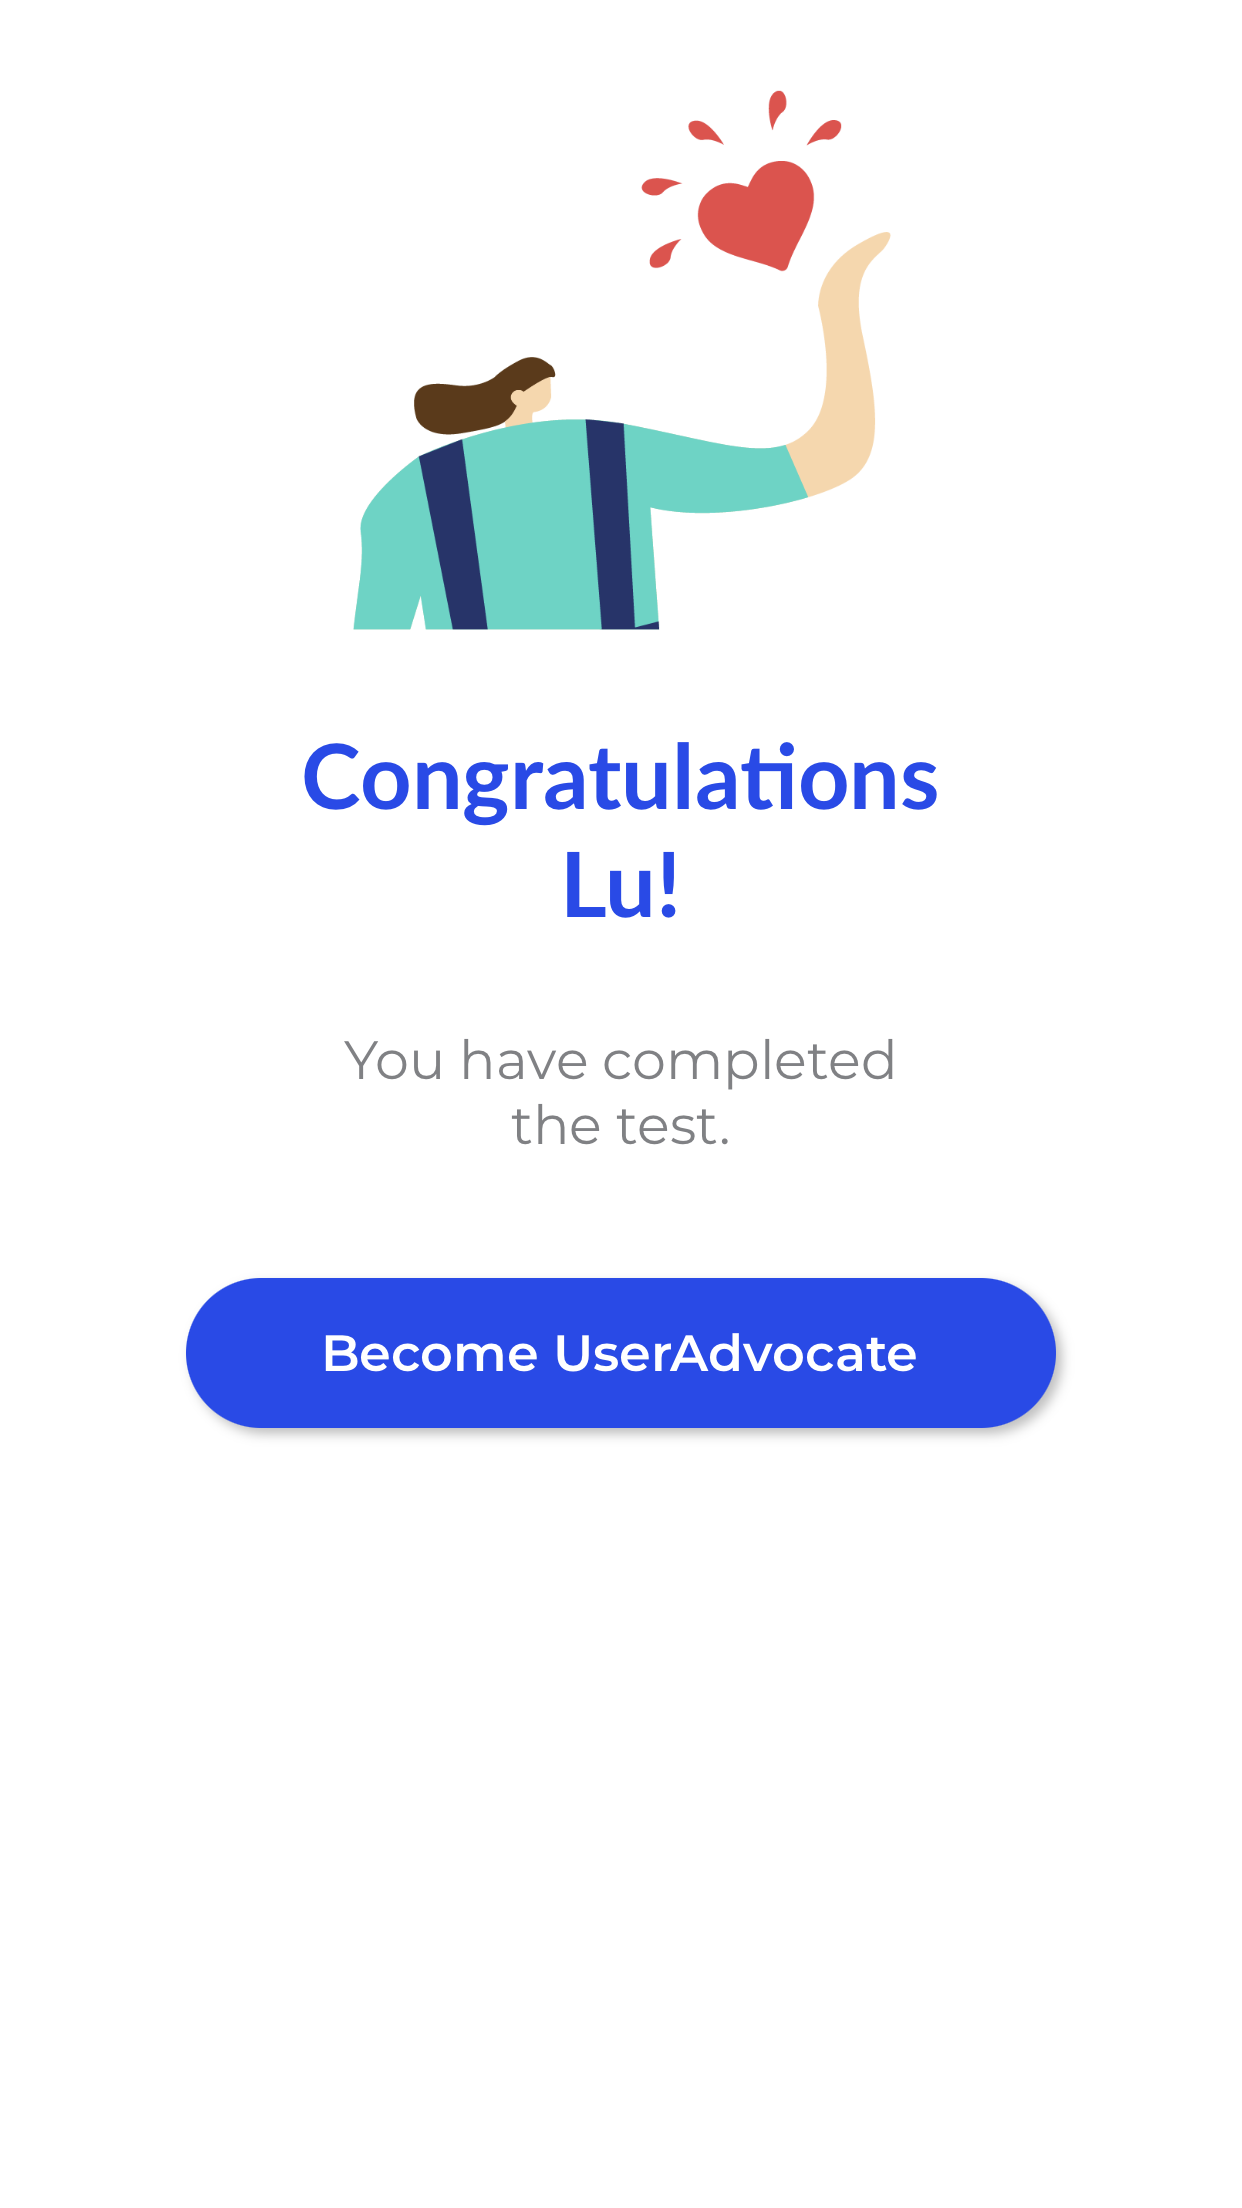
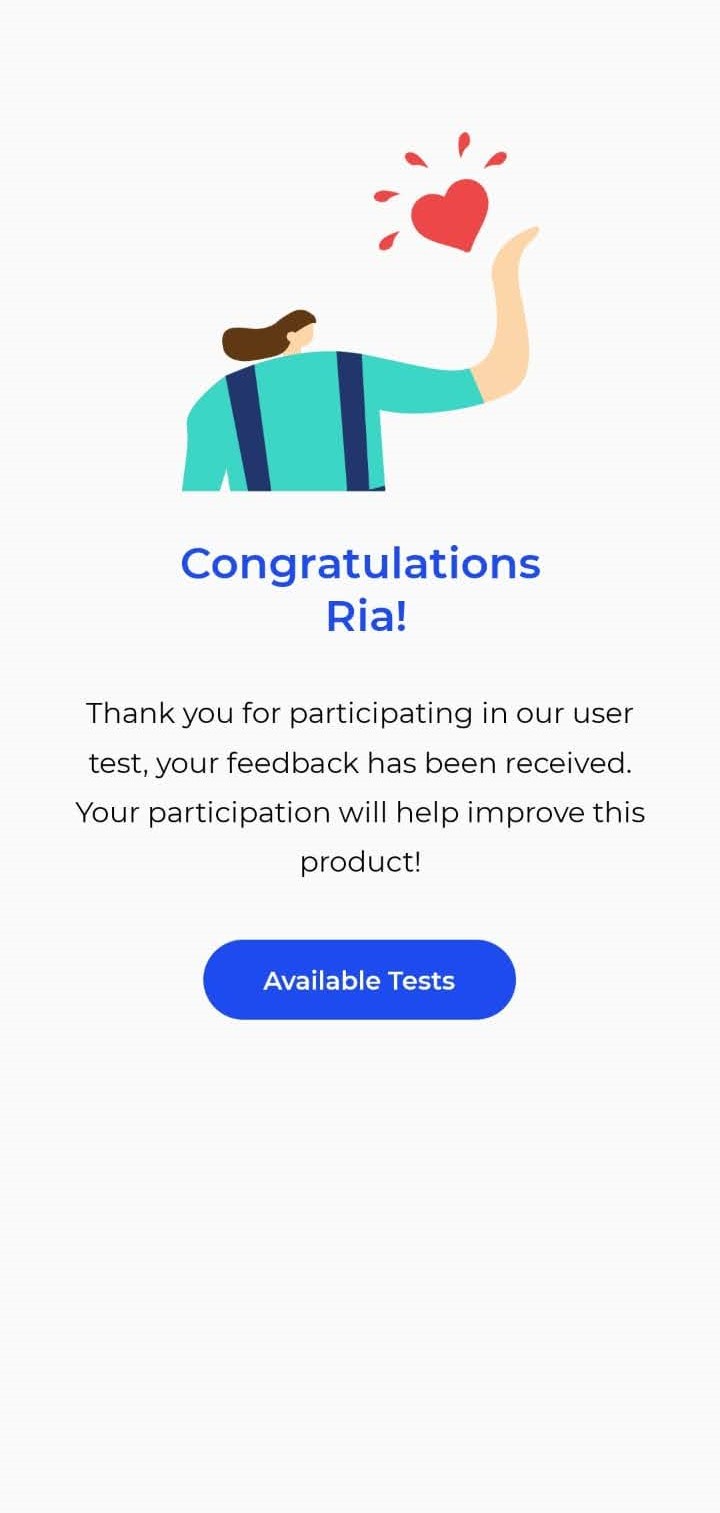
You will see a ‘Congratulations’ page to confirm that you have successfully completed the test. Keep a tab on ‘Available Tests’ for opportunities to participate in the future.
If there's any technical issue that happens in the test, please exit the test immediately and write an email to hi@uxarmy.com. We will come to assist you shortly.
Yes, you'll have to install the UserAdvocate app from the Google Play Store (for Android users) or the App Store (for iOS users).
For Android mobiles, you’ll need to have Android 5.0 (Lollipop) or later.
For iPhone users, you’ll need to have iOS 13.0 or later.
For the Android App test, click here to see the Step-By-Step guide. For the iOS App test, click here to see the Step-By-Step guide.
No, without allowing the microphone or screen recording permission User Study will not start.
It depends on the User Study, it could range from 10 to 50 minutes.
Yes, you can receive phone calls and messages during the User Study, however we suggest you to avoid that at set your phone mode to "Do no disturb" during the user study.
No, you only have to install the UserAdvocate App only once and you can attend all User Studies using this App.
If you faced any technical issues during the test or video uploading, please contact UXArmy Help at any time at hi@uxarmy.com. Our support team will assist you with the technical issues. Also, we would suggest you start the user study when you are in a strong wifi connection and quiet place to ensure your response can get approved by our clients easily.
For Android smartphones,
If you feel that your recording is not uploaded successfully, follow these steps:
Step 1: Open "File Manager" App on your Smartphone.
Step 2: Browse to "Internal Storage" and look for Folder name "UXSDK".
Step 3: This folder should have the video recording of your Test, you can confirm the Video by playing it back.
Step 4: Upload the Video on Google Drive, One Drive, Dropbox, or any other public Cloud storage.
Step 5: Create and Share Public downloadable link and send to hi@uxarmy.com
Don’t worry after you restart your mobile, you can open the UserAdvocate App, and re-take the user study again. A response submission will only be considered as complete until you have uploaded the video successfully.
Yes, you can! If you feel that you didn’t do well in the test and would like to re-take the user study, kindly sending an email to hi@uxarmy.com to request a re-take of the study.
No, you won’t be able to go back to the previous tasks once you have moved on to the next task. But Don’t Worry! You can re-start the study again by closing the UserAdvocate App and re-launching the App to take the study again from the beginning.
Sorry, we don’t support taking the test without the UserAdvocate App, you can only take User Studies through the UserAdvocate App.
Built By ![]()

All trademarks, logos and brands are property of their respective owners. All company, product and service names used in this website are for identification purposes only